Make a Tyvek Groundsheet With Footbox
If you use a tarp or a floorless shelter while backpacking, you probably use a ground sheet under your sleeping pad. A ground sheet protects your pad from rocks and twigs and helps keep your gear out of the dirt and away from ground moisture.
There are many materials that can be used for a ground sheet but Tyvek and polycro seem to be among the most popular among ultralight backpackers. Each has their advantages and disadvantages. Polycro is the lighter of the two and packs up smaller. Tyvek is generally considered to be more durable. One of the other advantages of Tyvek is that because of it’s stiffness and the fact that there is Tyvek tape available, the corners of the ground sheet can be taped up to form a bathtub type floor, which helps contain your sleeping gear, and better protect you from the wet ground.
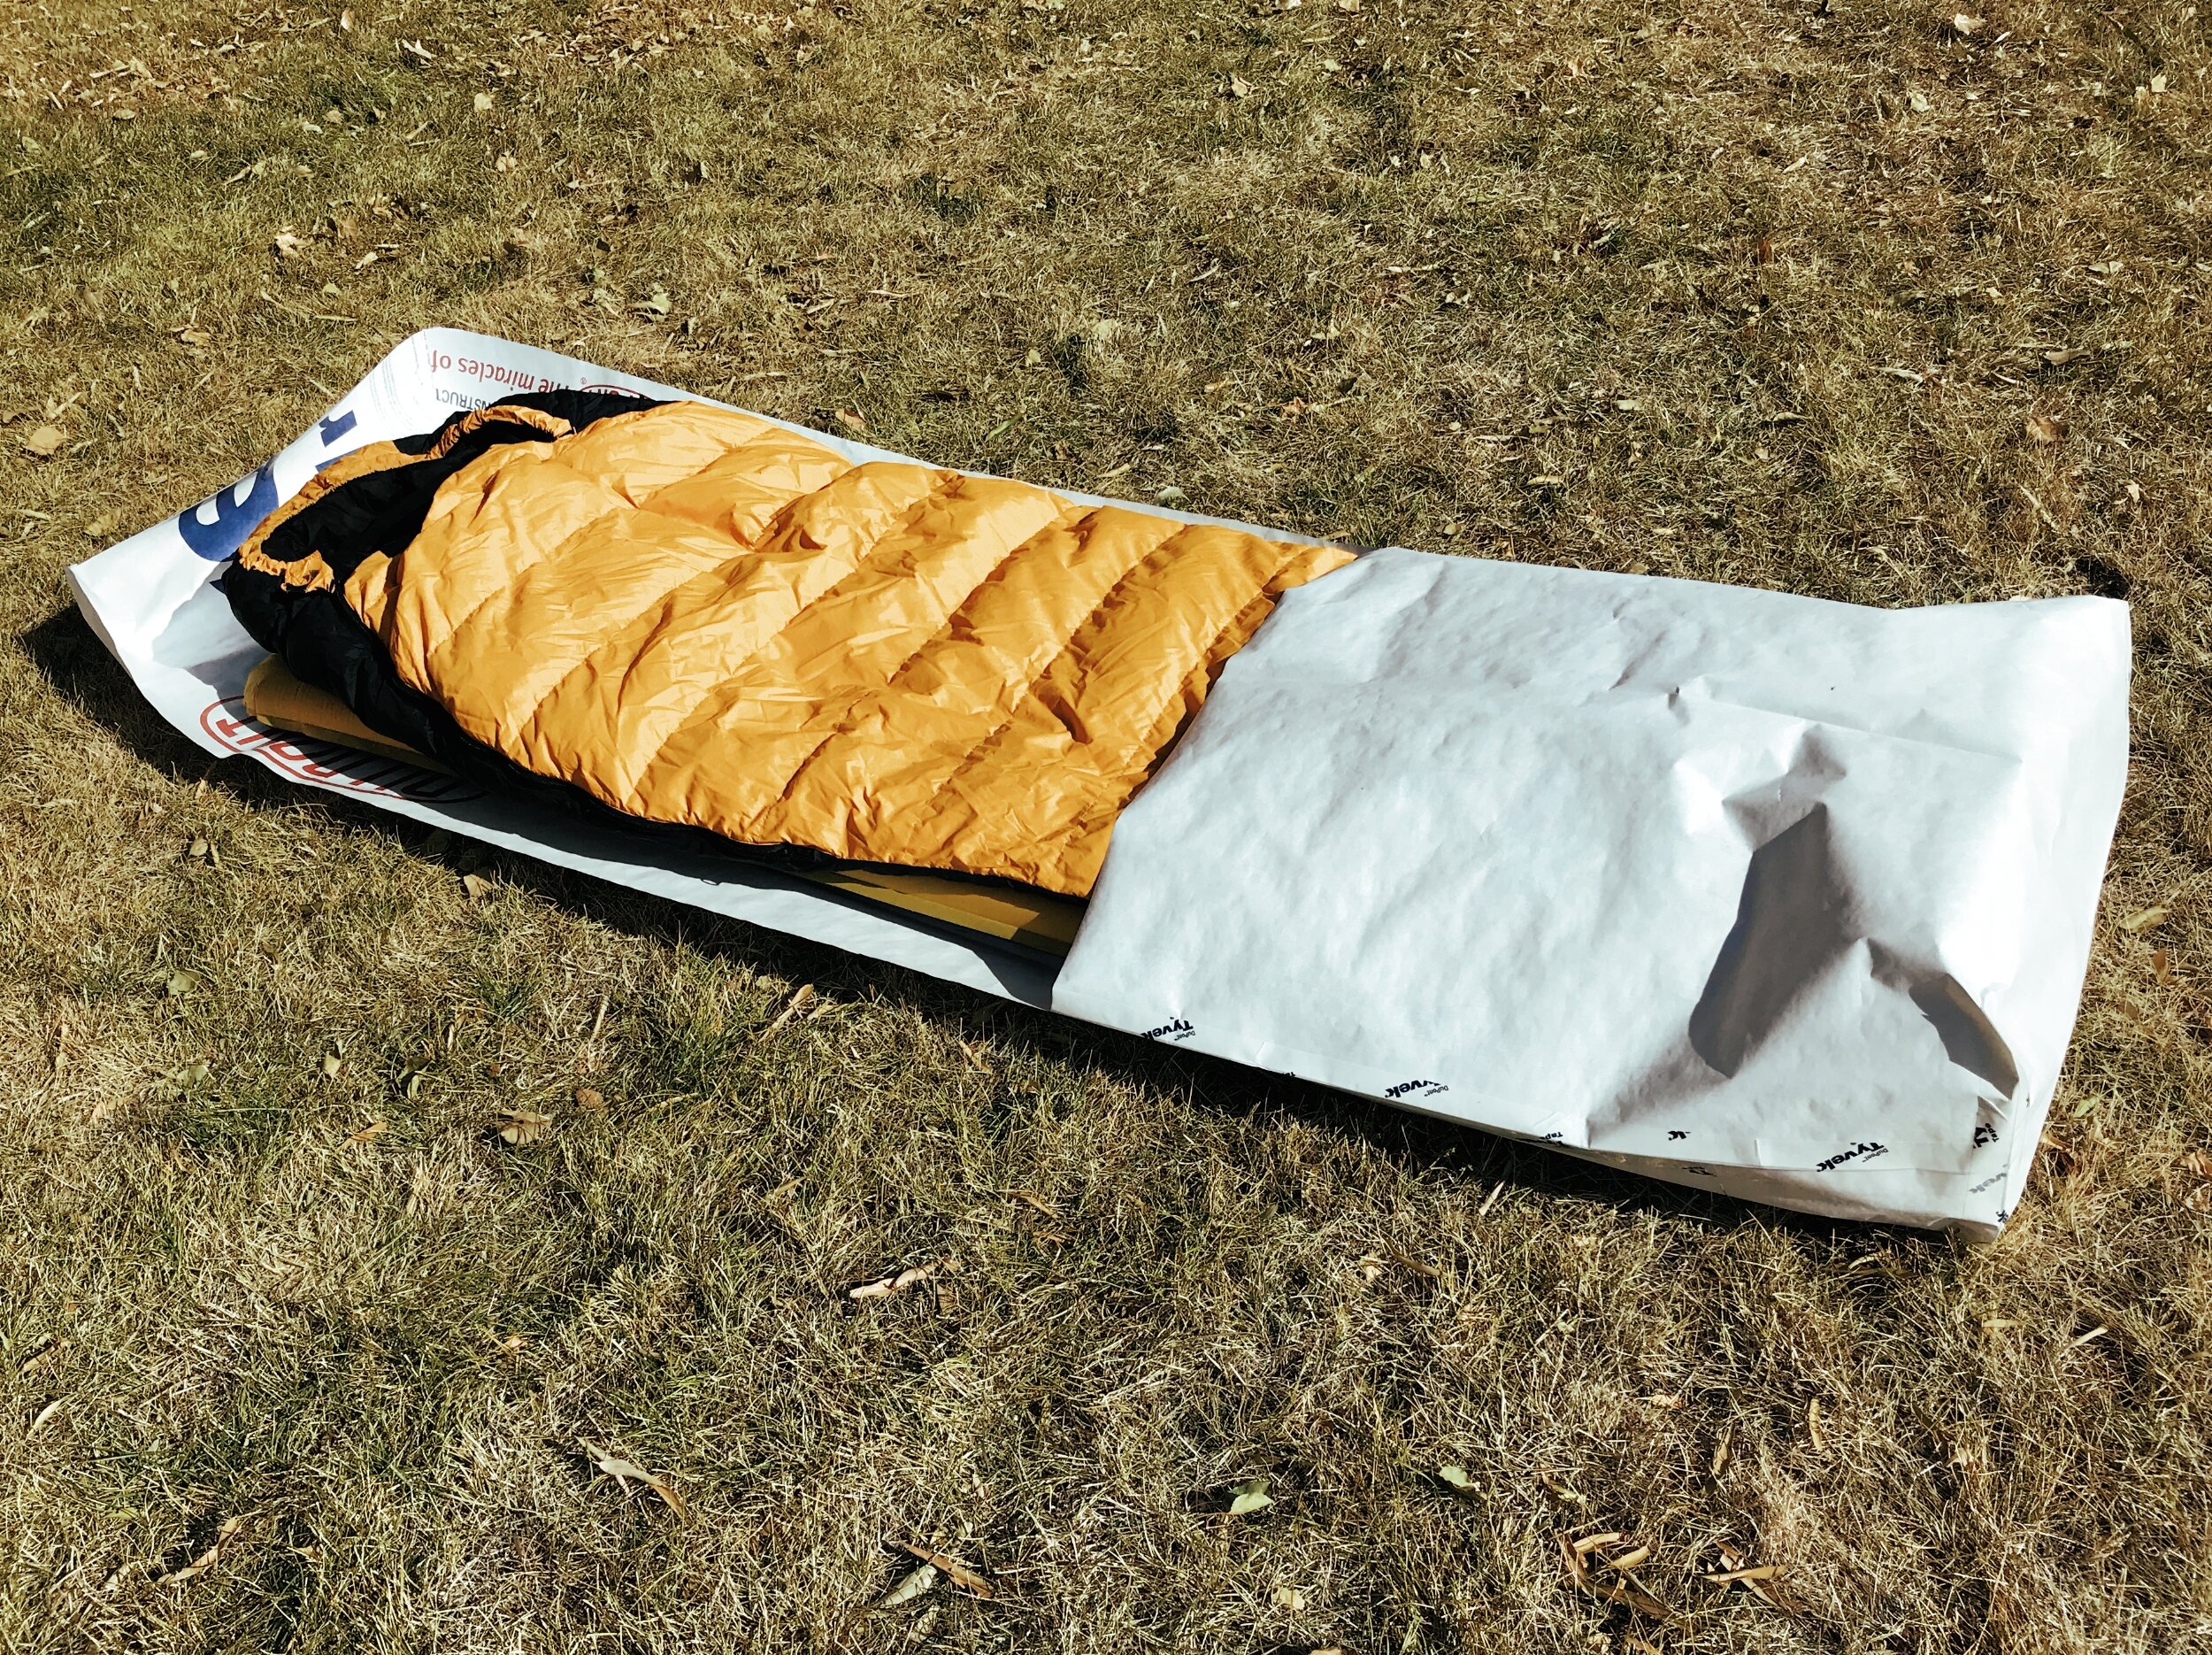
On a recent trip I took the idea of a bathtub floor a step further and formed a foot box into the Tyvek groundsheet. When using a slick inflatable pad I often find that during the night the pad will migrate off the ground sheet and into the dirt, especially when the ground isn’t level. I thought adding a foot box to the ground sheet would help mitigate this problem and it did. The foot box provided a couple of other benefits as well. It kept my feet warmer, and provided some additional splash protection for the end of my sleeping quilt. Because Tyvek is somewhat breathable I didn’t notice any issues with condensation on the inside of the foot box, although that could change depending on the time of year, temperature, etc.
It does add some weight to my sleep system so it isn’t something I would use in every situation but I think it is worth the extra weight in circumstances like the shoulder seasons when the extra warmth would be beneficial or when I’m using a small shelter and expecting inclement weather.
This article will go over the steps I used to add a foot box to a ground sheet. These steps are based on a 20” x 72” rectangular pad which is a pretty standard size for inflatable pads, but the same steps could be easily adapted to fit other sizes. The groundsheet is tapered to remove unnecessary material and the foot box is three dimensional so that it doesn’t compress the insulation in sleeping bag or quilt.
Instructions
The first diagram below shows the foot print size of the ground sheet. The second shows the additional flaps that are needed to form the foot box and bathtub floor. It looks like a complicated shape but don’t worry the following steps will show how you can cut out this shape without having to measure and mark every line on the Tyvek.
*Note: Many people will send the Tyvek through the washing machine to make it more flexible and quiet. I find it is easier to complete the following steps before softening the Tyvek. You could probably send the finished groundsheet through the washer but I have not tested this. I find that I can get much the same results by simply crumpling and then straightening out the finished ground sheet several times.
Step 1
Cut a piece of Tyvek 32” wide x 120” long
Step 2
Fold 30” of the Tyvek back on itself.
Step 3
Fold the Tyvek in half lengthwise.
Step 4
On the end of the Tyvek that has the folds, measure up 2” from the open edge. (There should be 4 layers of Tyvek here, and you should measure from the long edge that is open, not the folded one.)
Draw a line from your mark down to the corner on the other end of the piece. Cut along this line.
Step 5
Measure out a 4” square on the 2 bottom corners. Cut out the square.
Step 6
Unfold the long fold of the Tyvek. With the piece open, tape the footbox edges as shown below by wrapping the tape around the edge from back to front.
Step 7
Fold the corners at the head end of the groundsheet up and tape together. Pull the inside corners of the footbox apart. This should align the edges so that they can be taped. Repeat for the other side of the footbox. It is a good idea to add some additional tape on the inside of the footbox right where it starts to reinforce that stress point.
Related products that we recommend:
The links above are affiliate links. As an Amazon Associate Stitchback earns from qualifying purchases.


