
Accessorize Your Water Kit
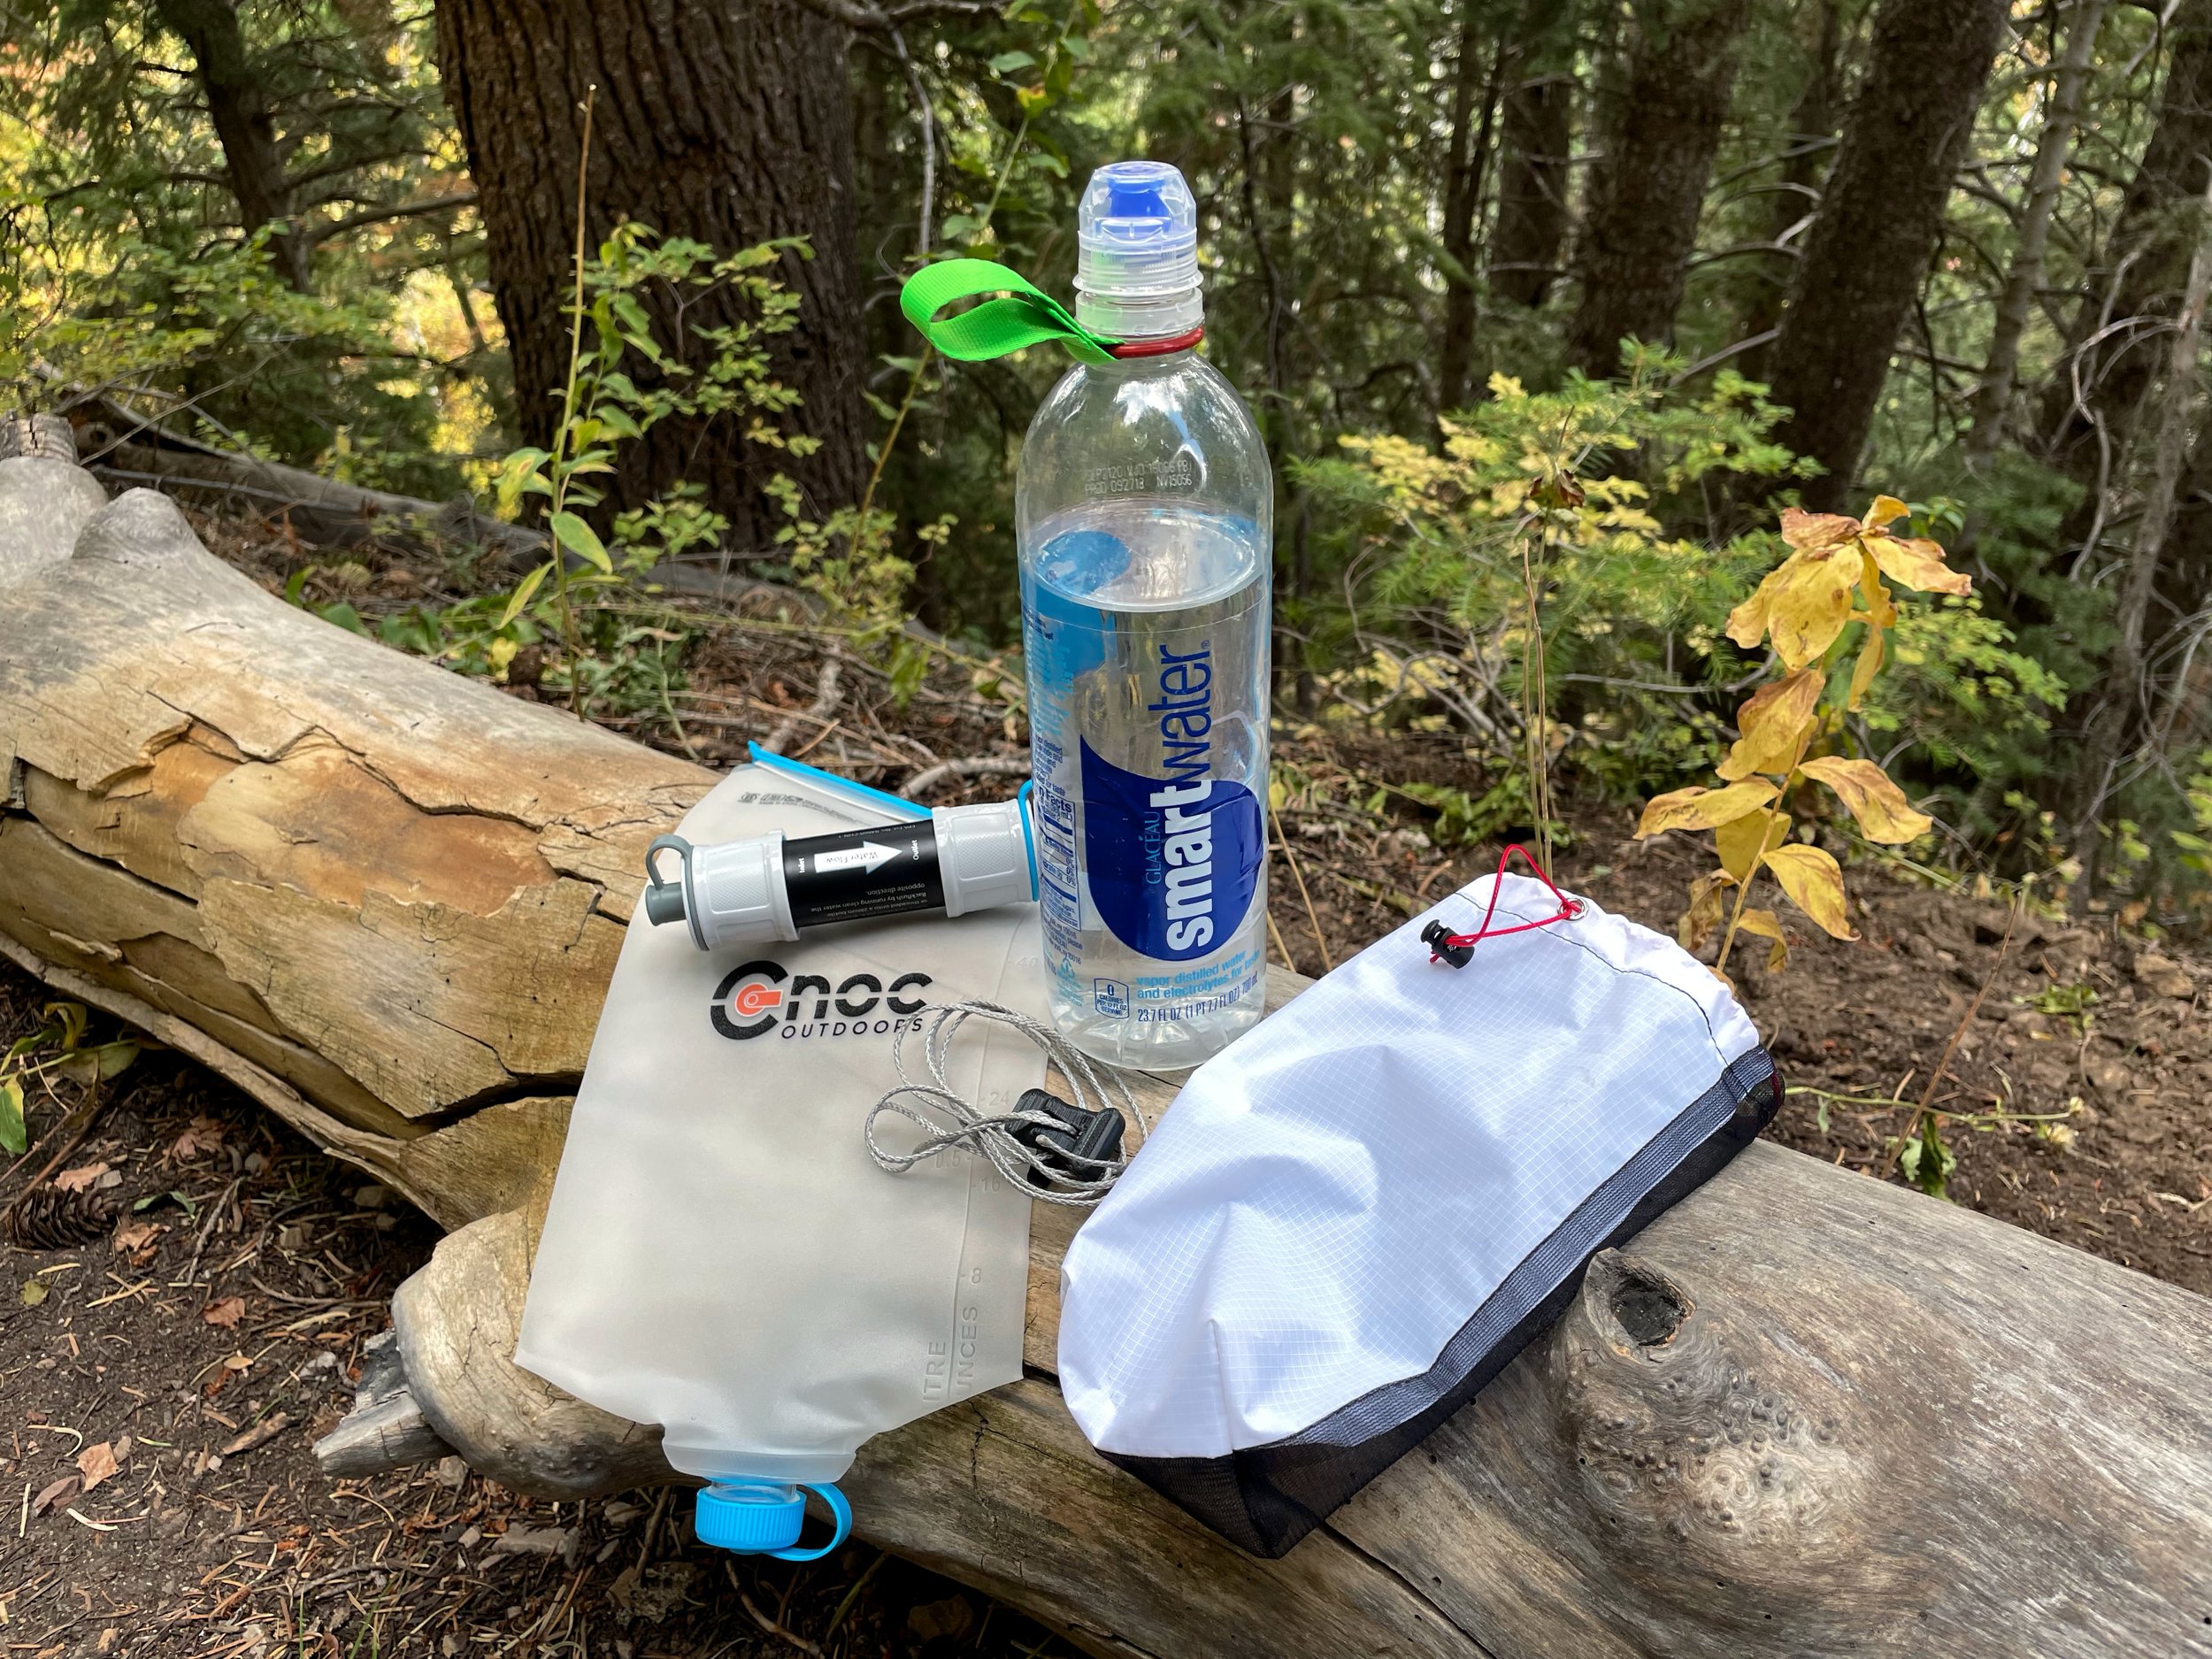
Over the years I have used several different systems for collecting and filtering water, but for the last four or five, I’ve settled on one that works really well for the type of hiking I do. It is the same system used by many backpackers, and it is easy to see why it is so popular. It is small, lightweight, versatile, and relatively inexpensive. The system consists of a Cnoc water bag and a Sawyer Mini or Versa Flow filter. A Smartwater bottle is the last major component of the system. I gather the dirty water in the Cnoc bag and filter directly into the Smartwater bottle. (Either through the flip cap with the Sawyer Mini, or by threading the bottle onto the filter with the Versa Flow.)

I love having the option to set the system up as a gravity filter when I have the time, but also being able to push the water through “Sawyer Squeeze” style when I don’t want to wait.
Over the years of using this system, I’ve come up with a few accessories that round out the kit and make it even a little more convenient. This article will go over how you can make these same accessories for your own kit.
Hanging Hook
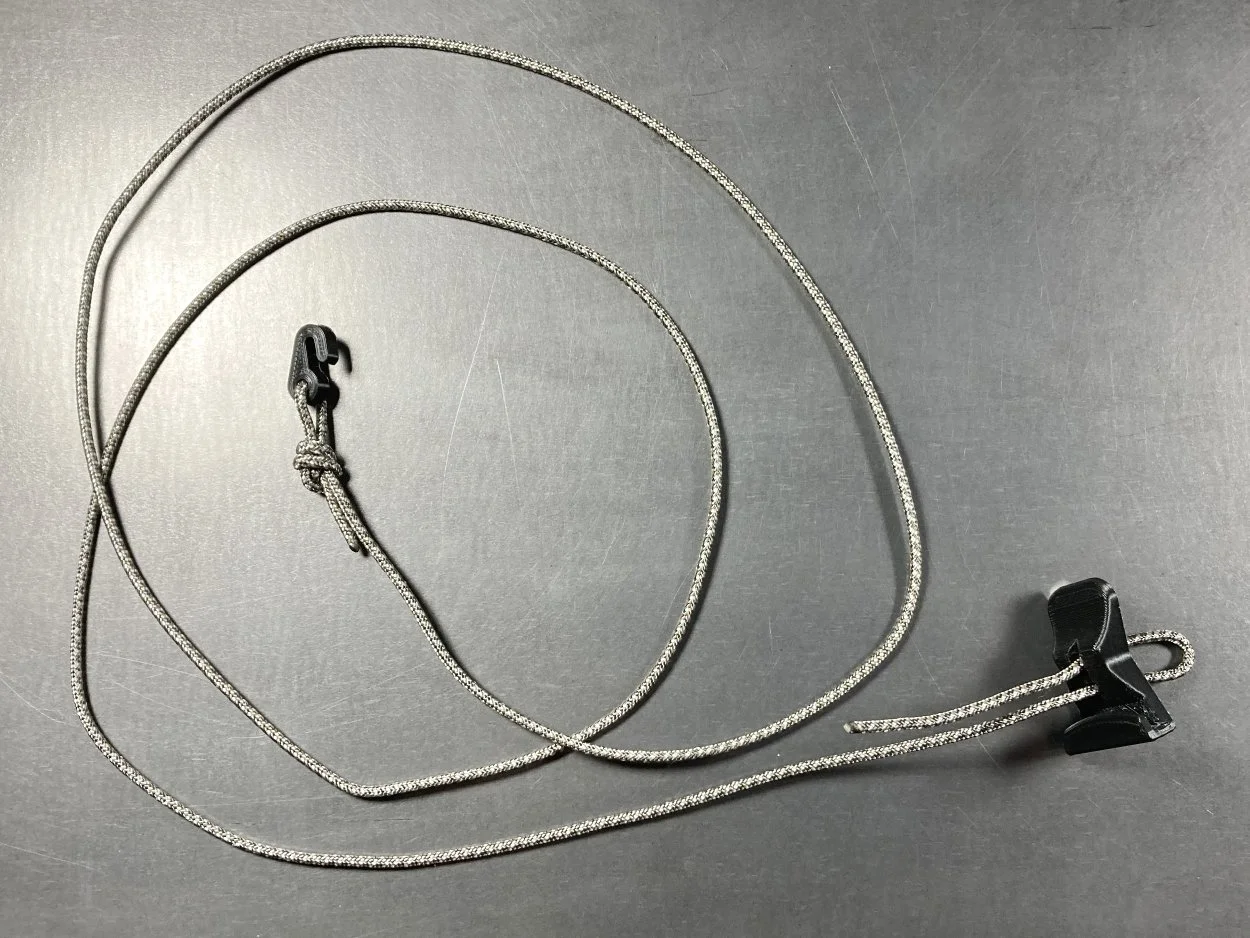
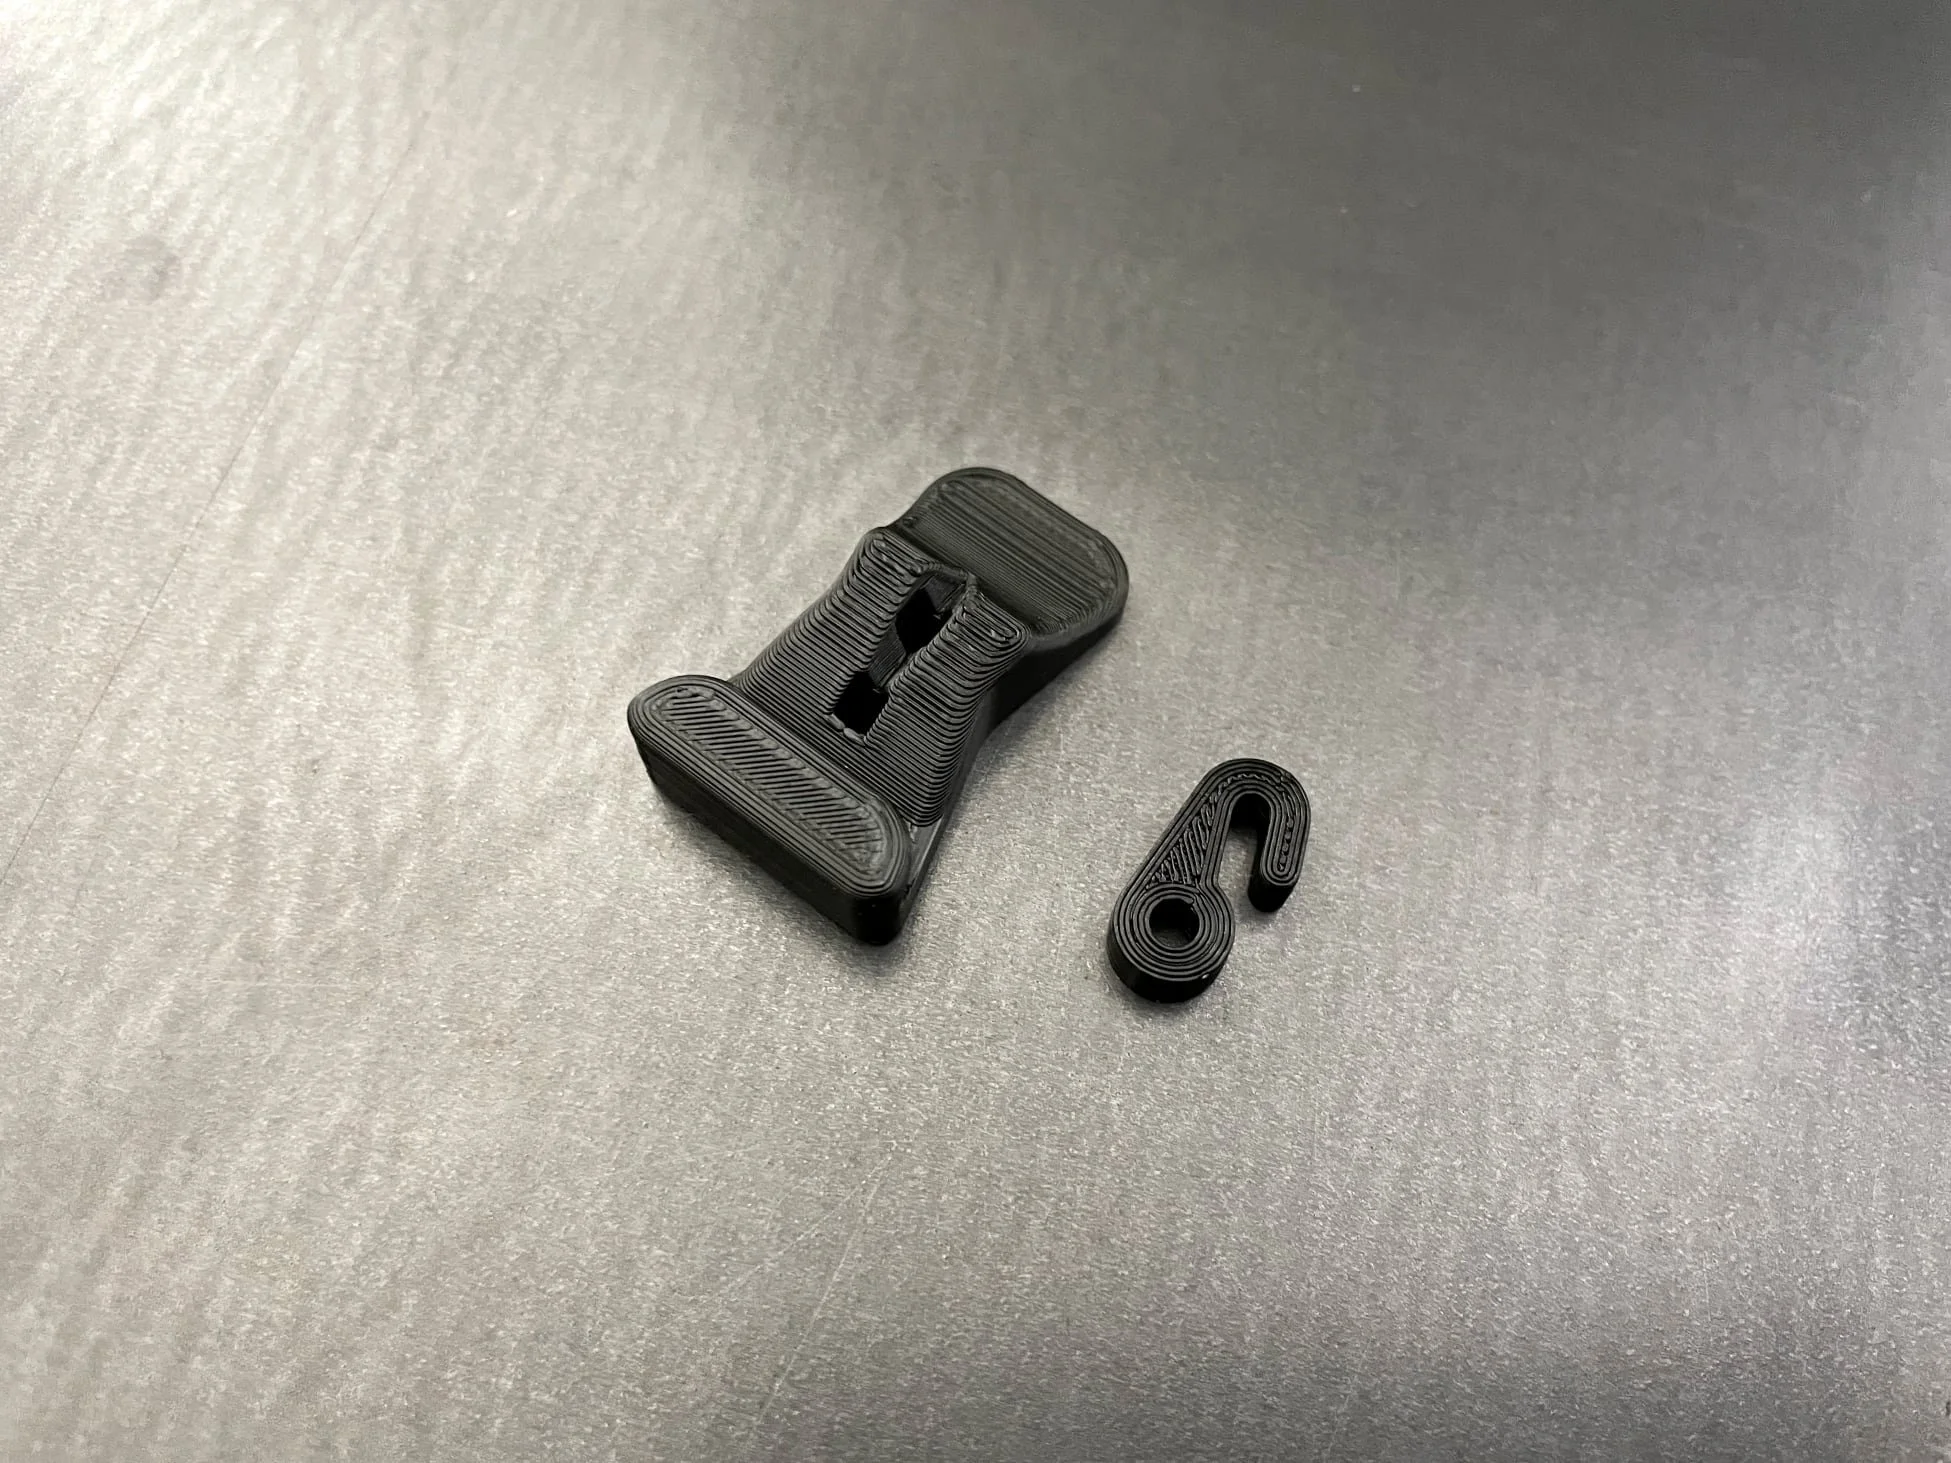
The first accessory is an adjustable hanging hook. This hook makes it easy to set the system up as a gravity filter. It consists of a piece of cord with small fixed hook on one end and an adjustable hook on the other.
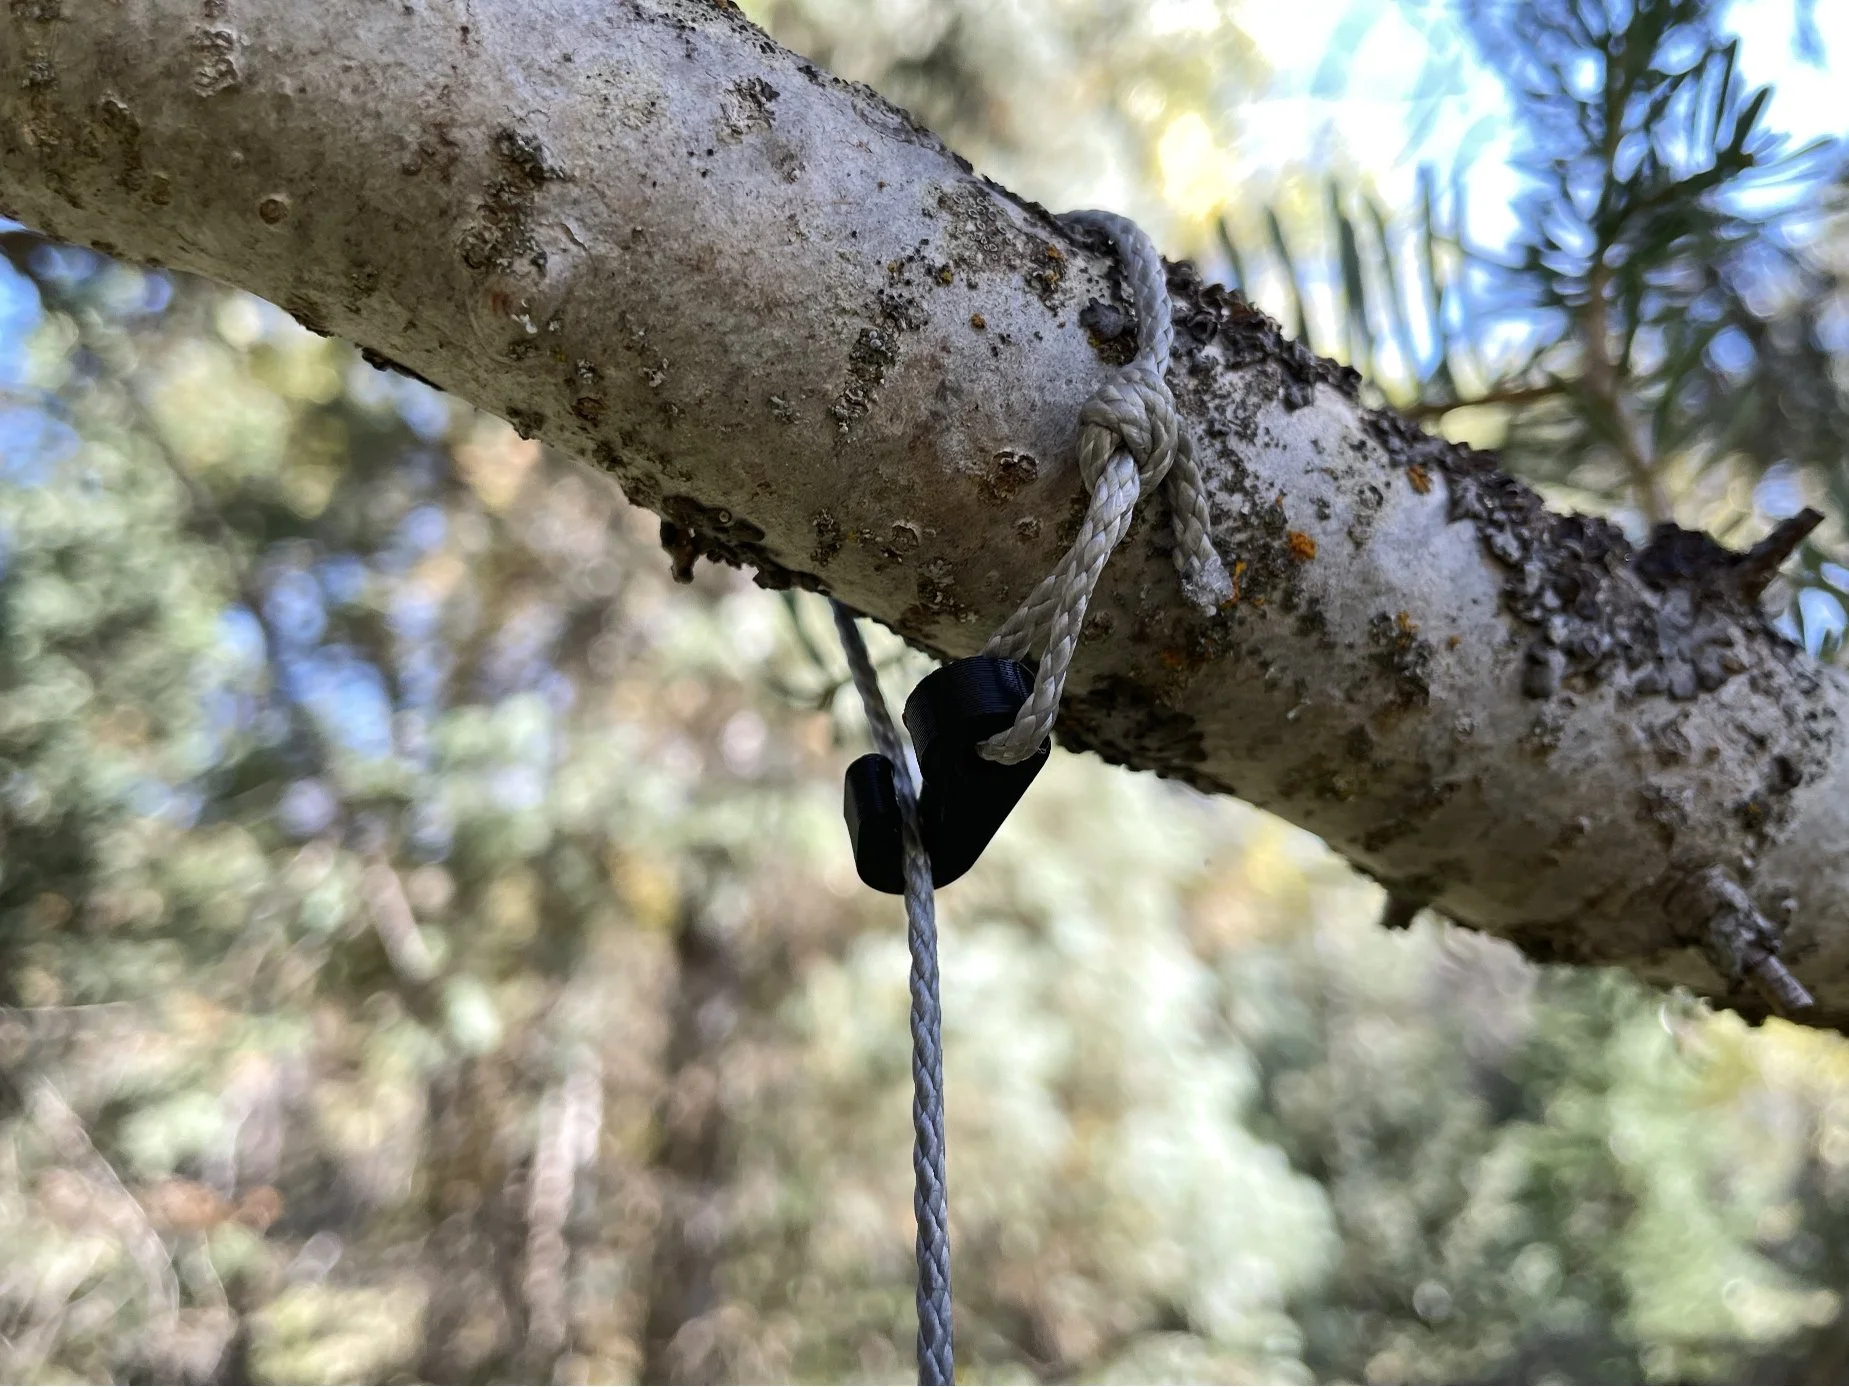
The fixed hook end can be looped over a branch and hooked on itself as shown below. This no knot method of attaching the end to a branch is quick and easy.
On the other end of the cord is an adjustable hook that clips into the slot on the top of a 2 liter Cnoc Vecto bag. The hook functions similarly to a Lineloc. It slides up and down on the cord and then locks in place. I find this helpful if the branch is high and I want to be able to position the filter at a more convenient height. I also have the option of filtering directly into a pot or other container by setting the container on the ground and adjusting the filter so it hangs just above it.
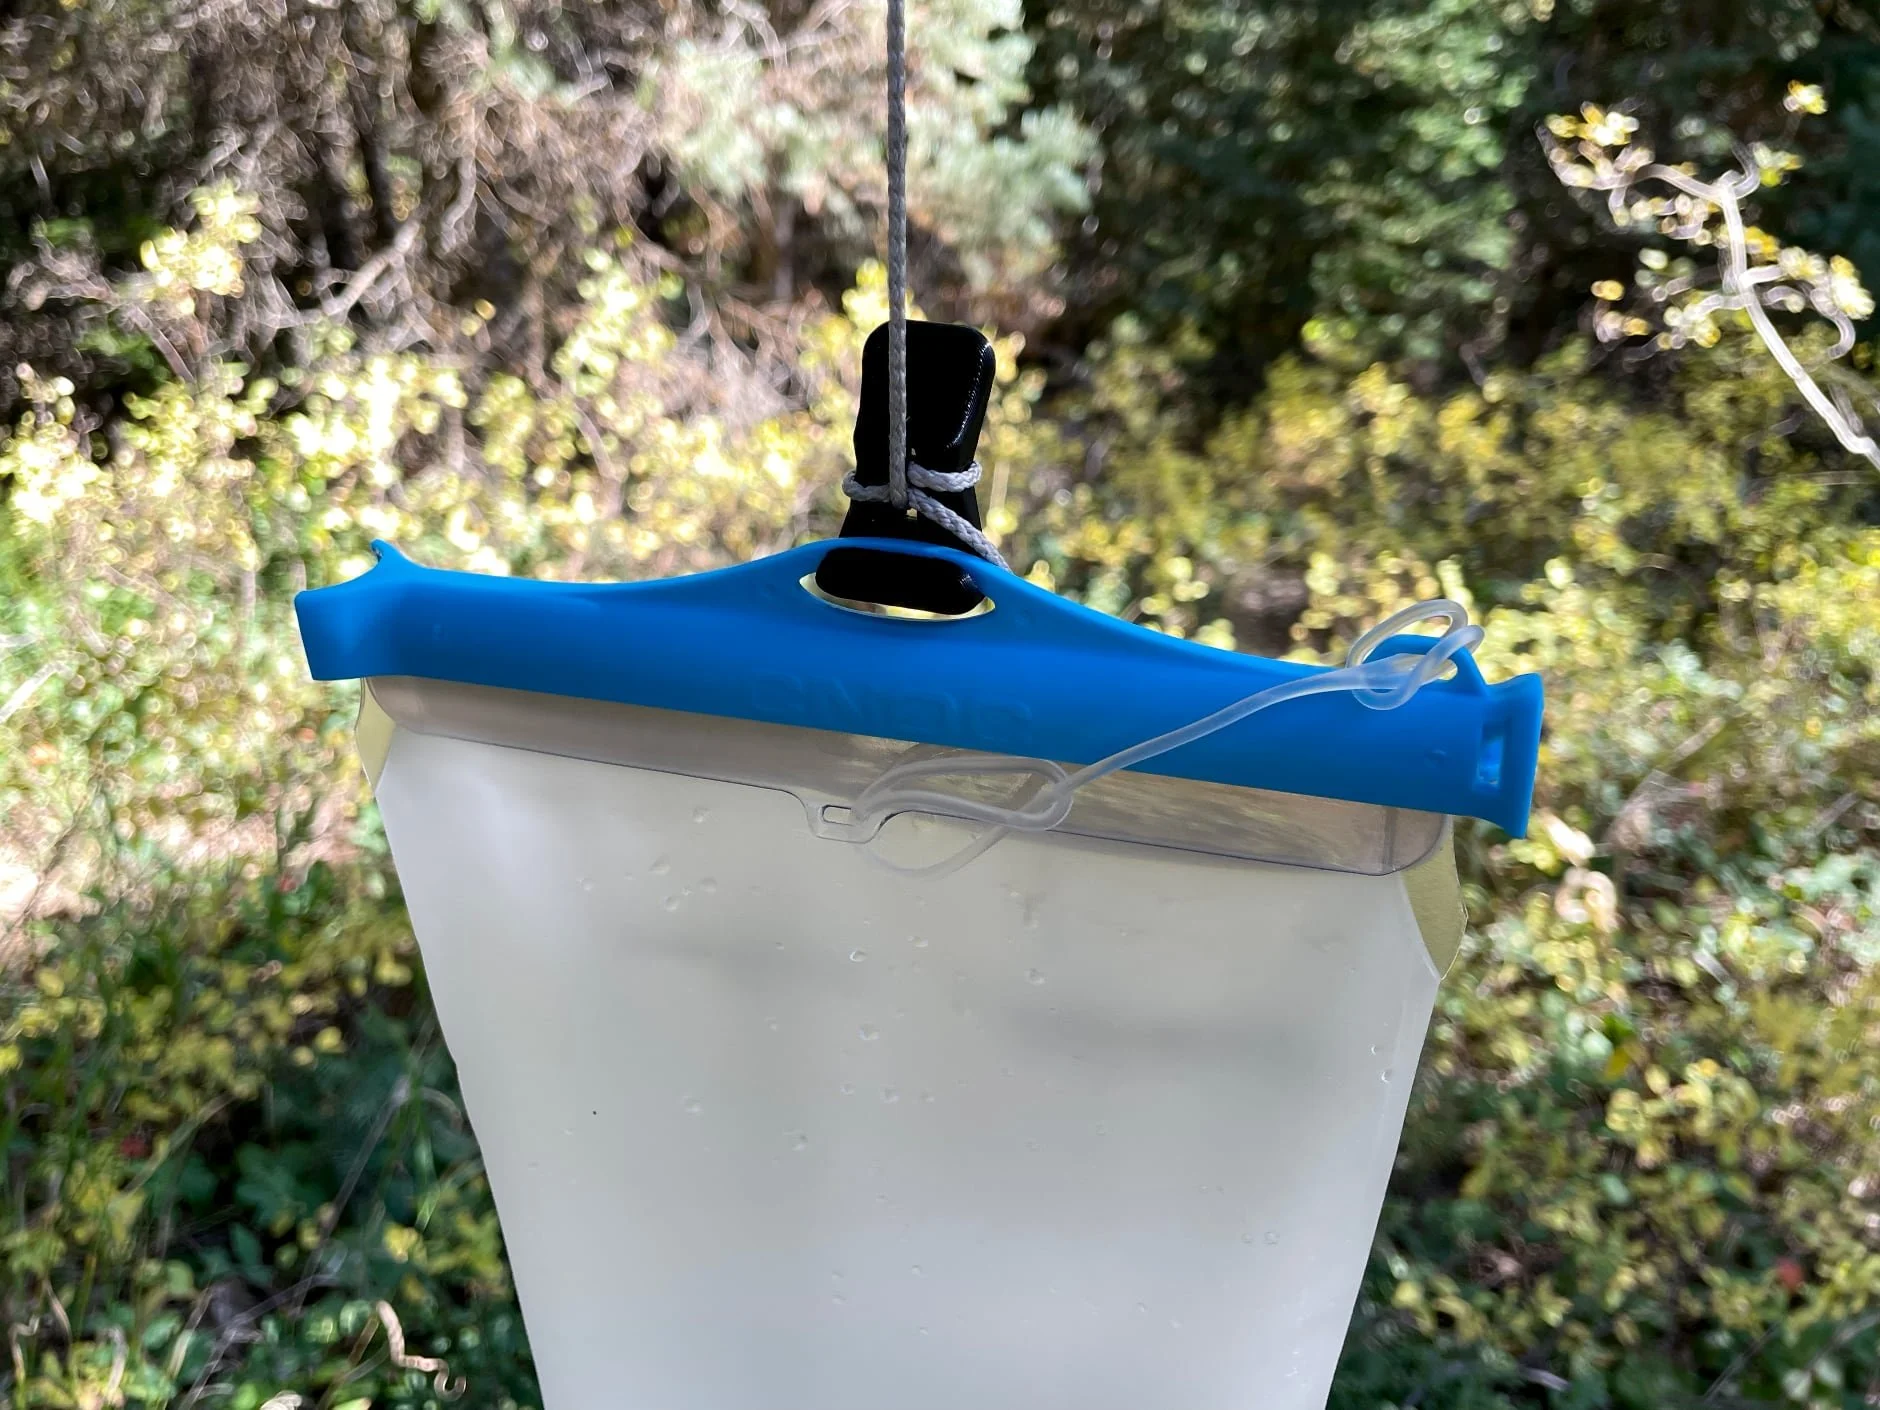

One of the main benefits I find in this method for hanging the bag is that I can unhook the bag and take it back to the water source to refill, then return and easily place it back on the hook without having to retie or adjust anything.
The two hooks are 3d printed parts, and you can download the file for free by clicking here. 3d printers are becoming more ubiquitous by the day, and many libraries or maker spaces have them available for use. There are also places online where you can have parts printed.
If you plan to print the parts, be sure to look at the document included with the download. It contains instructions for verifying the size of the parts as well as some suggested settings for the printer.
The hooks are designed to be used with 2.2-2.4mm cord such as Zing It. Any length could be used, but I have found 50” to be about right. To install the fixed hook, simply thread one end of the cord through the hole in the hook and tie an overhand knot with both strands as shown below.
Thread the other end of the cord through the adjustable hook as shown in the photos below.
Thread cord through bottom hole.
Thread cord back through upper hole.
The hook is designed so that after adjusting it to the desired height, it can be locked in place by wrapping the cord around the hook and behind the vertical strand as shown below.

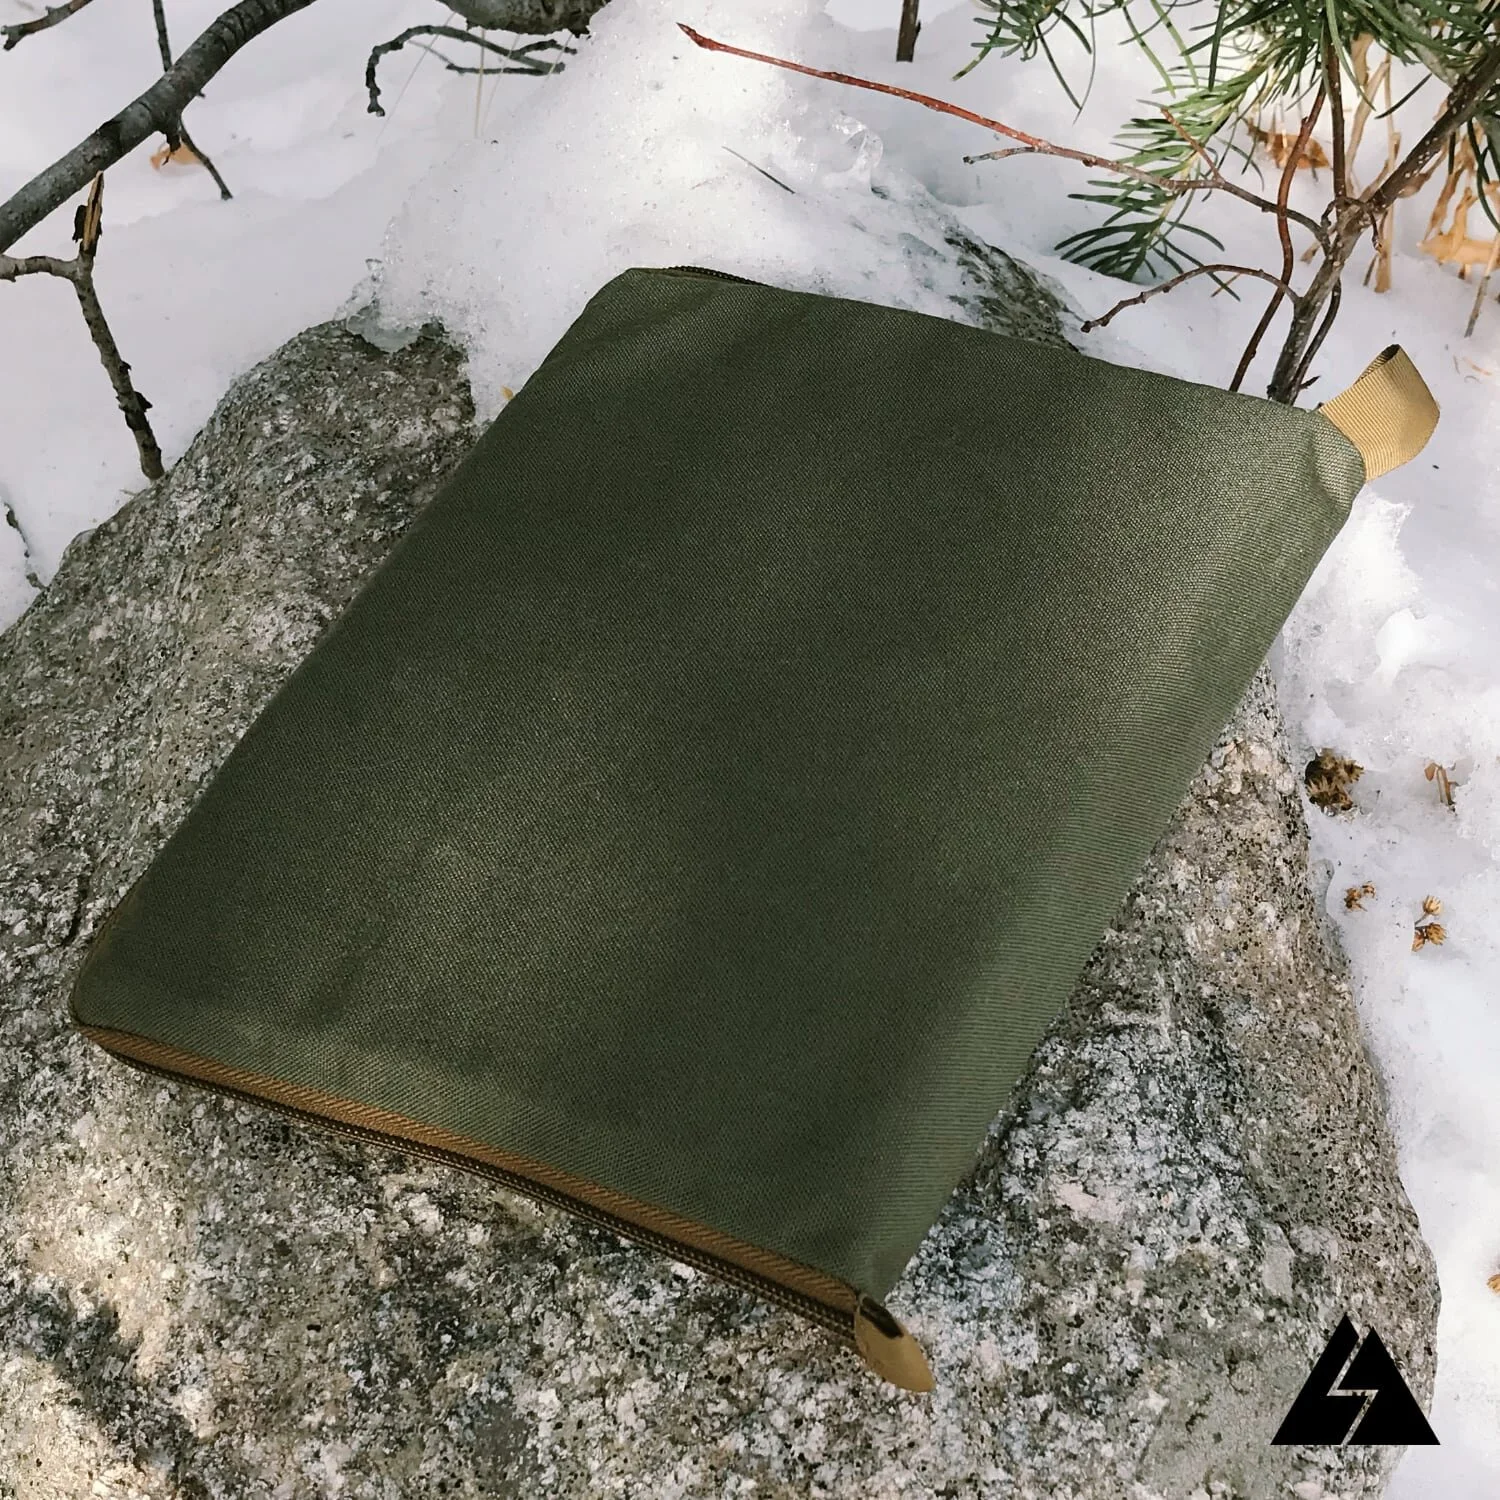
Storage Bag
The second accessory is a simple storage bag used to keep everything together. It’s sized to perfectly fit a 2 liter Cnoc bag, filter, and hanging hook.

You can download the pattern for free by clicking here.
The bag is made up of two parts of the same shape. If you carry your filter in an outer pocket and want the filter to be able to dry while carrying, you can make one of the parts out of some kind of mesh. If you plan to carry the filter inside your pack and want to keep the wet filter away from the other items in the pack, use a waterproof fabric for both parts of the bag.

Step one:
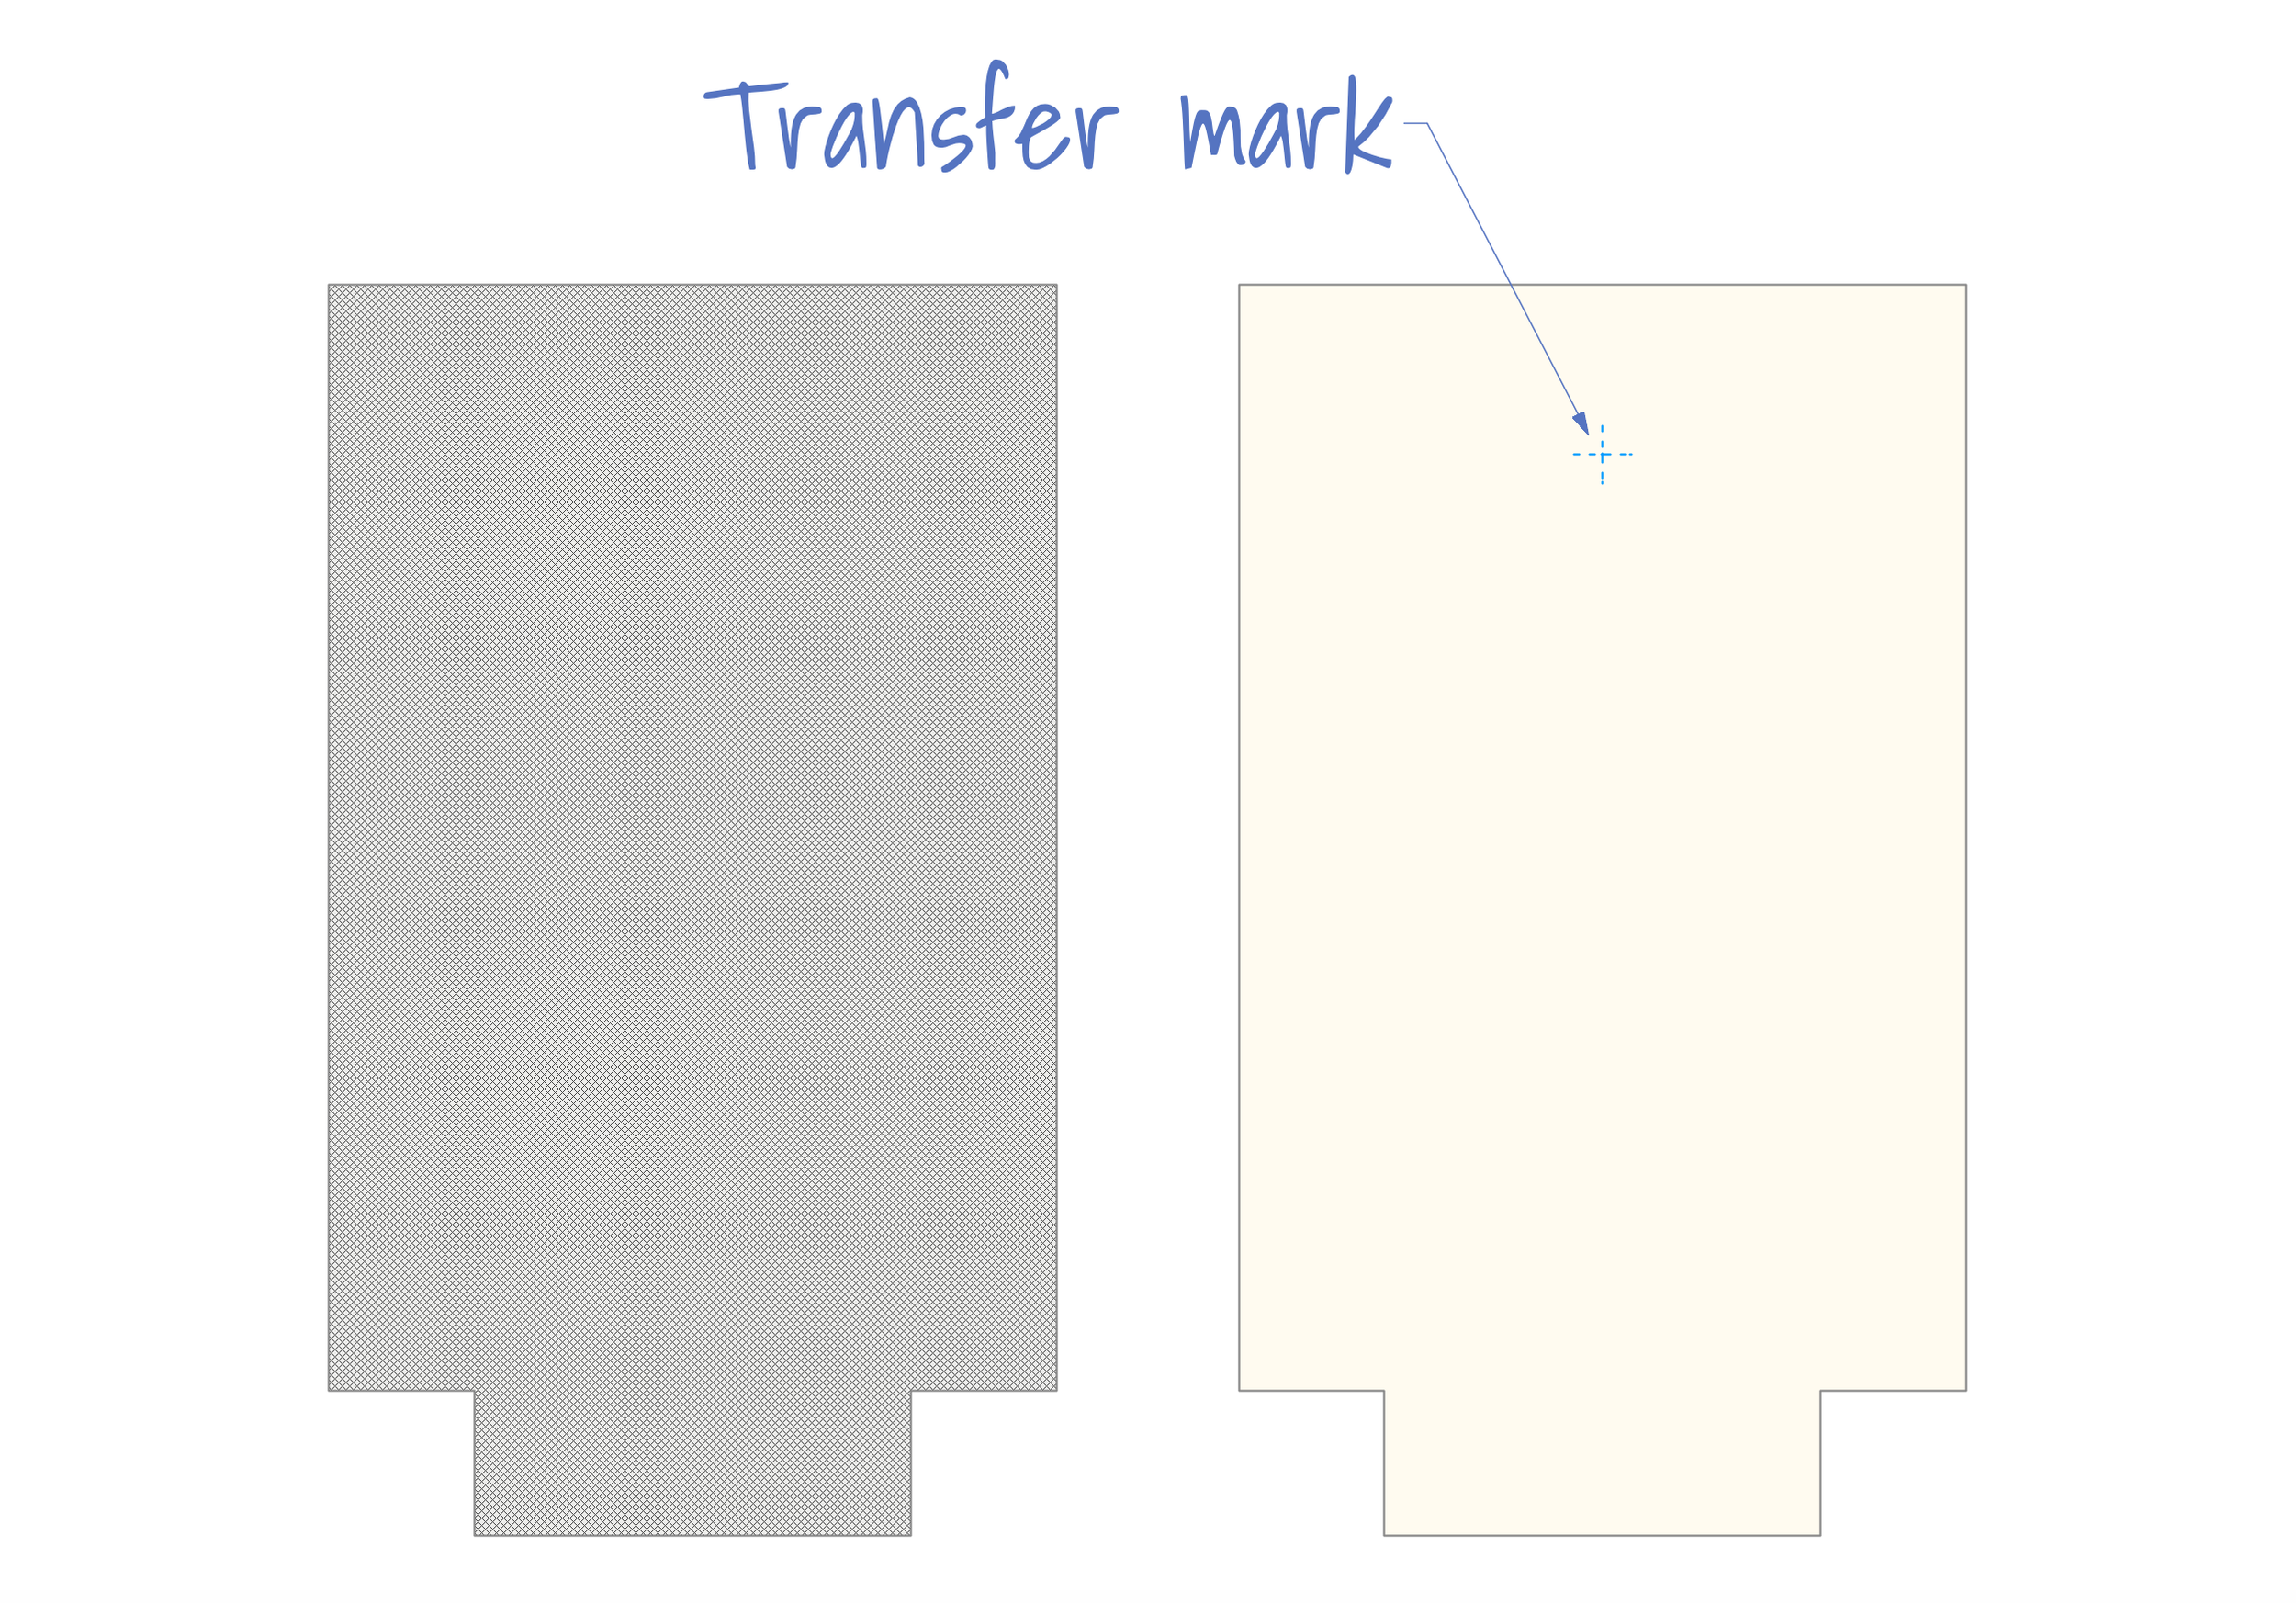
The pattern is divided into two parts. Print the pattern at full size. Cut out the parts and tape them together. Pin the pattern to the fabric. Cut the fabric using the pattern as a guide. Two parts are needed. If the fabric you are using is prone to fraying, use a lighter to carefully singe the edges of the part. Transfer the mark from the pattern to the fabric using a marking wheel and paper. The mark only needs to be transferred to one of the parts. If using mesh for one of the parts, I recommend transferring the mark to the non mesh part.
Step two:
Install a 3/16” grommet where marked as shown below. You can read about how to install grommets here.

Step three:
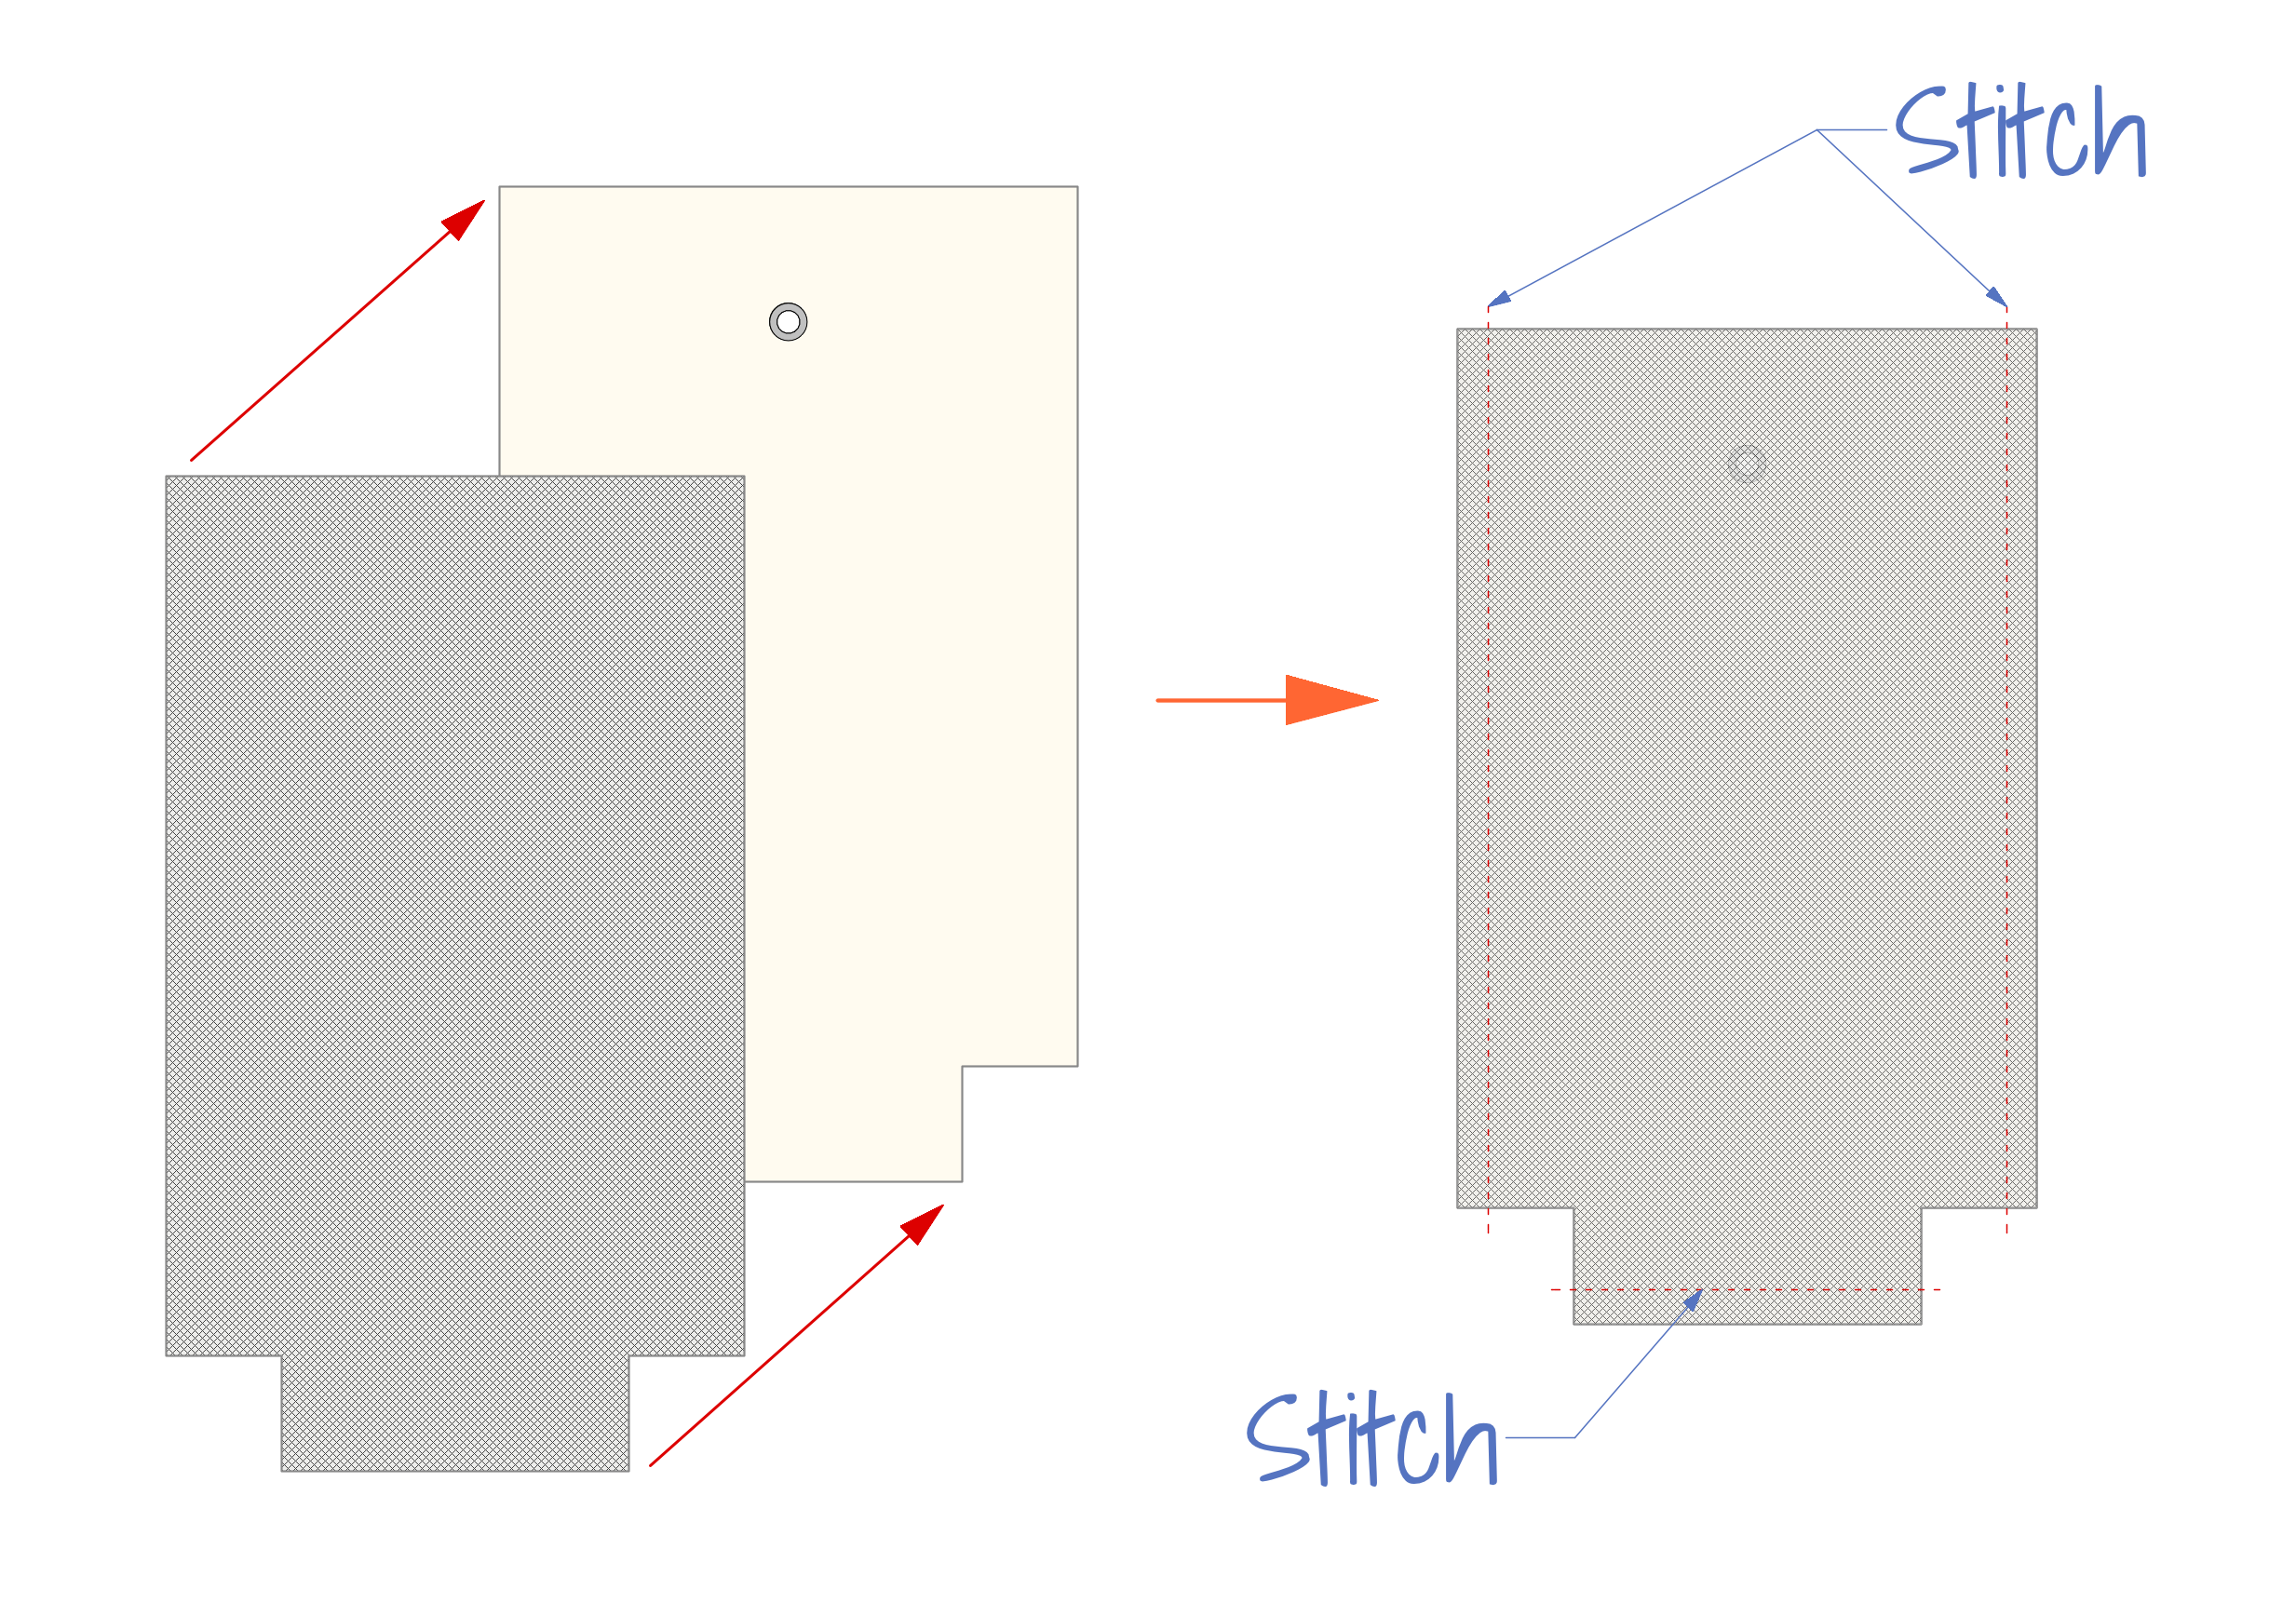
Pin the two parts wrong sides together with the edges aligned. Stitch the sides and bottom with a ⅜” seam allowance as shown below.
Step four:
Pull the bottom inner corners apart, so that the seams on the sides and bottom of the bag are aligned. Pin in place and stitch with a ⅜” seam allowance as shown below.


Step five:
Turn the bag right side out. Fold the drawstring channel into the top edge of the bag by making a ⅜” fold wrong sides together. Then make a second ¾” fold. This can be done in one step, but I find it easier to do it in two steps, by stitching the ⅜” fold in place first and then folding and stitching the ¾” fold. A zipper foot can be helpful in stitching past the grommet.

Step six:
Take an 18” piece of cord and thread it through the grommet and around the bag. Pinning a small safety pin to the end of the string will make this easier. Once the cord has been threaded all the way around, install a cord lock and tie a knot so it can’t fall off.


Bottle Grab Tab
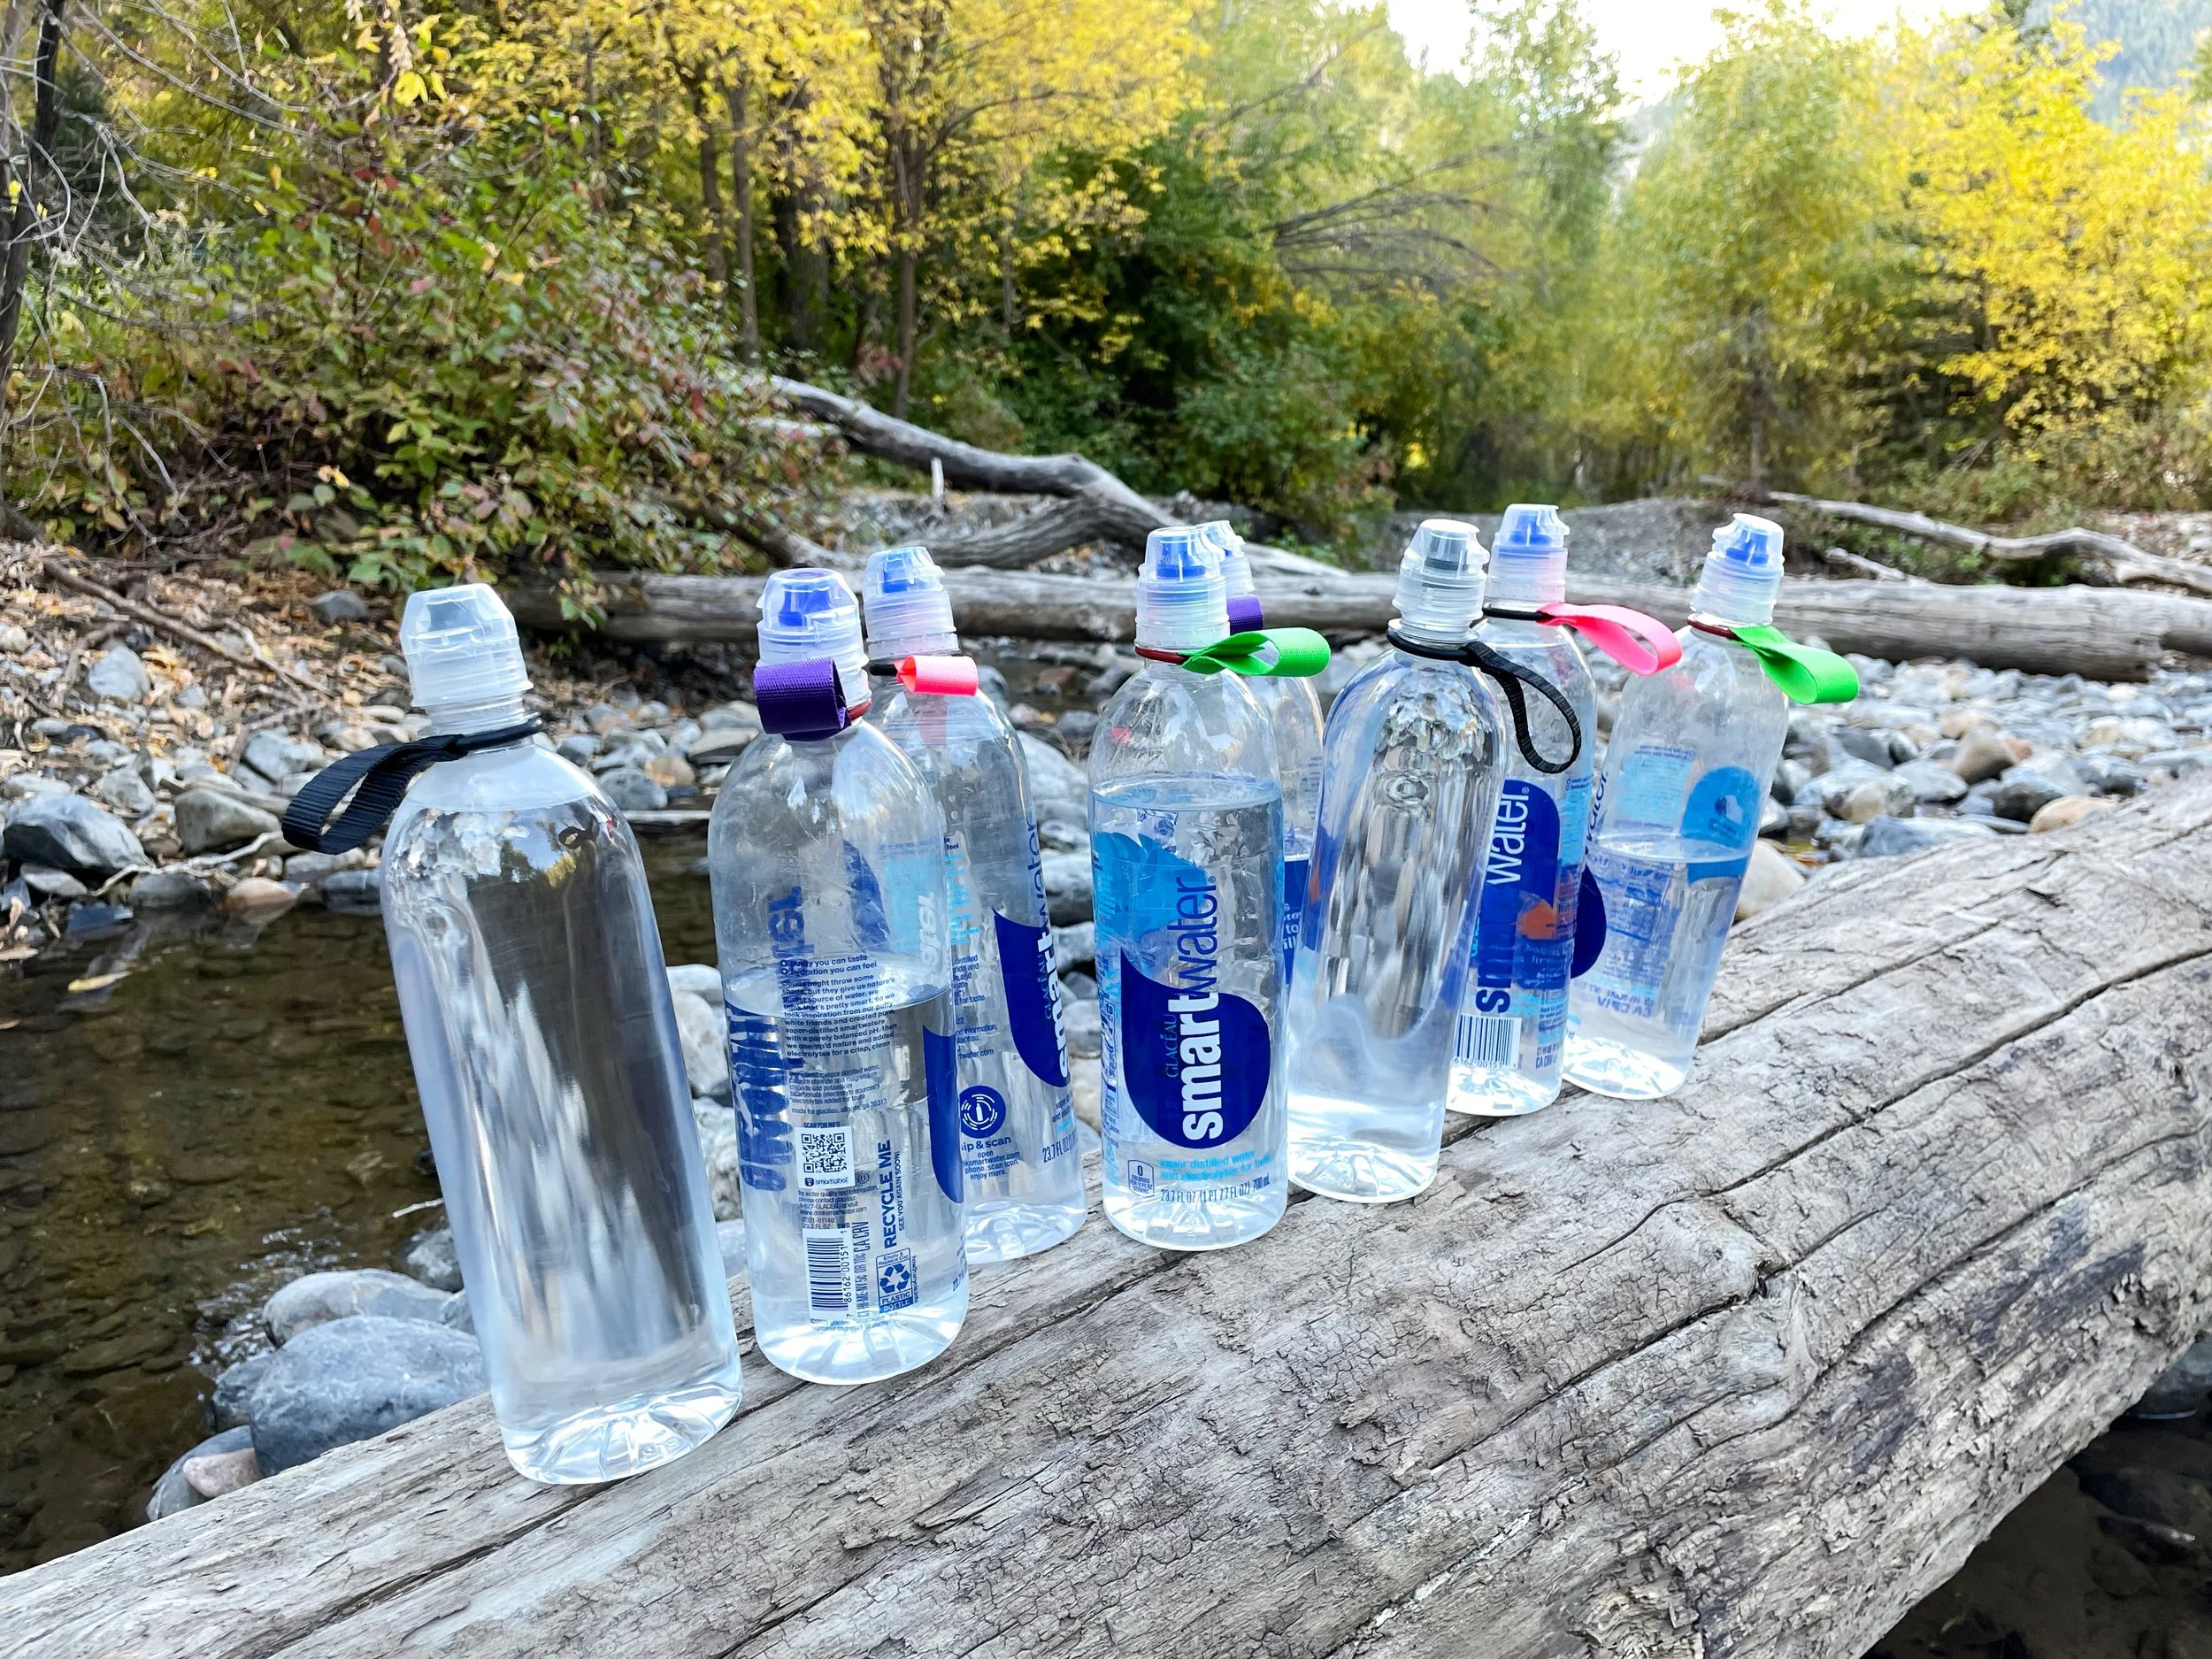
The third and final accessory is a webbing loop for the Smartwater bottle. I find that adding this small loop to the neck of the bottle makes it a little easier to reach the bottle when carrying it in the side pocket of a backpack, but where it really comes in handy is when carrying multiple bottles back from a water source.

In addition to making the bottles easier to carry, I’ve also found that the grab tabs are a great way to differentiate the bottles. When backpacking as a family we often have 8 or more Smartwater bottles amongst us, and it used to be confusing trying to remember which bottle belonged to who, but by using a different color webbing for each person's bottles, this is no longer a problem.
Parts needed:
O-ring
5-1/2” piece of ⅝ or ¾” webbing
These grab tabs make use of an O-ring to attach the webbing to the neck of the bottle. I like this method because it is clean, (there are no knots or other bulky connections) and because the tabs can be easily moved to another bottle if one happens to get a hole or wear out. But I have found that some O-rings work better than others. See the note on O-rings below. An alternate method would be to use a zip tie to attach the webbing to the bottle. This method is very secure, but can’t be easily moved to a different bottle.
Note on O-rings: O-rings can be found at good hardware stores and also on Amazon. I have found that O-rings that have a 24mm inside diameter and a 4mm cross section work well. O-rings with a cross section smaller than 3.5mm are too stretchy, and the weight of the water may be enough to pull the bottle through the O-ring. O-rings are available in different materials. Silicone is resistant to UV rays and will last longer than Nitrile O-rings out in the elements, but the silicone O-rings I have tried are stretchy and feel as though they could pull off. Nitrile O-rings are affected by UV rays and ozone and will eventually get hard and crack, but these are less stretchy and seem to hold more securely. I have grab tabs made with Nitrile O-rings which are many months old and show no signs of deterioration, but your mileage may vary.
To make the grab tab take a 5.5” piece of ¾” webbing and fold about 1” around the O-ring as shown below.
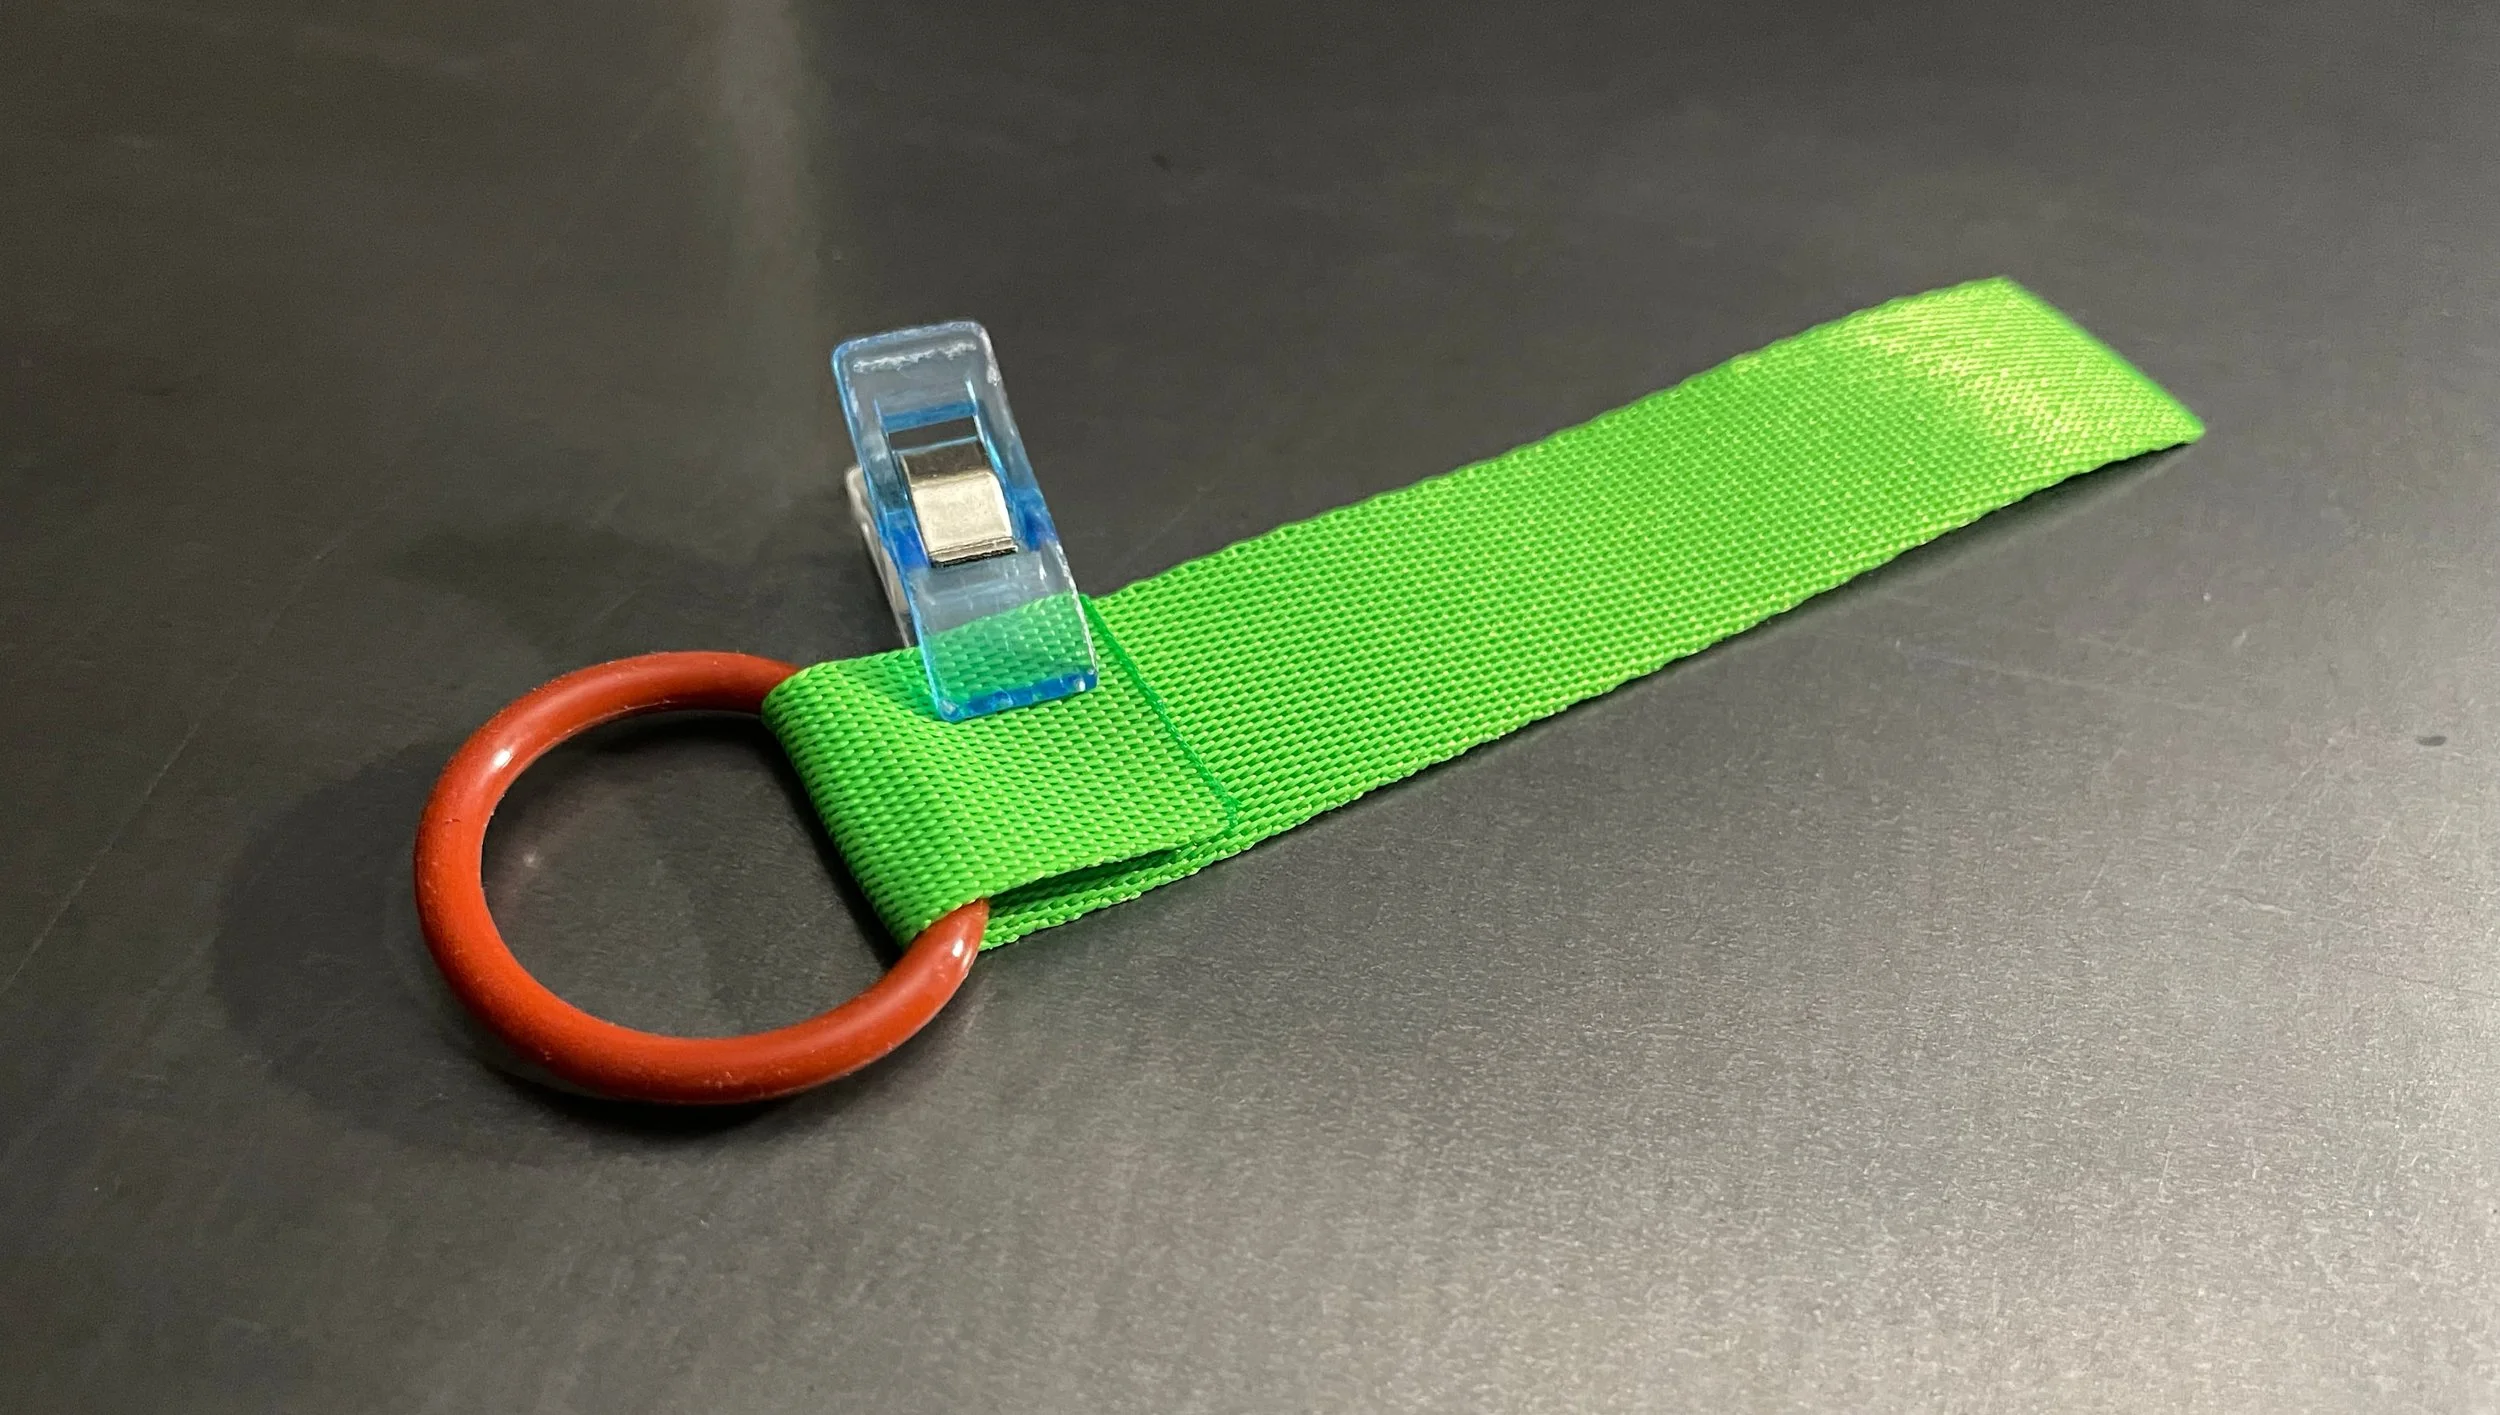
Fold the other end of the webbing back to the o-ring as shown.
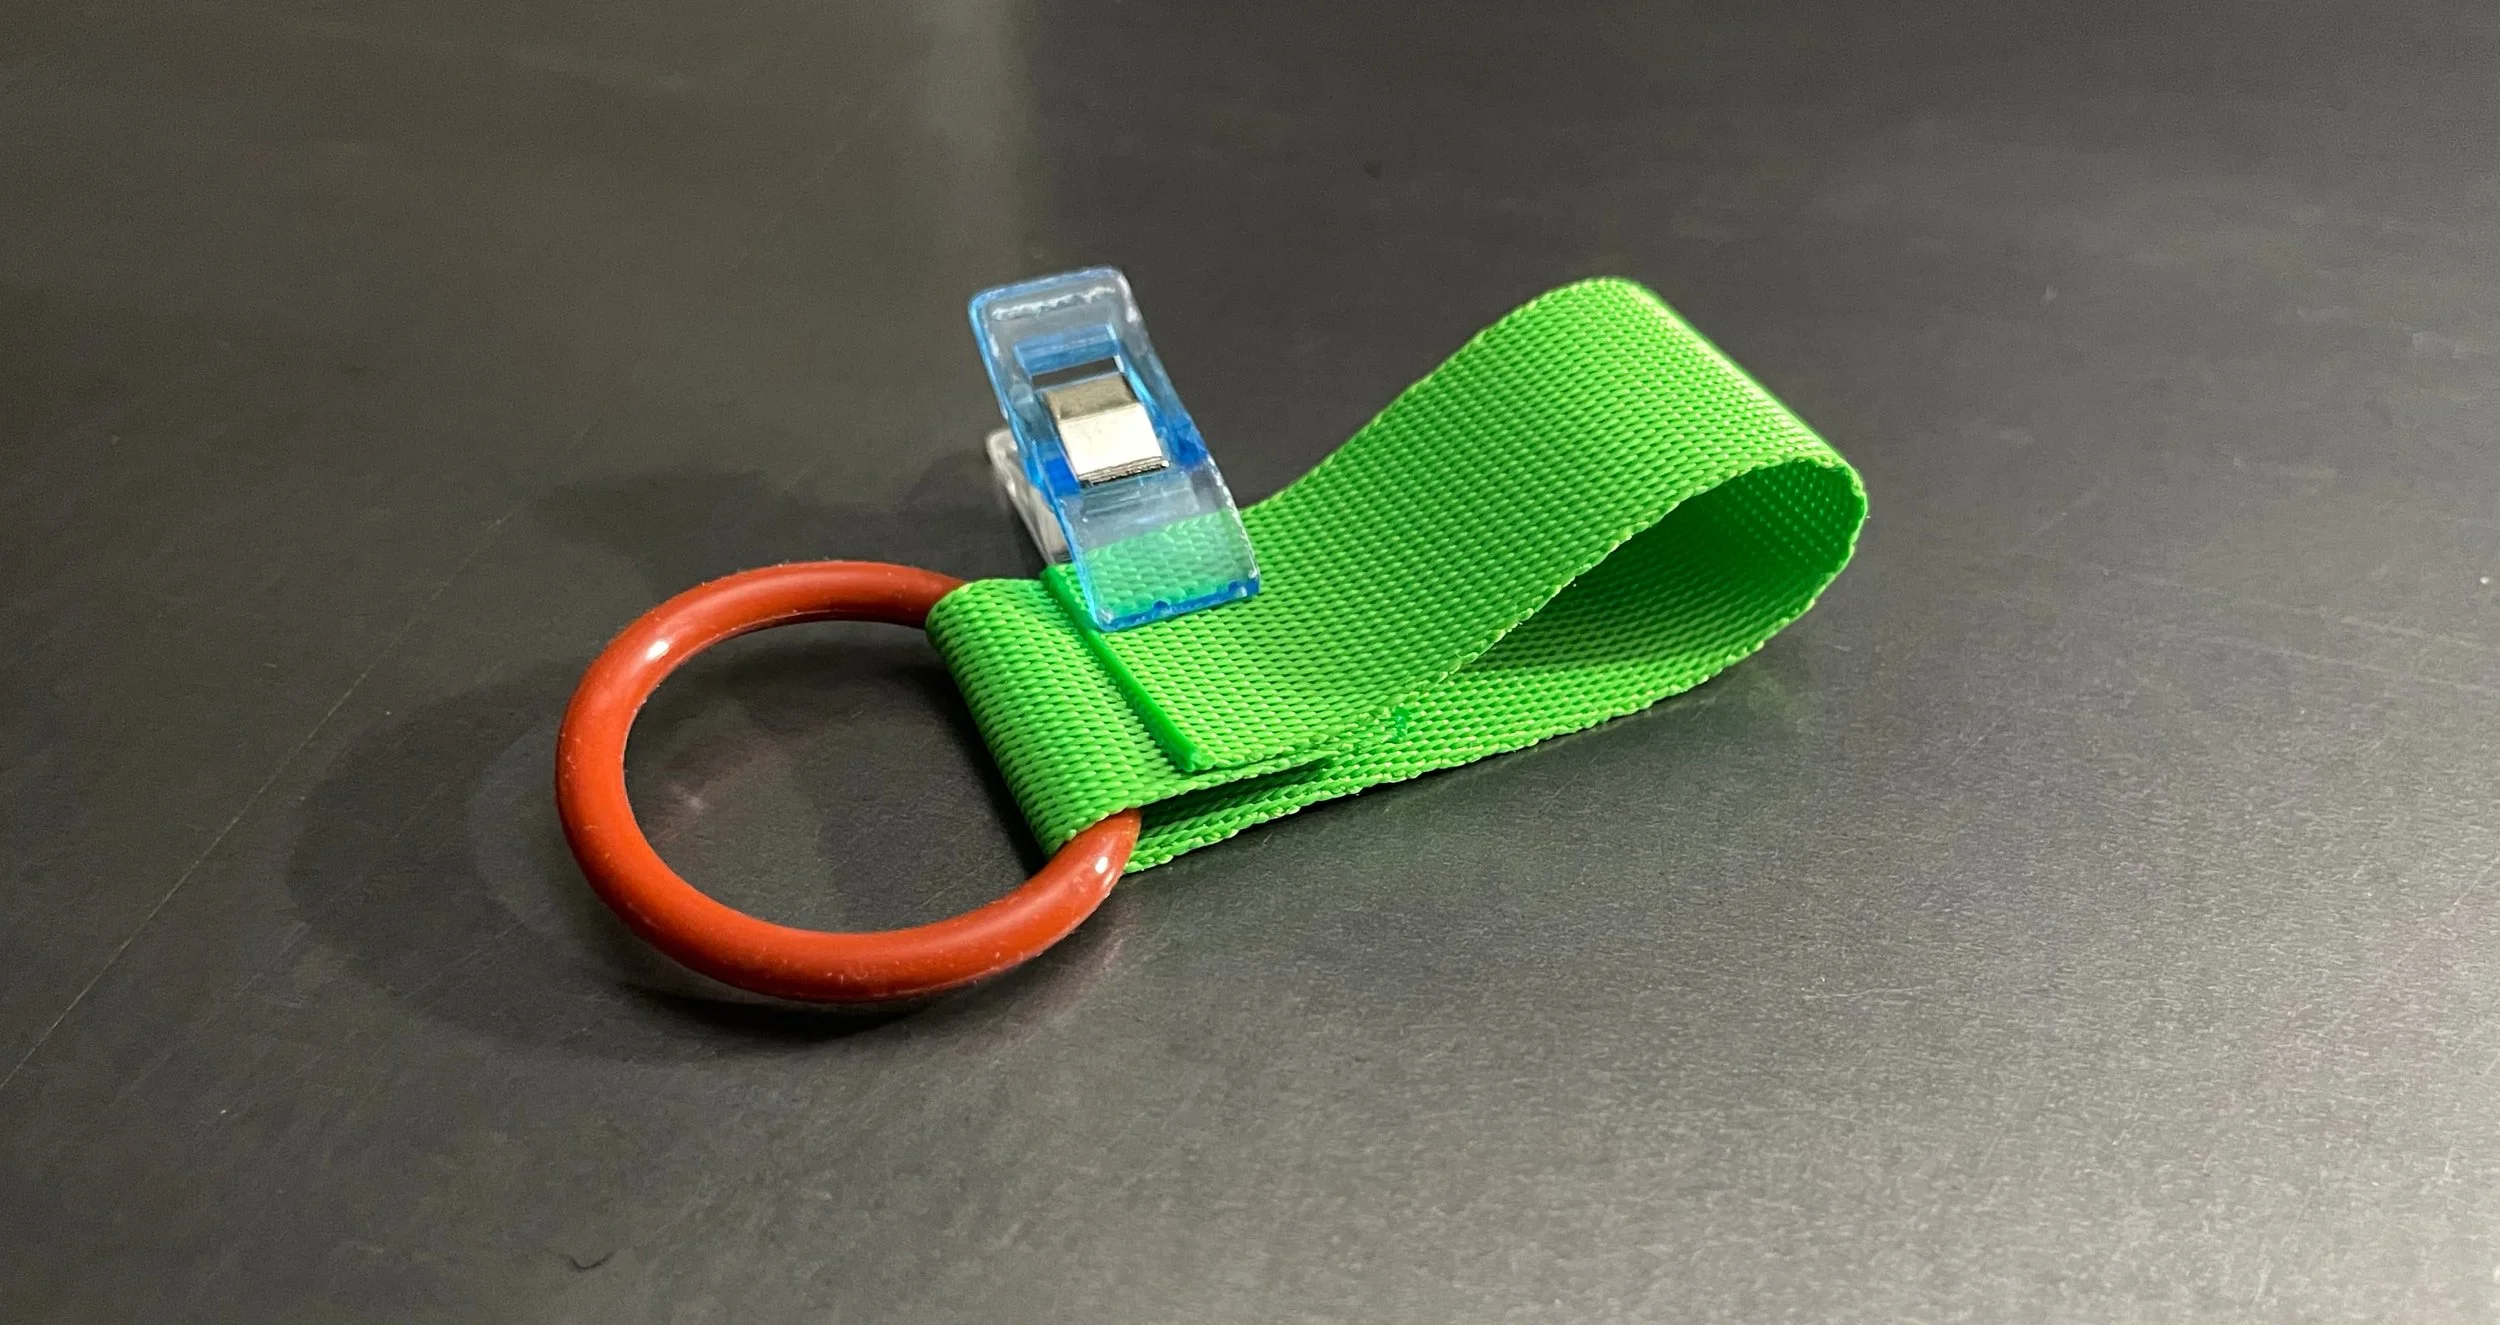
Stitch through all 3 layers of webbing with a bar tack as shown.
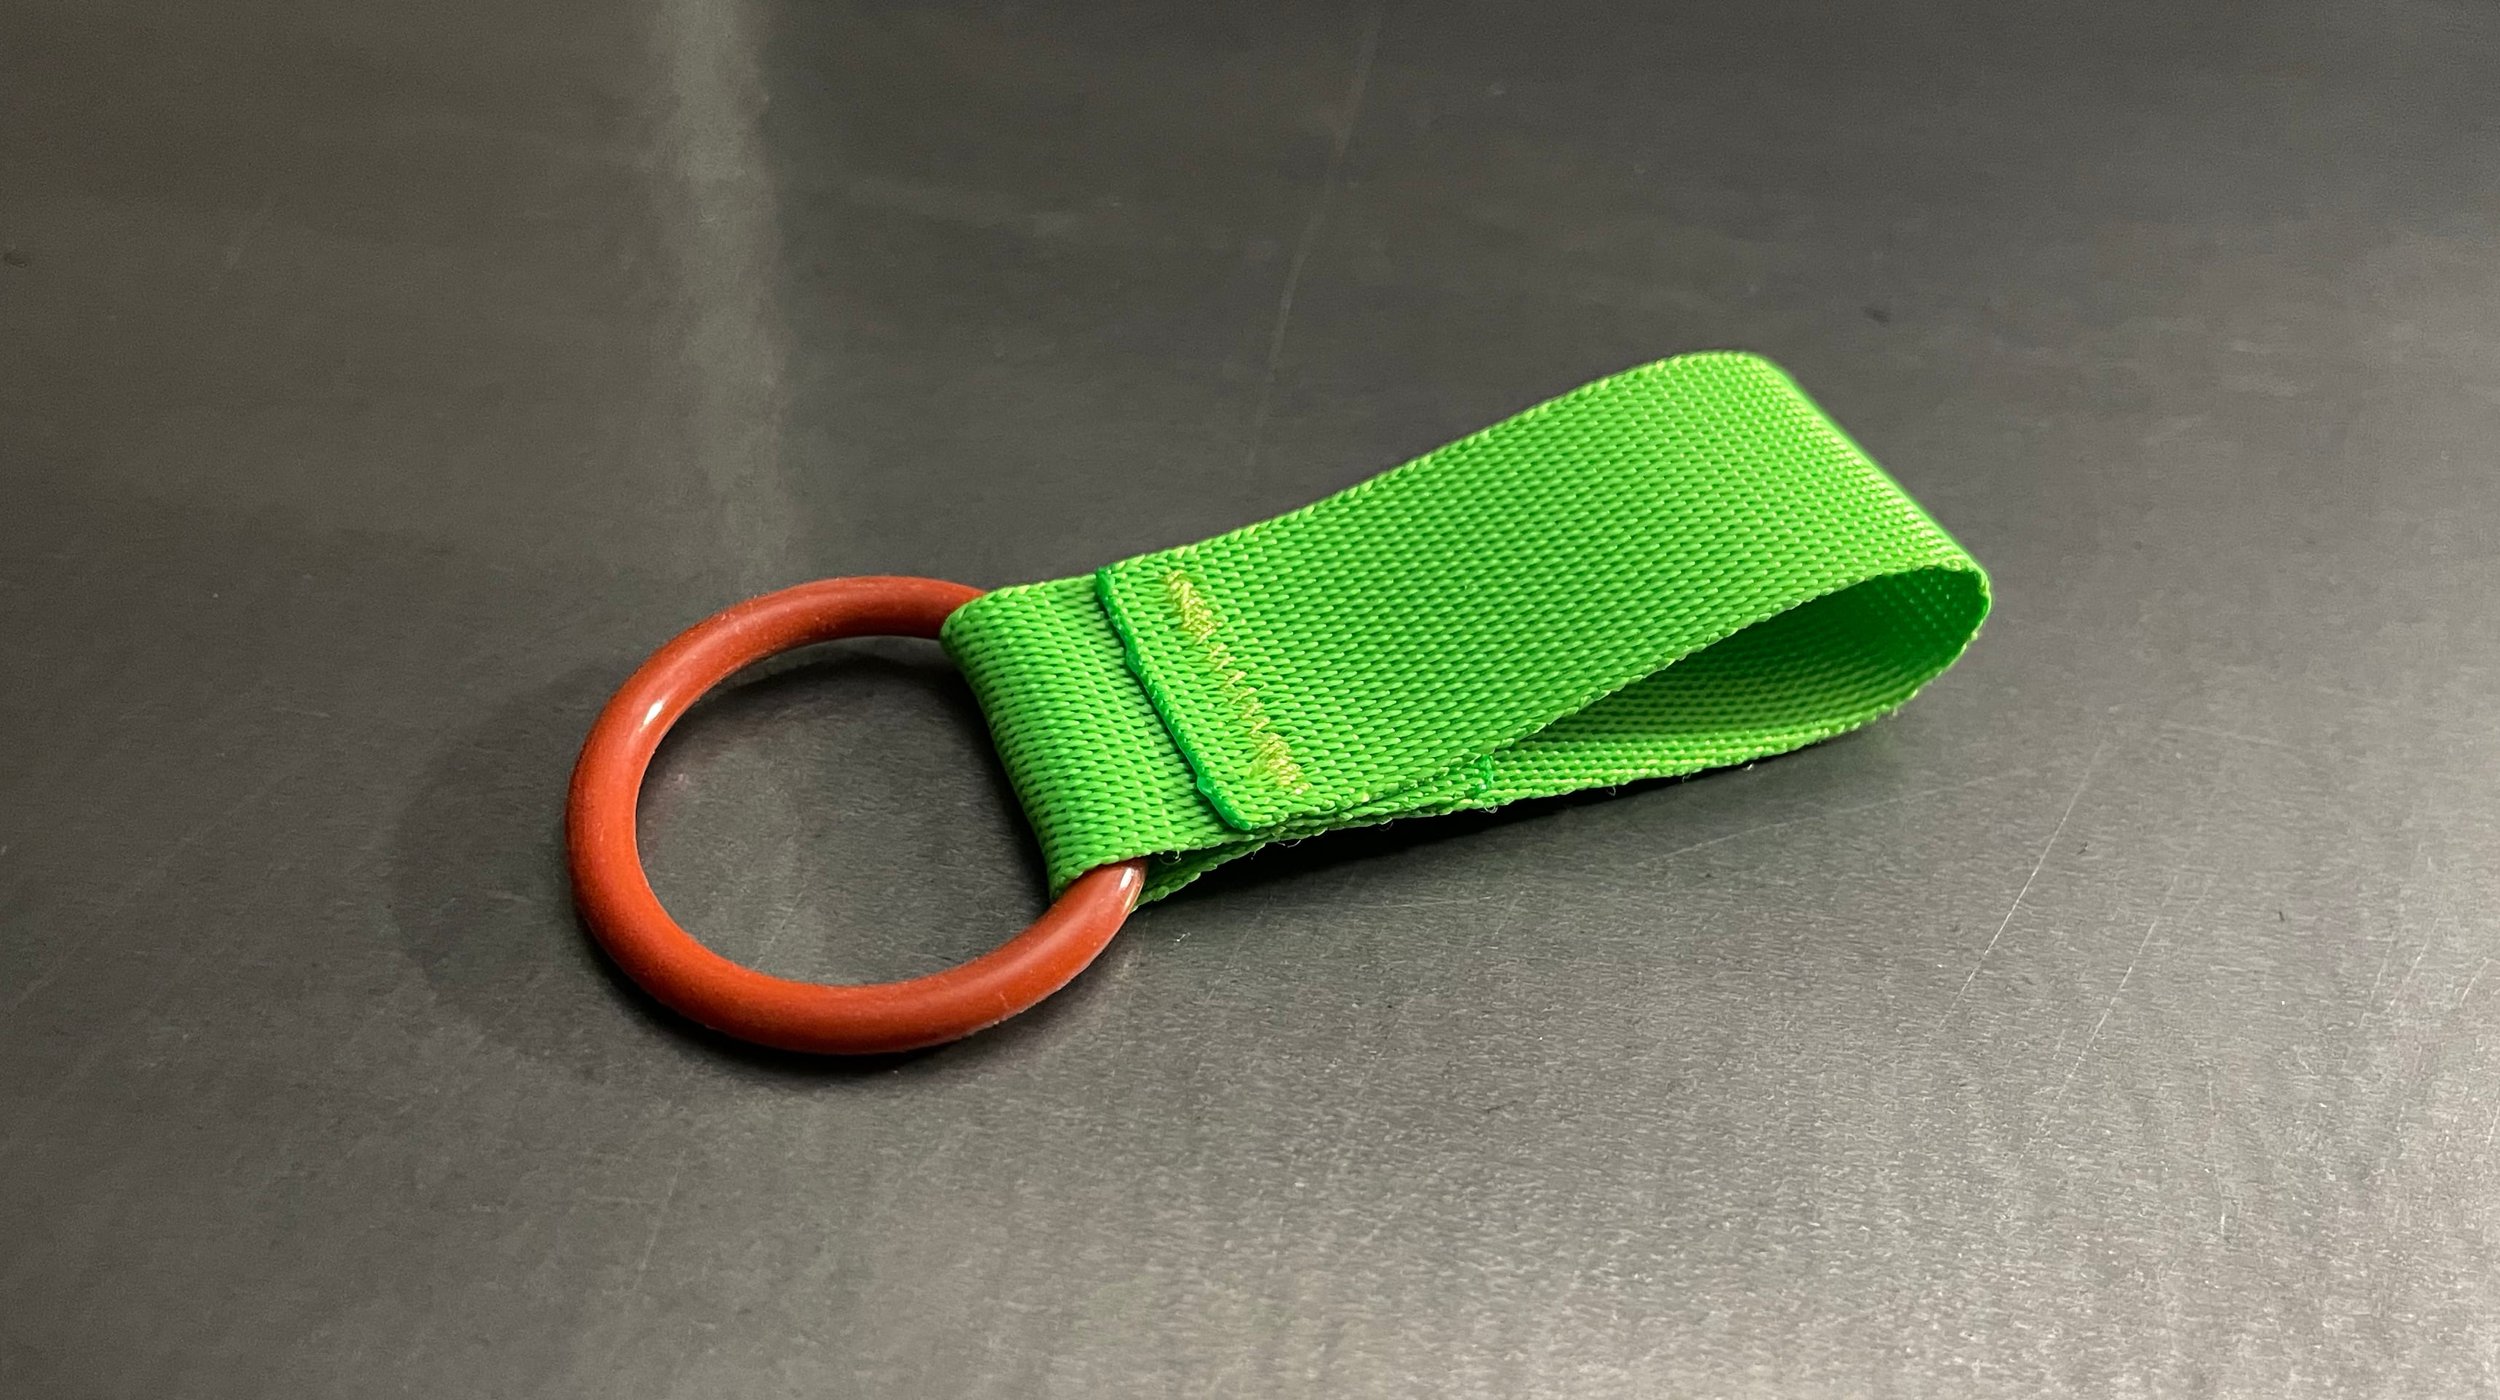
Remove the cap from the bottle and gently stretch the o-ring over the flange into place.

There you have it! Three simple accessories for your water kit.
Related products we recommend
The links above are affiliate links. As an Amazon Associate Stitchback earns from qualifying purchases


Learn how to make a pair of ultralight wind mittens. Perfect for keeping your hands warm while hiking with trekking poles in cool weather.