Easy to Make Ultralight Backpack
The “Stitchback EZ” backpack was designed with one main goal in mind: to be easy to make. It is a perfect project for those looking to make their first backpack, or those with limited sewing experience. It would also be a project well suited for scout groups or other youth groups as the sewing involved is very straightforward, it is also an inexpensive project, especially when the material costs can be spread over several backpacks.
In an attempt to simplify the construction of the pack it has been stripped down to the bare essentials, resulting in a minimalist and streamlined design that is best for ultralight loads. If you are looking to make a more robust pack with additional features check out our other patterns.
We’ll get to the instructions in a moment but first let’s go over some of the details. This backpack is made in 2 parts: The suspension and the bag. This is a concept that has been used by other pack manufacturers for various reasons. In our case this design approach was chosen because it greatly simplifies the sewing involved in making the pack, but it has several added benefits detailed below.
The Suspension
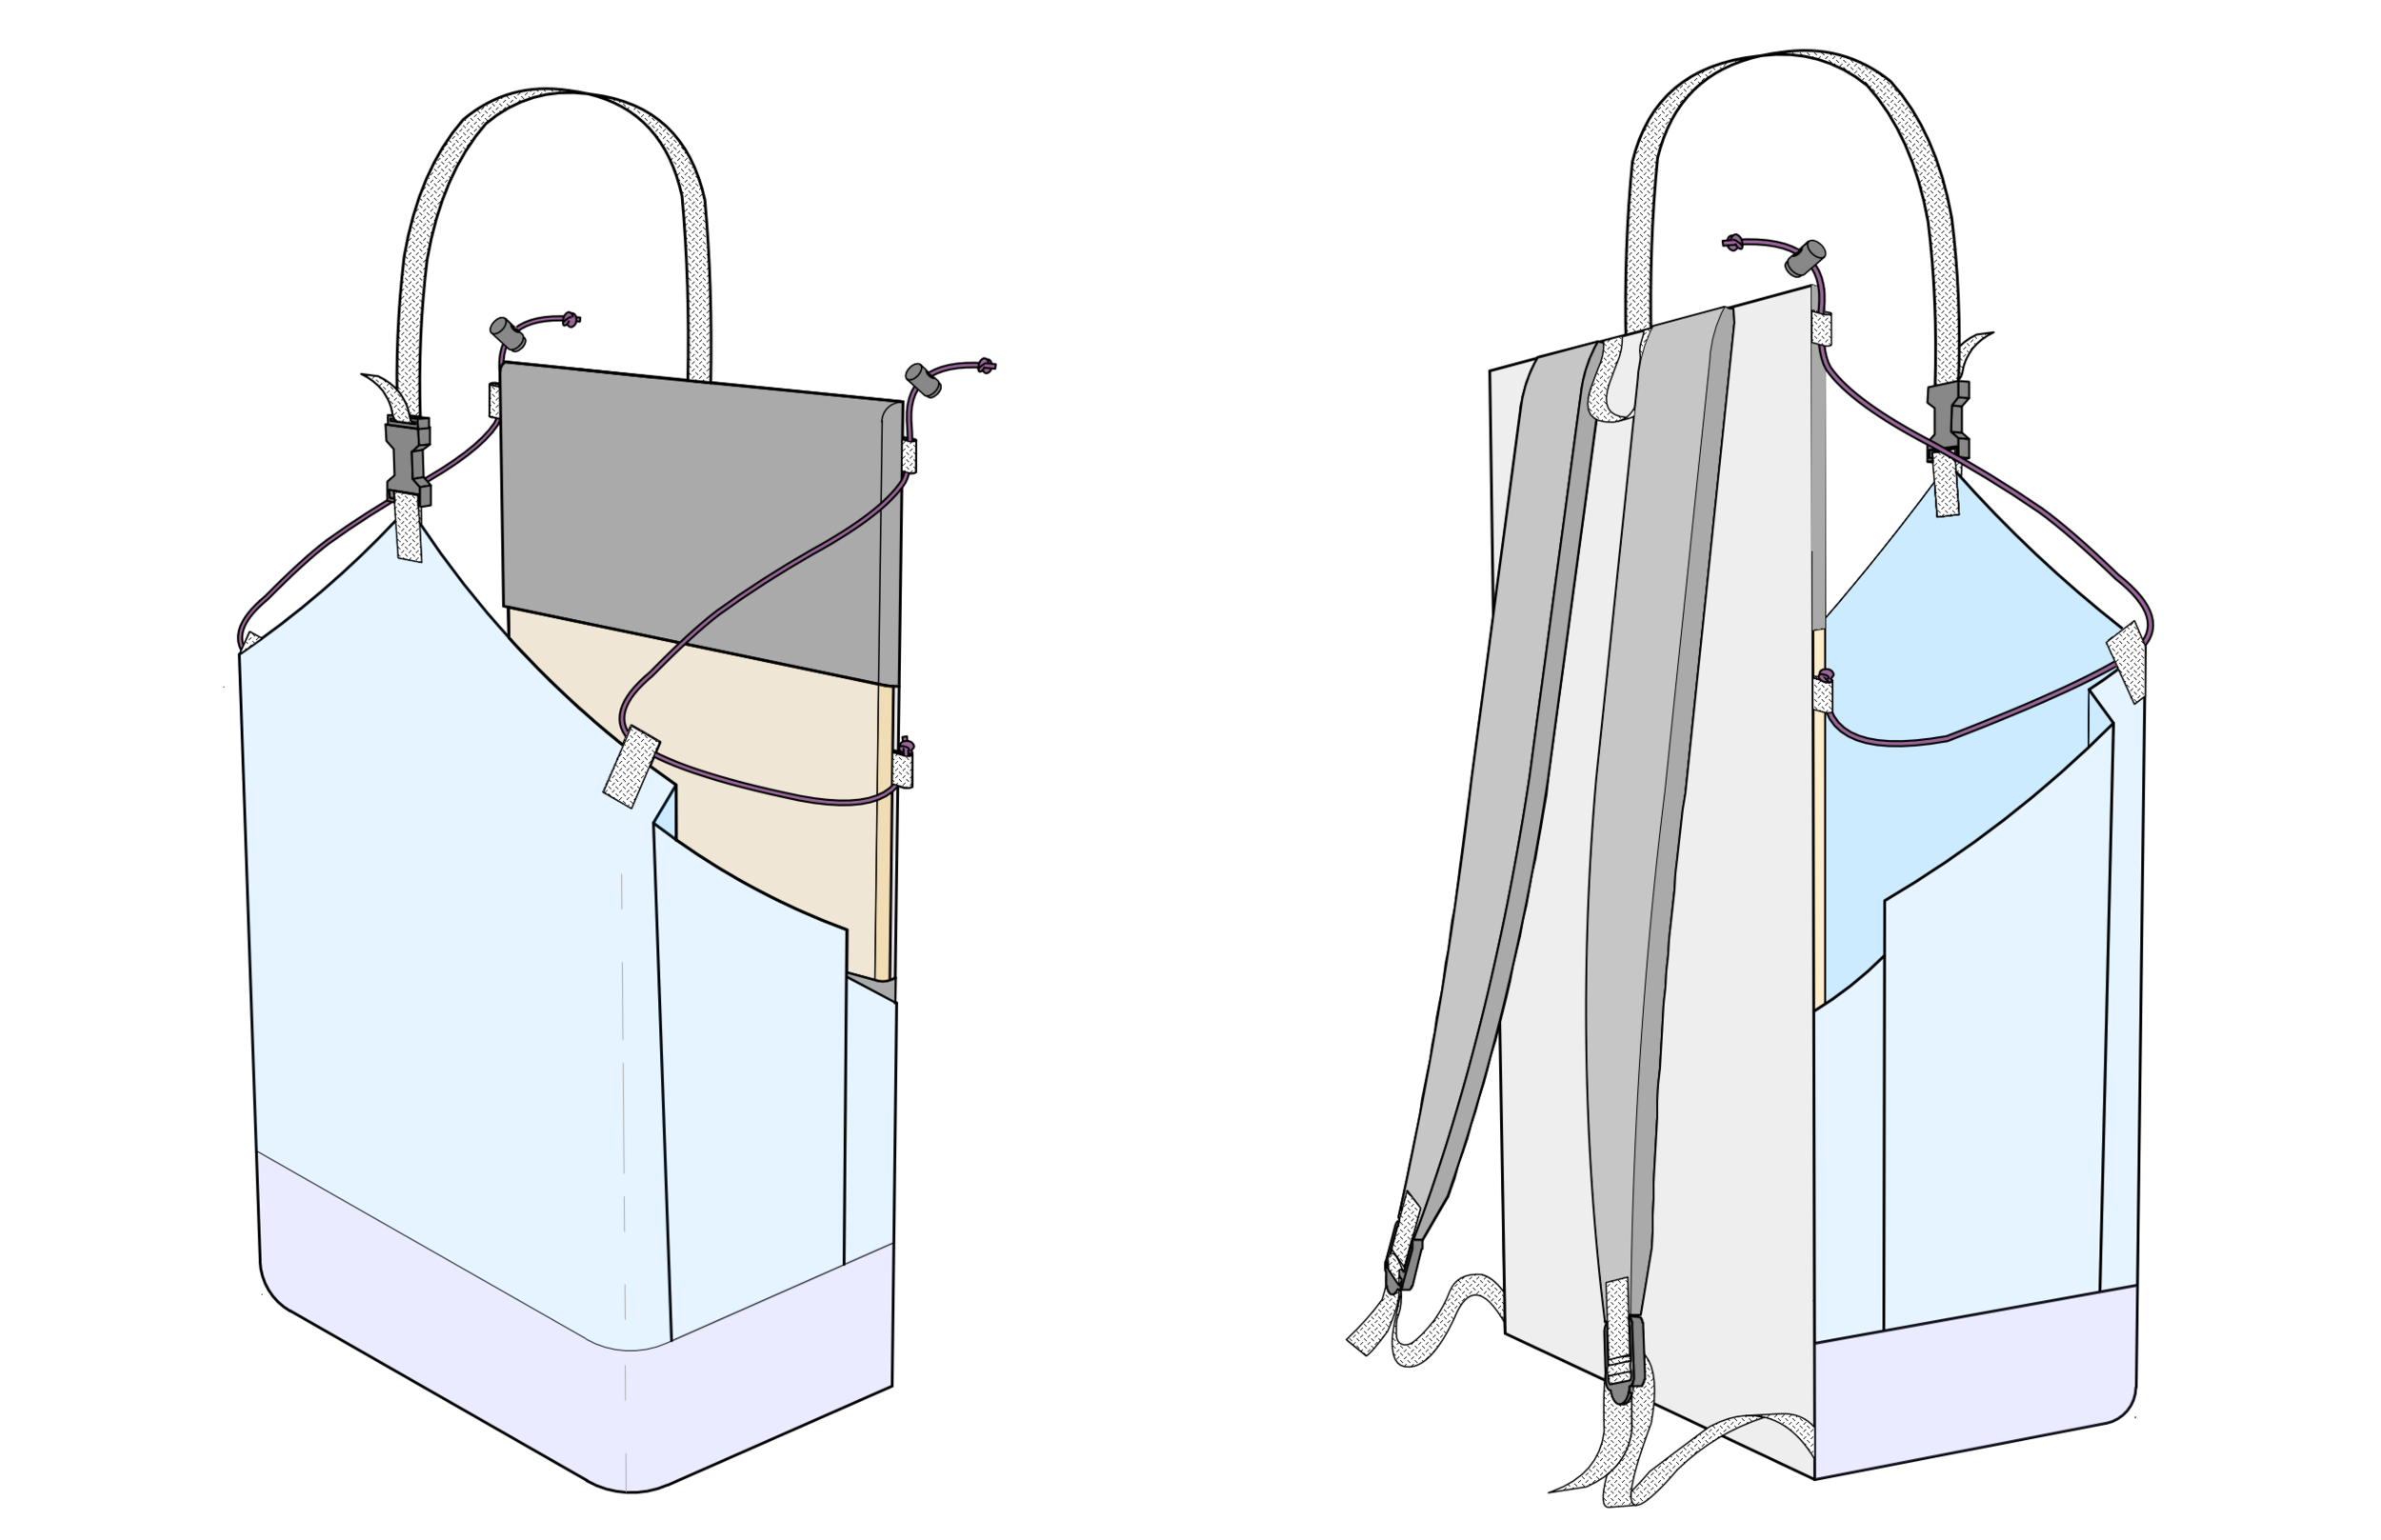
The suspension consists of a back panel with an integrated bottom and back flap. The bag slides between the back panel and flap and is held in place by the compression straps. The back panel has a pocket to hold a foam frame sheet which gives structure and padding to the backpack. This pocket can also hold an inflatable pad (deflated and folded) or a folded groundsheet in addition to the foam, allowing them to act as part of the structure for the pack. The bottom provides protection for the main bag. When the main bag is in place and loaded, the back flap becomes an exterior pocket which can hold water bottles and other items. A hydration bladder can also be slid in between the main bag and the back panel, making it easy to access for refilling and eliminates the chance that it could leak inside your pack.
In order to keep this backpack easy to make, the shoulder straps have a simple J curve. But it would be easy to customize by adding recurved straps or a sternum strap etc. A hipbelt could also be easily added to this design.
The Bag
The design of this pack allows just about any bag of the right size to be used. It could be a simple stuff sack or a drybag. These instructions will go over how to make a bag from Tyvek. Again, this material was chosen based on ease of construction. The Tyvek bag is taped together which eliminates a lot of sewing. Admittedly, Tyvek is not the most durable material for a backpack, but the design of this pack has several advantages that allow it to work well in this application. First, the bottom of the Tyvek bag is protected by the bottom on the suspension. This is generally the area of the pack subjected to the most abrasion. Second, the shoulder straps and compression straps are not sewn directly to the Tyvek so there isn’t the fear of them ripping out, as there would be if the entire pack was made from Tyvek.
While Tyvek is an ultralight material and won’t last forever, it does have the advantage of being easy to patch with Tyvek tape, and it is inexpensive, so when it finally does wear out, it won’t be too costly to replace. Best of all, the Tyvek bag is rain proof when taped carefully, and also extremely light.
Instructions
The first step is to cut out the parts. The same fabric could be used for all of the parts on this backpack if desired. (HDPE gridstop would be an excellent option.) In fact you can get all of the parts needed for the suspension portion of the pack out of 1 yard of fabric. But there are some advantages to using different fabrics for the different parts. For example the pack shown in the photos, uses a heavier fabric on the bottom for durability and pocket mesh on the back flap. Stretch fabric was used on the back panel pockets to allow them to hold additional items besides the foam frame sheet. Choosing different fabric types or colors is great way to customize the pack.
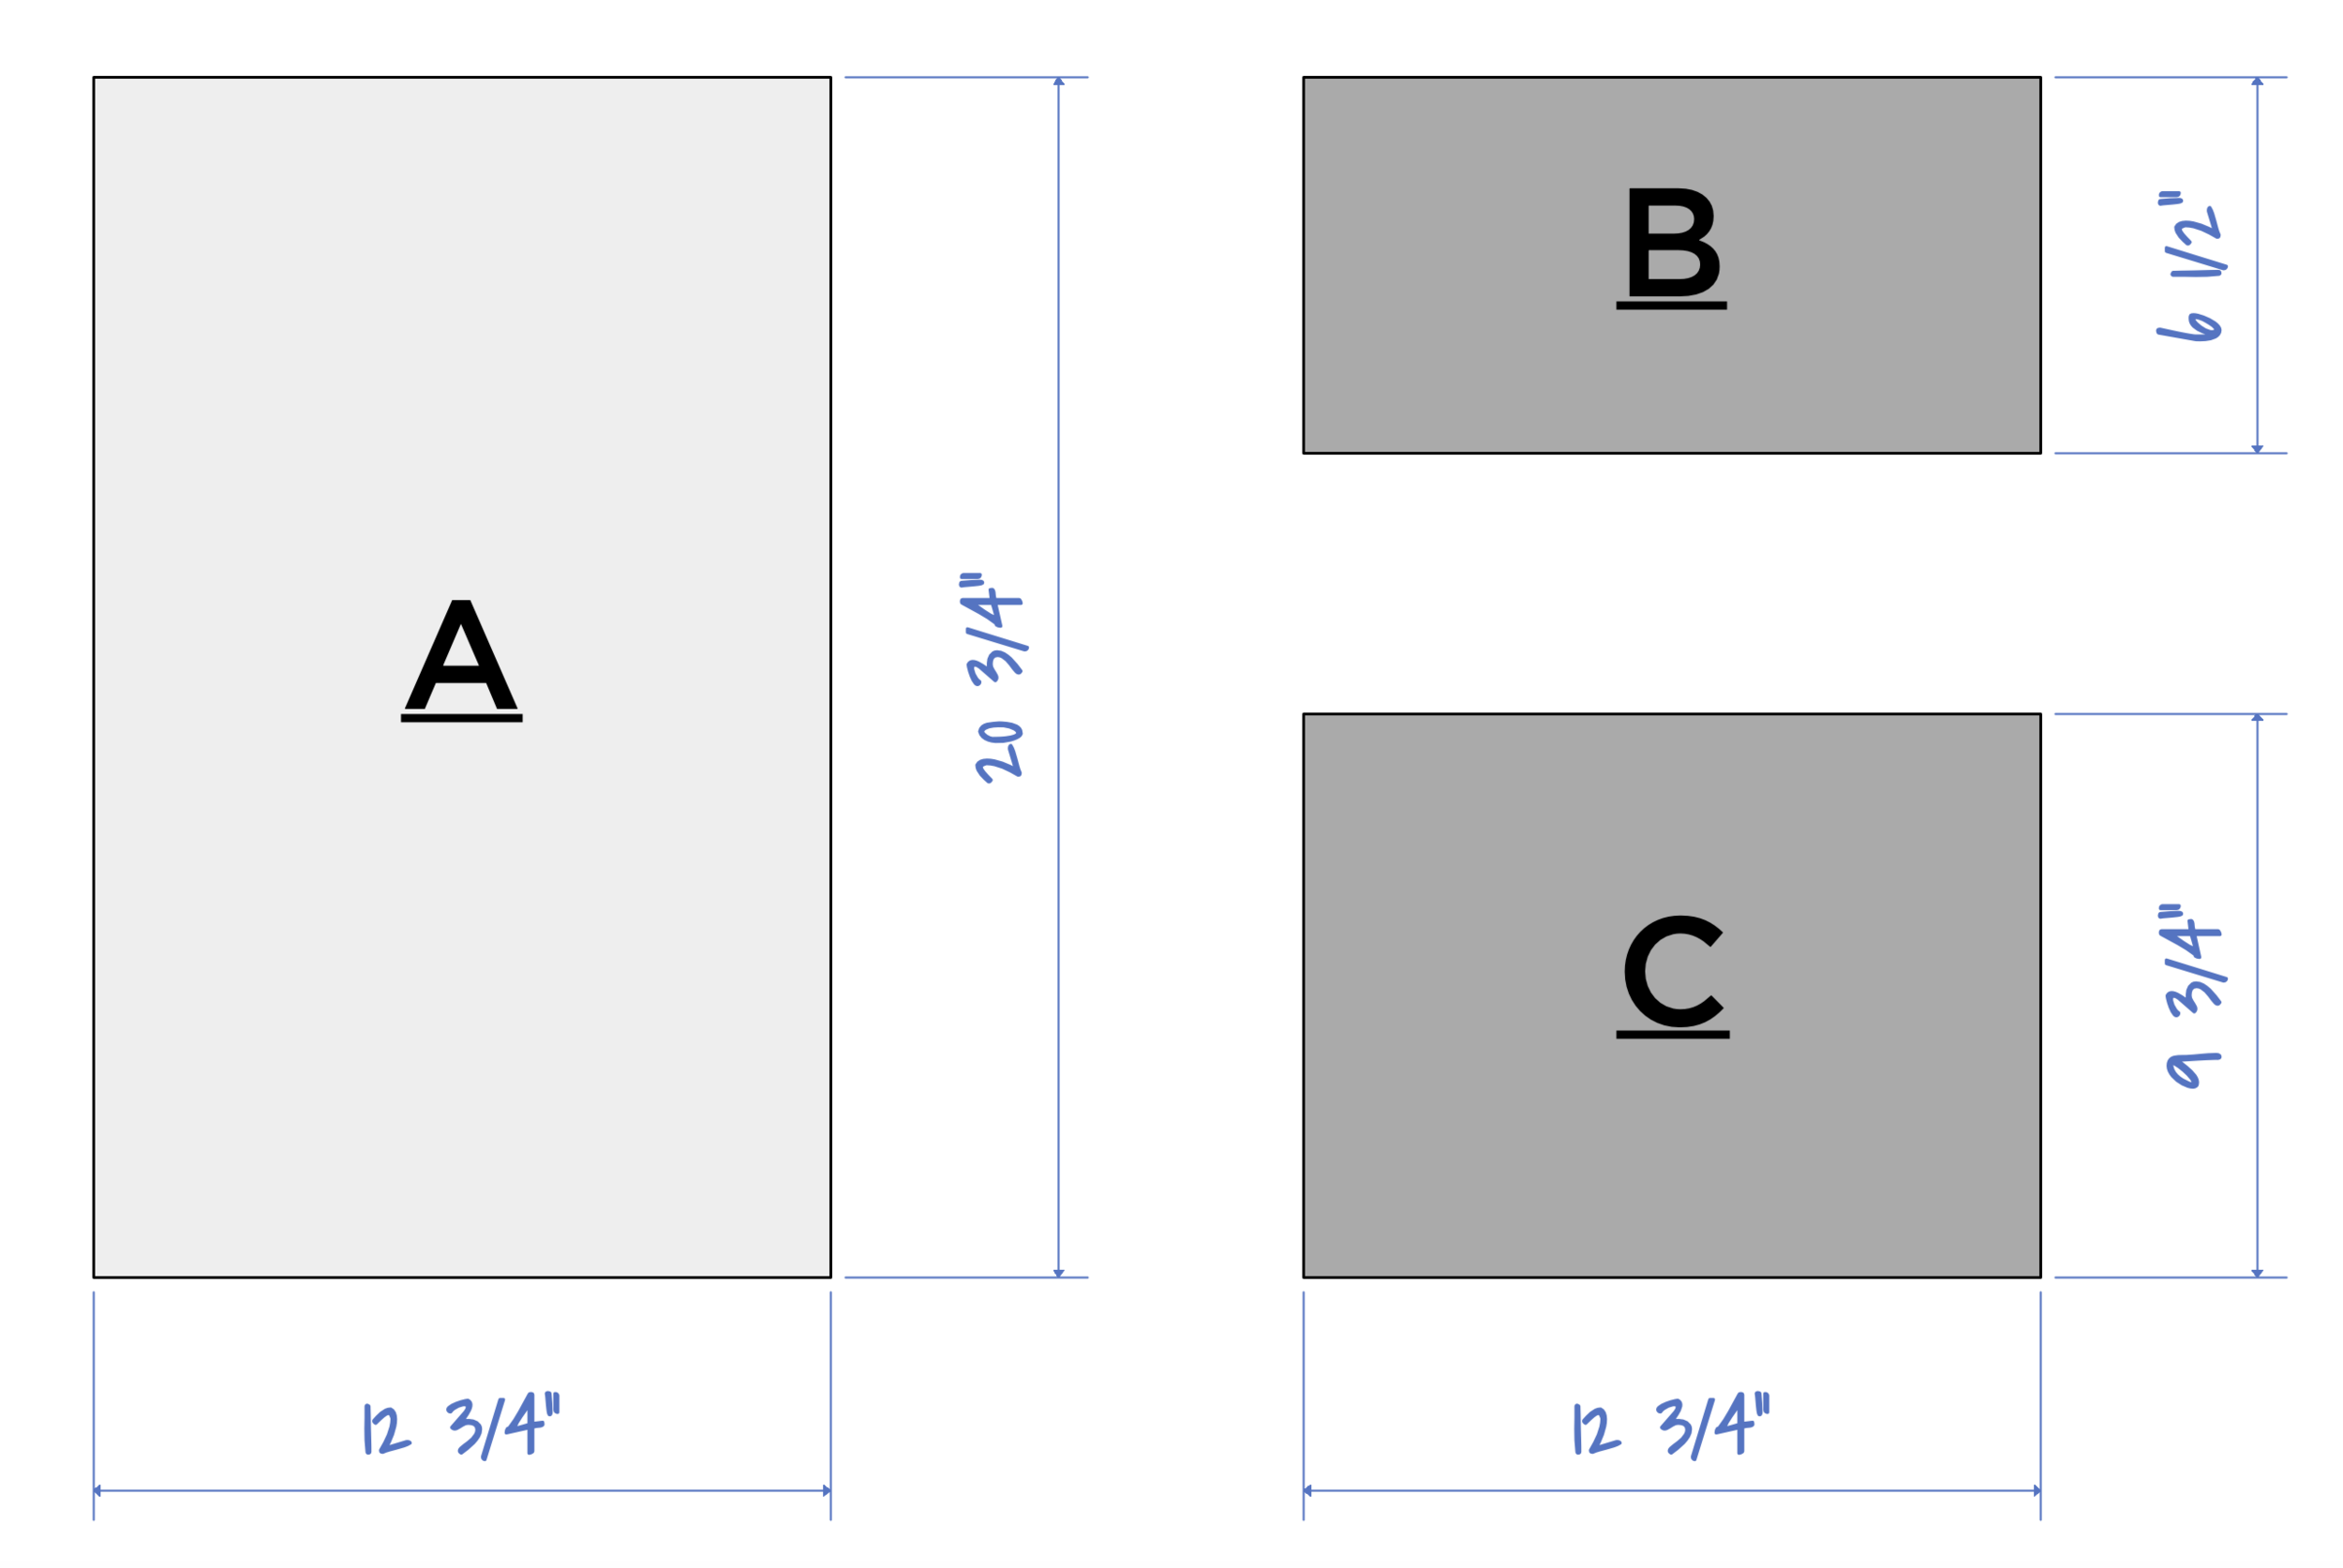
Each part is shown below along with some recommended fabrics. All of the dimensions needed for drawing out the parts are shown as well.
Suspension Parts
Part A: Back Panel - Cut 1
Recommended fabrics: 210D Ripstop, 210D HDPE Gridstop, VX-21, 420D Robic, 500D Cordura
Parts B and C: Back Panel Pockets - Cut 1 of each
Recommended fabrics: 210D Ripstop, 210D HDPE Gridstop, Spandura, Stretch pocket mesh
Part D: Bottom - Cut 1
Recommended fabrics: 210D Ripstop, 210D HDPE Gridstop, VX-21, 420D Robic, 500D Cordura
Part E: Back Flap - Cut 1
Recommended fabrics: Pocket Mesh, 210D Ripstop, 210D HDPE Gridstop
Part F: Shoulder Straps - You will need 4 parts total. An inner & outer part for the the left shoulder strap and an inner & outer for the right shoulder strap. Left and right parts should be a mirror of each other.
Recommended fabrics: 210D Ripstop, 210D HDPE Gridstop, Spacer Mesh*
*Spacer mesh for the inner parts only
Part G: Shoulder Strap Foam - Cut 1 right and 1 left
Recommended material: 3/8” EVA foam
Part H: Foam Frame Sheet - Cut 1
Recommended Material: 3/8” EVA foam
3/8” foam flooring tiles work well for the frame sheet (part H) as it is a dense foam and they are readily available. A 24”x24” tile is large enough to get the shoulder strap parts as well, although some people may find this foam a little too stiff for the shoulder straps. I’ve found that punching holes in the shoulder strap foam with a leather hole punch helps soften the straps and allows me to use the same tile for all of the needed foam.)
Other Materials that you will need:
2 - 20” long pieces of 1” grosgrain
3 - 2.5” long pieces of 3/4” webbing
1 - 8.5” long piece of 3/4” webbing
4 - 2” long pieces of 3/4” webbing
2 - 22” long pieces of 3/4” webbing
1 - 3/4” single adjust side release buckle
2 - cord locks
2 - 24” long pieces of paracord
2 - 3/4” ladderloc buckles
1 - 36” long piece of 3/4” webbing
2 - 3” long pieces of 3/4” webbing
Assembly instructions
Step 1:
Sew a 3/8” double fold hem on one long edge of parts B and C. If you are using a stretchy fabric sew the hem with a zigzag stitch.
Step 2:
Take one of the 20” long pieces of 1” grosgrain and fold it around the edge of part E as shown below. The grosgrain should hang past part E on both ends. Pin in place, then stitch.
(Note: It can be helpful to use a clothes iron to press the fold into the grosgrain before placing it around the edge of the fabric. Be sure to use the appropriate setting on the iron.)
Trim the ends of the grosgrain flush with part E. repeat the process with the second piece of grosgrain.
Step 3
Make a mark 7” down the edge from the top point of part E as shown below. Fold one of the 2.5” pieces of 3/4” webbing in half around the edge of part E, at the mark. Pin in place forming a loop as shown, the loop should be big enough for the paracord to slide through easily. Bar tack the webbing to part E in 2 places as shown. Repeat this process for the other side of part E.
Step 4:
Take the third 2.5” piece of 3/4” webbing and thread it though the female side of the side release buckle. Fold the webbing around the point of part E as shown and bartack in place.
Step 5:
Measure and mark the bottom edge of part E as shown below.
Fold each pair of marks together, forming pleats as shown. Stitch the pleats in place with a 1/4” seam allowance along the bottom edge. With all 4 pleats stitched in place, the bottom edge of part E should measure 25-3/4”.
Step 6
Place part D on top of part E with the right sides together. Align the bottom edges as shown below, and pin in place. Stitch part D to part E with a 1/2” seam allowance.
Fold parts open and press the seam allowance toward part D. Topstitch across part D and through the seam allowance, 1/8” from seam.
Fold the corners on one side of part D right sides together so that the edges are aligned as shown below. Pin and then stitch with a 3/8” seam allowance leaving the last 3/8” un-sewn as shown in the detail drawing below.
Repeat this process for the other side of Part D. The bottom of the suspension should now be formed, and should look similar to the drawing below.
Step 7
The next step will be to assemble the shoulder straps. Place one part F on top of the another, right sides together. You should have parts for a left and right shoulder strap. Stitch with a 3/8” seam allowance on the edges noted below.
Clip the seam allowance by cutting a slit 3/4 of the way through the seam allowance where the shoulder strap's curves are the tightest. (Be careful not to cut through seam.) Turn the shoulder strap right side out.
Insert the shoulder strap foam (part G) into the shoulder strap. It might take a little work to massage the foam into place. When the foam is fully inserted there should be about 3/4” of fabric on either end of the foam. If you are unable to get the foam to fit in place, you may need to remove the foam and trim it slightly. Avoid trimming the foam too much. It should fit tightly. Repeat the process for the other shoulder strap.
Take a 3” long piece of webbing and thread it through a ladderloc buckle. Fold the webbing around the narrow end of the shoulder strap and pin in place. Stitch the webbing to the strap with 2 bar tacks as shown in the the photo.
Step 8
Fold one of the 2” long pieces of webbing in half and pin to the right side of part A 1-3/8” from top as shown below. Stitch in place with 1/4” seam allowance. Repeat for other side. Pin the 36” long piece of webbing centered on the top edge of part A. Stitch in place with 1/4” seam allowance.
Pin one of the 22” long pieces of webbing to the right side of part A 3/4” up from the bottom edge. The webbing should be at a 35 degree angle as shown below. Stitch in place with a 1/4” seam allowance. Repeat for the other side.
Take the 8.5” haul loop webbing and pin one end on either side of the center webbing on the right side of part A. Stitch in place with 1/4” seam allowance. Pin the shoulder straps to either side of the haul loop webbing as shown below. Stitch in place with 1/4” seam allowance.
Step 9
Pin part B to part A right sides together, with the top edges aligned. (Part B will cover the shoulder straps.) Stitch along top edge with 3/8” seam allowance. Bar tack the areas were the shoulder straps and webbing attach.
Stitch down both sides of part B and bar tack were the webbing loops are attached, and at the bottom corner of part B.
Step 10
Pin the back assembly to the bottom assembly right sides together as shown. Stitch the bottom edge and up the sides with a 3/8” Seam Allowance.
Pin part C to part A right sides together. (Part C will lay over the bottom assembly. It can be helpful to use some pins or masking tape to pull the bottom assembly away from the edges and toward the center.) Stitch the bottom edge of part C with a 3/8” seam allowance leaving a 1/2” gap on either end as shown below.
Stitch up the sides of part C with a 3/8” seam allowance. Bar tack the upper corners of part C and the areas where the webbing is attached as shown below.
Step 11
Turn the parts right side out. When the parts have been turned right side out you should have a back panel with shoulder straps on one side, and the bottom & back flap on the other, with the 2 framesheet pockets (parts B & C) on the inside.
Notice that the edge of part A in between parts B and C naturally folds toward the center. Pin this fold in place, it should be 3/8” wide. Stitch fold in place. Take a 2” piece of 3/4” webbing and fold in half. Pin the loop 1-3/8” down from the bottom edge of part B as shown. Attach webbing loop to part A with 2 bar tacks. Repeat this process for the other side.
Step 12
Install the compression straps by tying a knot in one end of a 24” long piece of paracord. Thread it down through the bottom loop on the back panel then through the loop on the back flap (part E) and back through the upper loop on the back panel as shown below. Install a cord lock on the end of the paracord and tie a knot so that it can’t slide off. Repeat for the other side.
Insert the foam frame sheet (part H) behind parts A and B. Thread the male half of the side release buckle onto the top strap. Thread the shoulder strap webbing through their corresponding buckles. The suspension portion of the backpack is now complete and ready to receive the pack bag.
packBag
Parts:
1 - piece of Tyvek 36” x 34”
1- 3/4” side release buckle
Approximately 10’ of tyvek tape
Step 1
Cut the Tyvek as shown below.
Step 2
Fold a piece of tape around the top edge of the Tyvek.
Fold the right and left edges so that they meet in the center. (If you want the bag to be white as shown in the photos you should fold the tyvek with the colored printing facing out, and apply the tape to the printed side. The bag can be turned right side out after taping resulting in a white bag.)
With the edges folded into the center, tape the joint where the edges meet. Wrap the tape around the top and bottom edge by a few inches for strength. (top layer only.)
Wrap tape around the bottom edge. (both layers)
Pull the inside corners of the notch away from each other. This should align the edges of the notch and form a box shape into the bag. Once the edges are aligned tape the corner. Repeat these steps for the other side.
If you want the tape on the inside of the bag, you can now turn the bag right-side out. Crumpling up and straightening out the bag several times will make the Tyvek quieter and more flexible.
Step 3
Attaching the buckle. The buckle could be attached to the top of the bag with 3/4” webbing sewn in place, but we found that the Tyvek tape worked pretty well. Take a 5” long piece of tape and fold it lengthwise so that it fits through the male side of the buckle. With the vertical seam in the bag centered and the top pulled tight use another piece of tape on each side of the buckle to secure it to the top edge of the bag as shown below. Repeat with the female side of the buckle on the other side of the bag.
That’s it! The bag should now be ready to be inserted into the suspension portion of the backpack.
It is a great feeling heading out on the trail with a pack you’ve made yourself. Hopefully this article will encourage those who are hesitant to try making a backpack to give it a shot. If you make this pack we would love to hear how it turns out! Let us know in the comments, or you can send us note here.
Related products that we recommend:
The links above are affiliate links. As an Amazon Associate Stitchback earns from qualifying purchases.


Learn how to make a pair of ultralight wind mittens. Perfect for keeping your hands warm while hiking with trekking poles in cool weather.