Make an Ultralight Hikers Wallet
It’s a good idea to carry your ID with you while hiking, especially on longer hikes where you could be stopping in towns to resupply. Some cash and a key to your vehicle are other items you’ll often be carrying on a hike. But if you’ve ever felt the wave of momentary panic when locating your key takes longer than it should, and worrying that it could be anywhere across miles of wilderness, you understand the importance of having a good method of keeping those items secure.
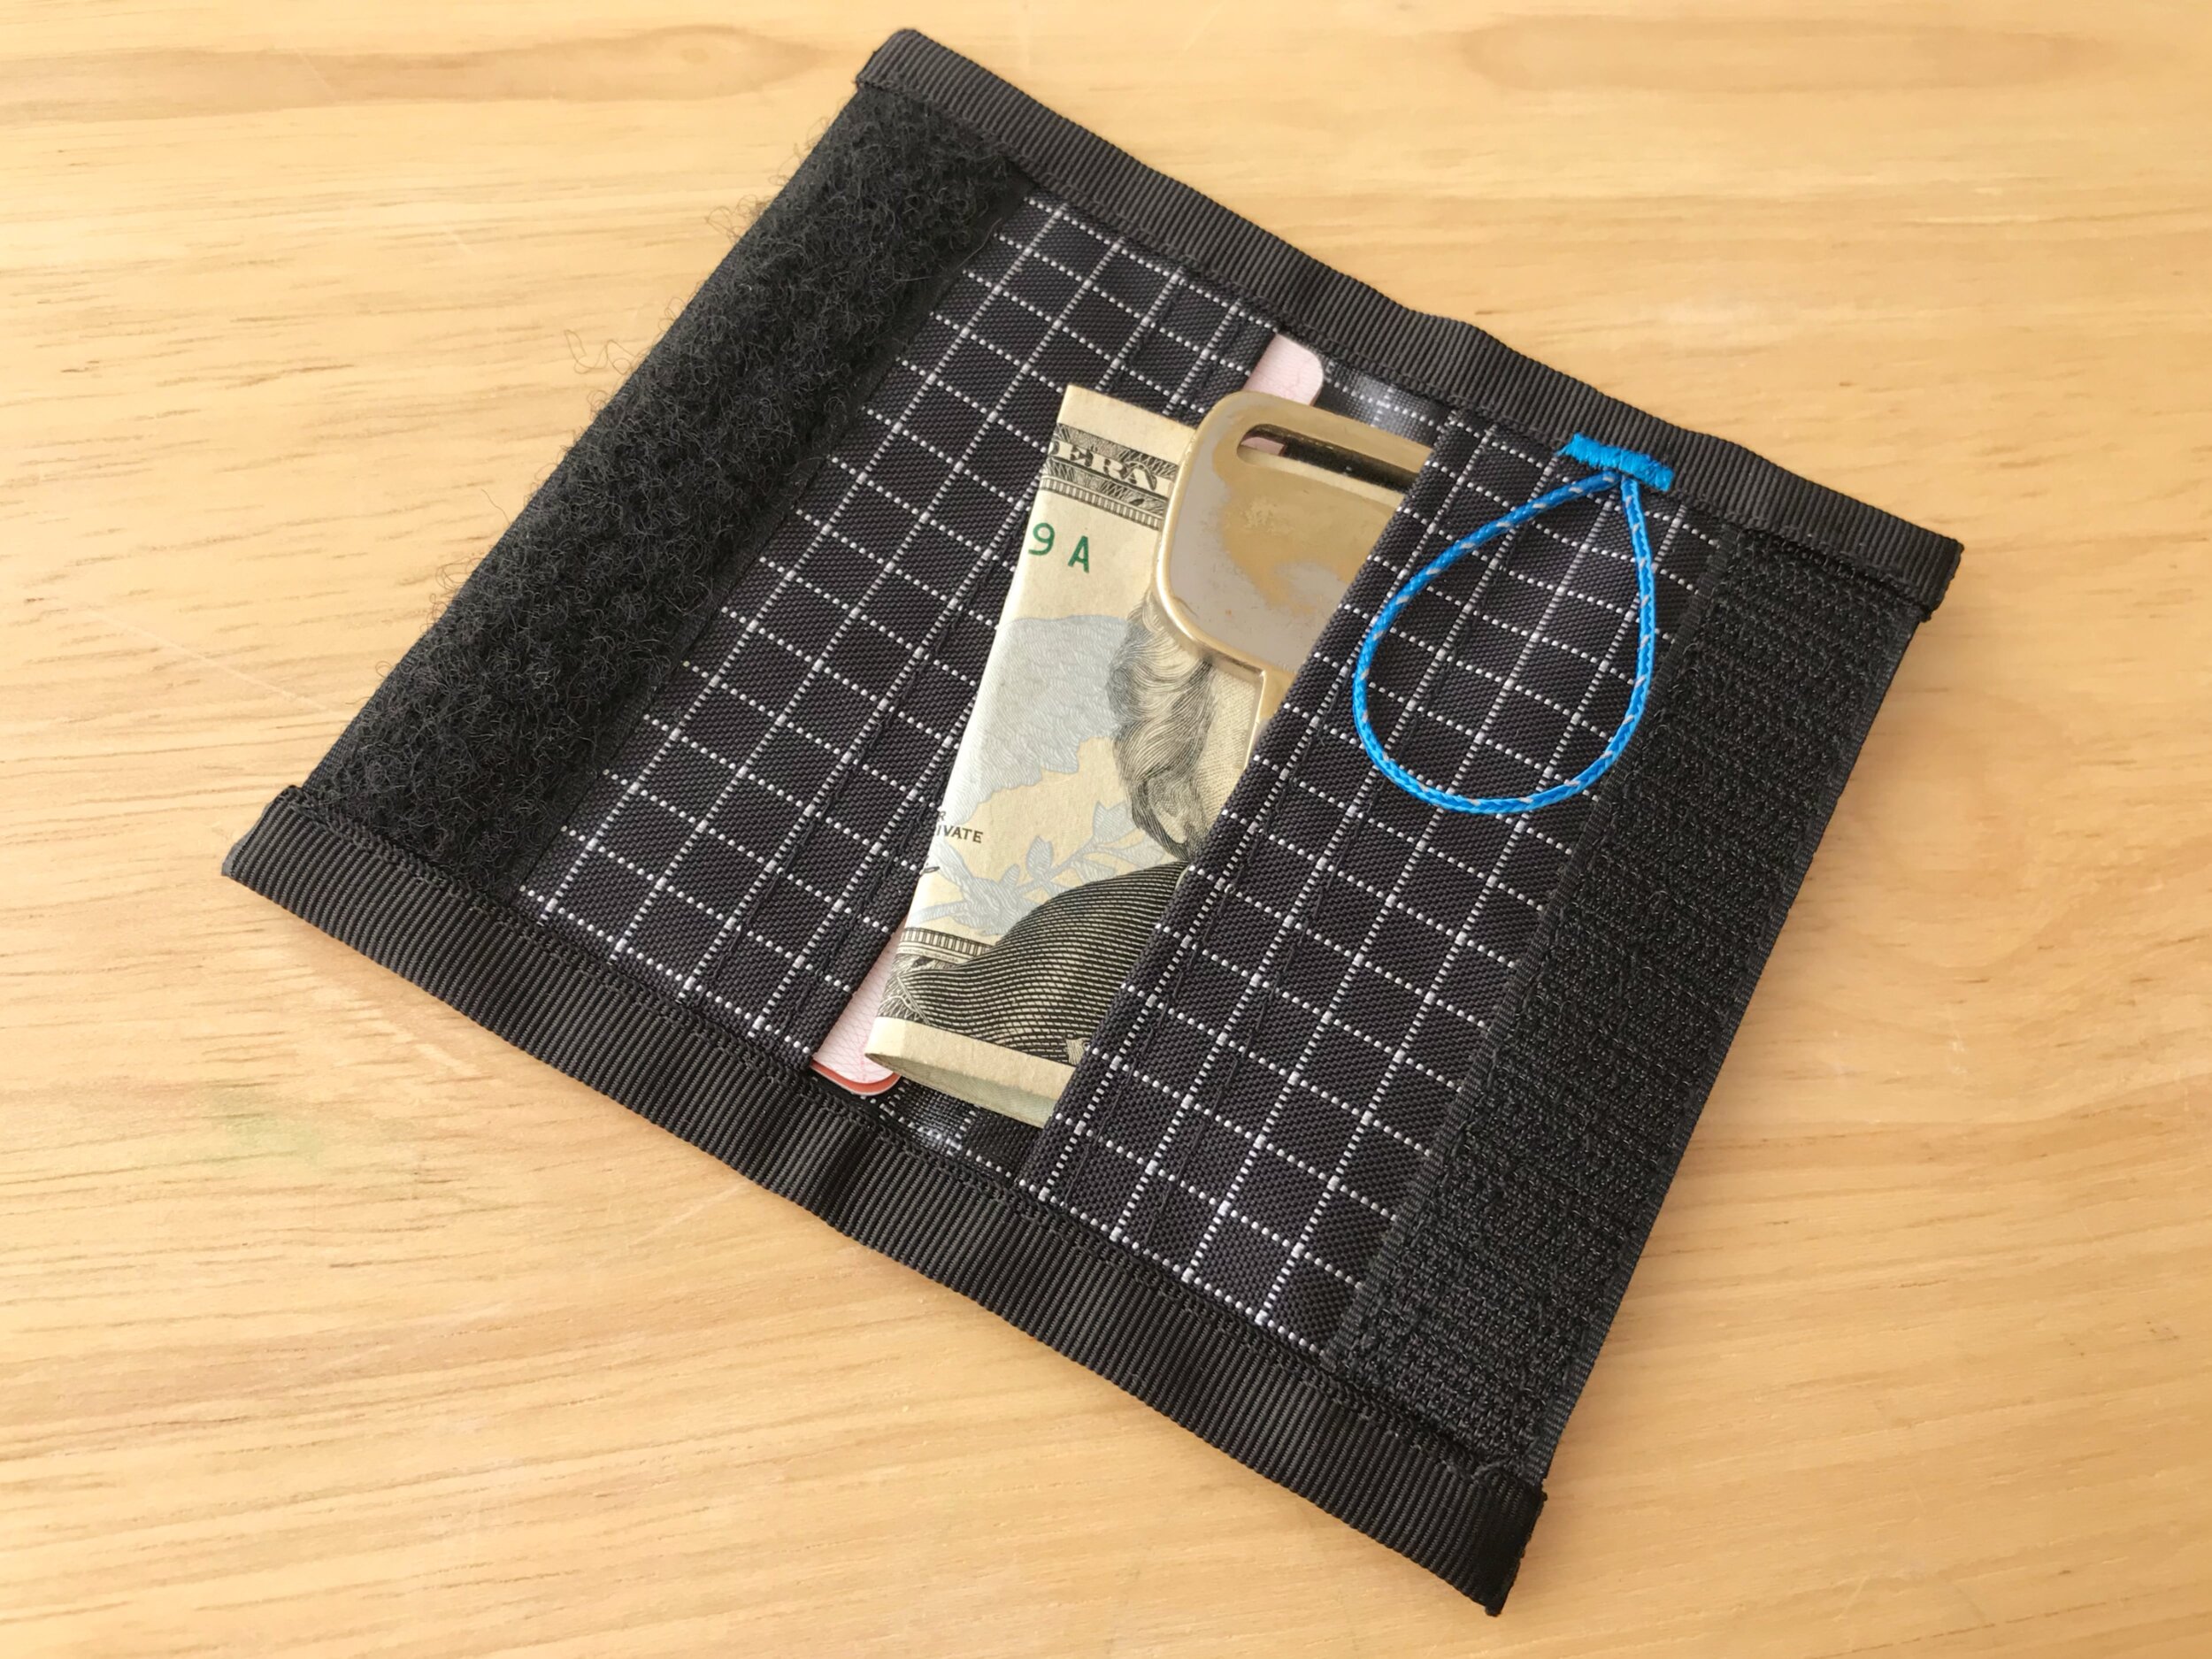
The Stitchback Hikers Wallet is an easy myog project that can help with that. The design is a simplified version of the classic velcro wallet. Two card sized pockets open to the inside of the wallet so that nothing can fall out once it is closed.
A cord loop allows you to secure the wallet inside your pack or attach it to lanyard to wear around your neck if security is a concern. The loop can be tucked to the inside when not needed. The wallet weighs only .2 oz. when made out of 210D Gridstop as shown in the photos,
This tutorial will show you how to make your own hikers wallet. Just about any fabric could be used, in fact this project is a good way to use the scraps of fabric left over from other myog projects. All the dimensions needed for cutting out the fabric are shown below, but we recommend downloading the free, full size pattern. The pattern can be printed out at home and will eliminate the need for doing any measuring.
Be sure to print the pattern at 100% scale.
Other items that you will need for this project:
1 - 4-1/8” long piece of 3/4” wide Velcro (both sides needed)
2 - 5” long pieces of 3/4” wide grosgrain
1 - 4” long piece of micro cord
Step 1
Use pins or weights to hold the pattern in place and cut out the fabric using the pattern as a guide. Transfer the markings from the pattern to the right side of the fabric using a tracing wheel and paper. (You can read more about how to do that here.)
Step 2
If the fabric you are using is prone to unraveling, use a flame to seal the two short ends of the fabric. Fold the end over, wrong sides together where marked, forming a single fold hem on the short end of the fabric. Stitch the hem in place with 2 rows of stitching ¼” apart. Repeat this process on the other end of the fabric.
Step 3
Turn the fabric right side up and place the velcro between the marks as noted on the pattern. Use masking tape or pins to hold the velcro in place for sewing. Stitch the velcro to the fabric with a box-x stitch.
Step 4
Fold the fabric wrong sides together where marked. (The fold will be along the edge of the velcro.) Use pins or clips to hold the folds in place.
Step 5
Fold the piece of cord in half forming a loop. Use masking tape to secure the loop at the alignment notch. Stitch the loop in place, stitching about ⅛” from the edge of the fabric.
Step 6
Fold a piece of ¾” wide grosgrain in half lengthwise. It can be helpful to use a clothes iron to press the fold into the grosgrain. (Be sure to use the correct heat setting.) Fold the grosgrain around the edge of the wallet as shown below. The grosgrain should overhang the wallet on either end. Use pins or clips to secure the grosgrain and then stitch in place about 1/16 in from the inner edge of the grosgrain. Repeat this process for the other side of the wallet.
Step 7
Trim the grosgrain just barely past the edge of the wallet. (Be careful not to cut into the fabric.) Use a flame to melt the ends of the grosgrain.
Step 8
Stitch a bar tack at the location of the cord loop to ensure that it is securely attached.
That’s it! Your wallet is now ready for use. If you decide to make this wallet we’d love to hear how it turns out. Leave us a comment below.
Related products that we recommend:
The links above are affiliate links. As an Amazon Associate Stitchback earns from qualifying purchases.


Learn how to make a pair of ultralight wind mittens. Perfect for keeping your hands warm while hiking with trekking poles in cool weather.