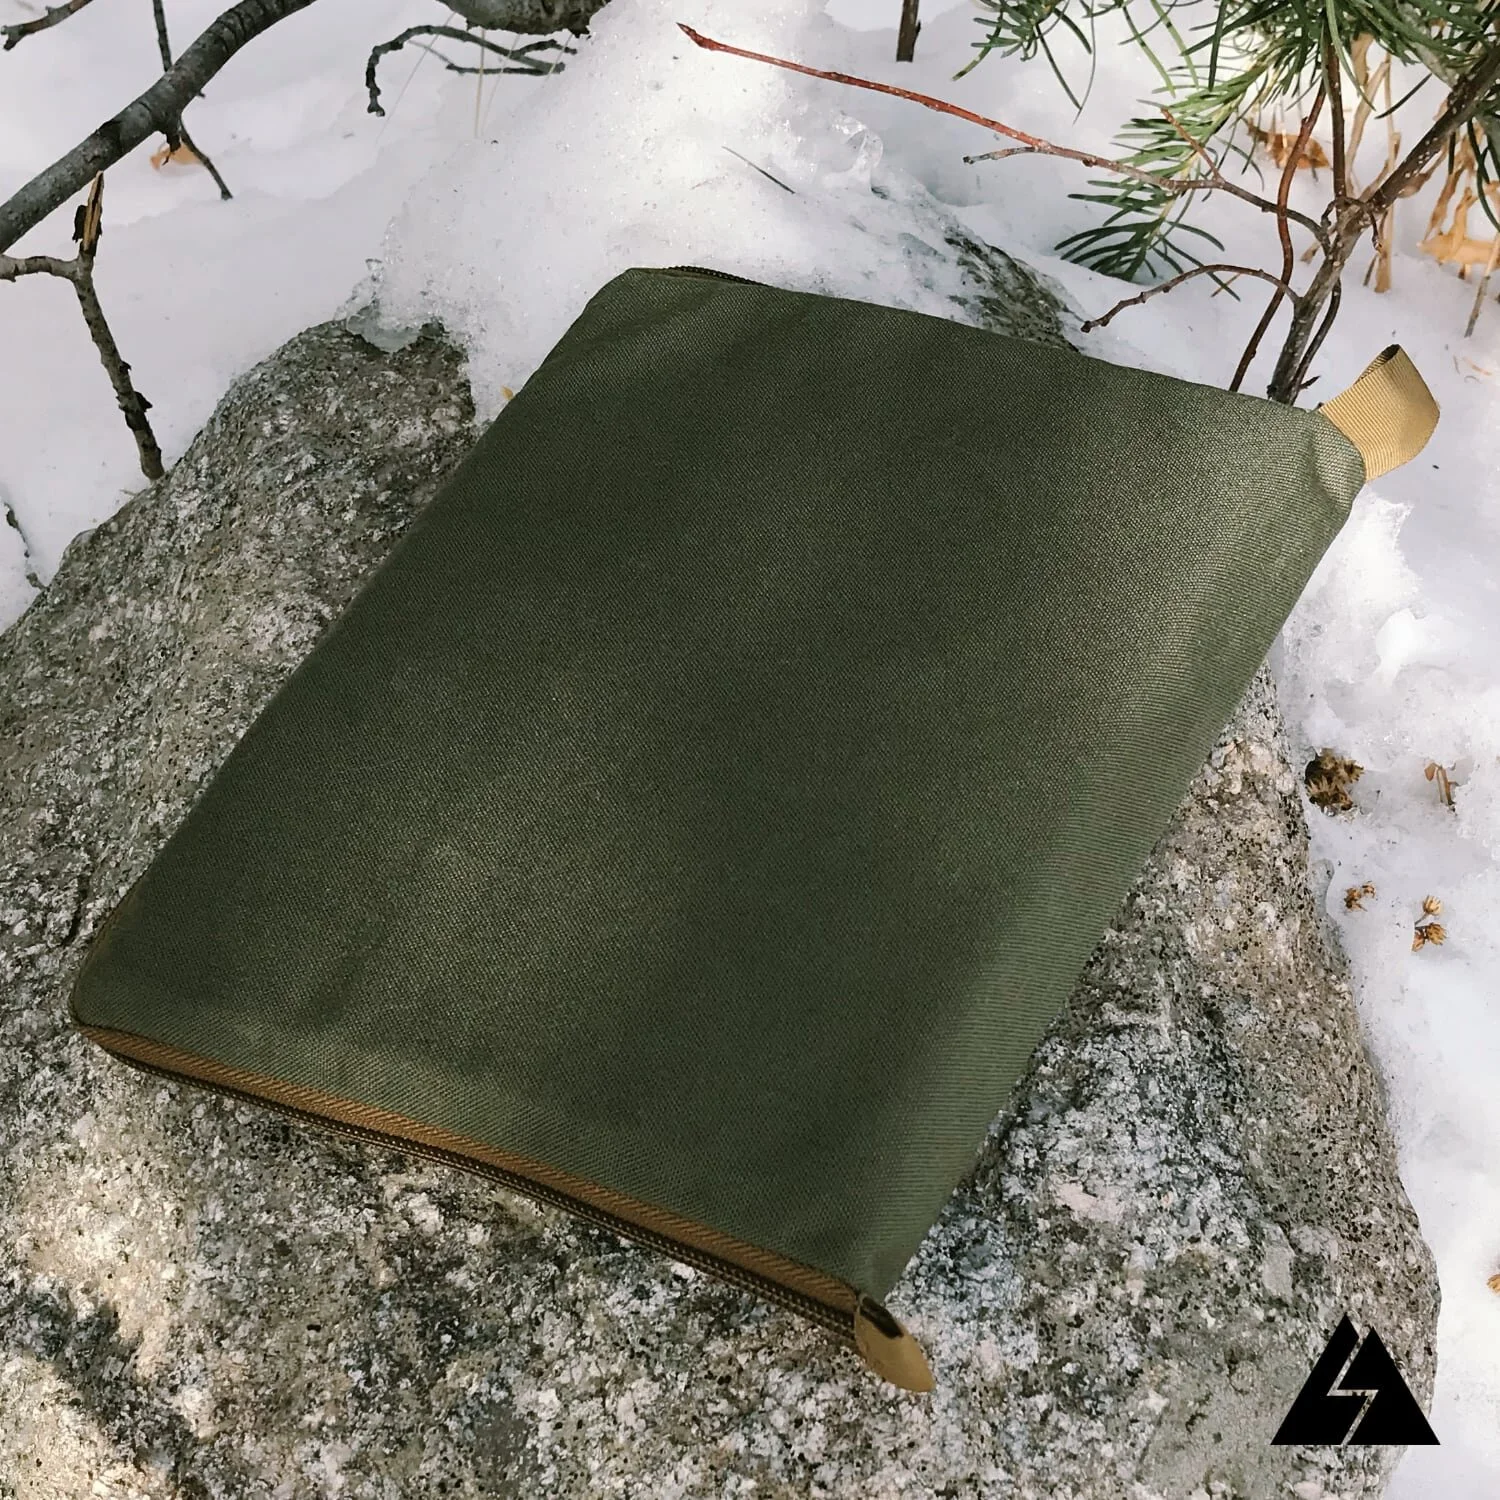
Make a Hiking Pillow / Dry Bag
This article will go over how to make a handy little bag with dual uses. It can be used both as a dry bag, to keep your sleeping clothes dry inside your backpack, and then when you are ready to sleep, it can be turned inside out and stuffed with a jacket and used as a pillow.
The dry bag uses a Kam snap closure. This was chosen because it is low profile and won’t be obnoxious when the bag is used as a pillow. The bag also features a velcro closure which is used when the bag is in pillow mode, this allows the bag to lay flat like an actual pillow. The velcro also stiffens the upper edge of the bag making it easier to roll when in dry bag mode.
This is a very straightforward project, good for beginning sewers. It’s also a good way to use up any scraps of fabric you may left over from larger MYOG projects.
One side of the bag has a soft lining that is exposed when the bag is turned inside out for use as a pillow. The instructions are for a bag that is 9” x 15-1/2” (But the size could be easily adjusted to suit your needs.) I’ve found that this is a good size for storing my sleeping clothes. I also like this size because a buff can be used as a pillow case.
Side note: If you always carry a buff and plan to use it as a pillow case, you could eliminate the soft lining from the bag and save a little weight.
Using a buff as a pillow case.
Materials Needed:
2 - Pieces waterproof fabric, 11” x 17-1/2”. Just about any lightweight, waterproof fabric could be used.
1 - Piece lining fabric, 11” x 17-1/2”. Any fabric that is soft to the touch could be used, such as micro fibers or fleeces, even polyester prints could be used to add some personality to the bag.
1 - Piece of 3/4” wide Velcro 6-3/4" long. Omni-tape velcro is recommended because it is less likely to snag on items that you place in the bag.
2 - Pieces of 1” wide grosgrain, 2” long
1- Kam snap (both sides)
Instructions:
Step 1
Cut out 2 rectangles 11” X 17-1/2” from the waterproof fabric. Cut a 3rd rectangle of the same size from the lining fabric.
Step 2
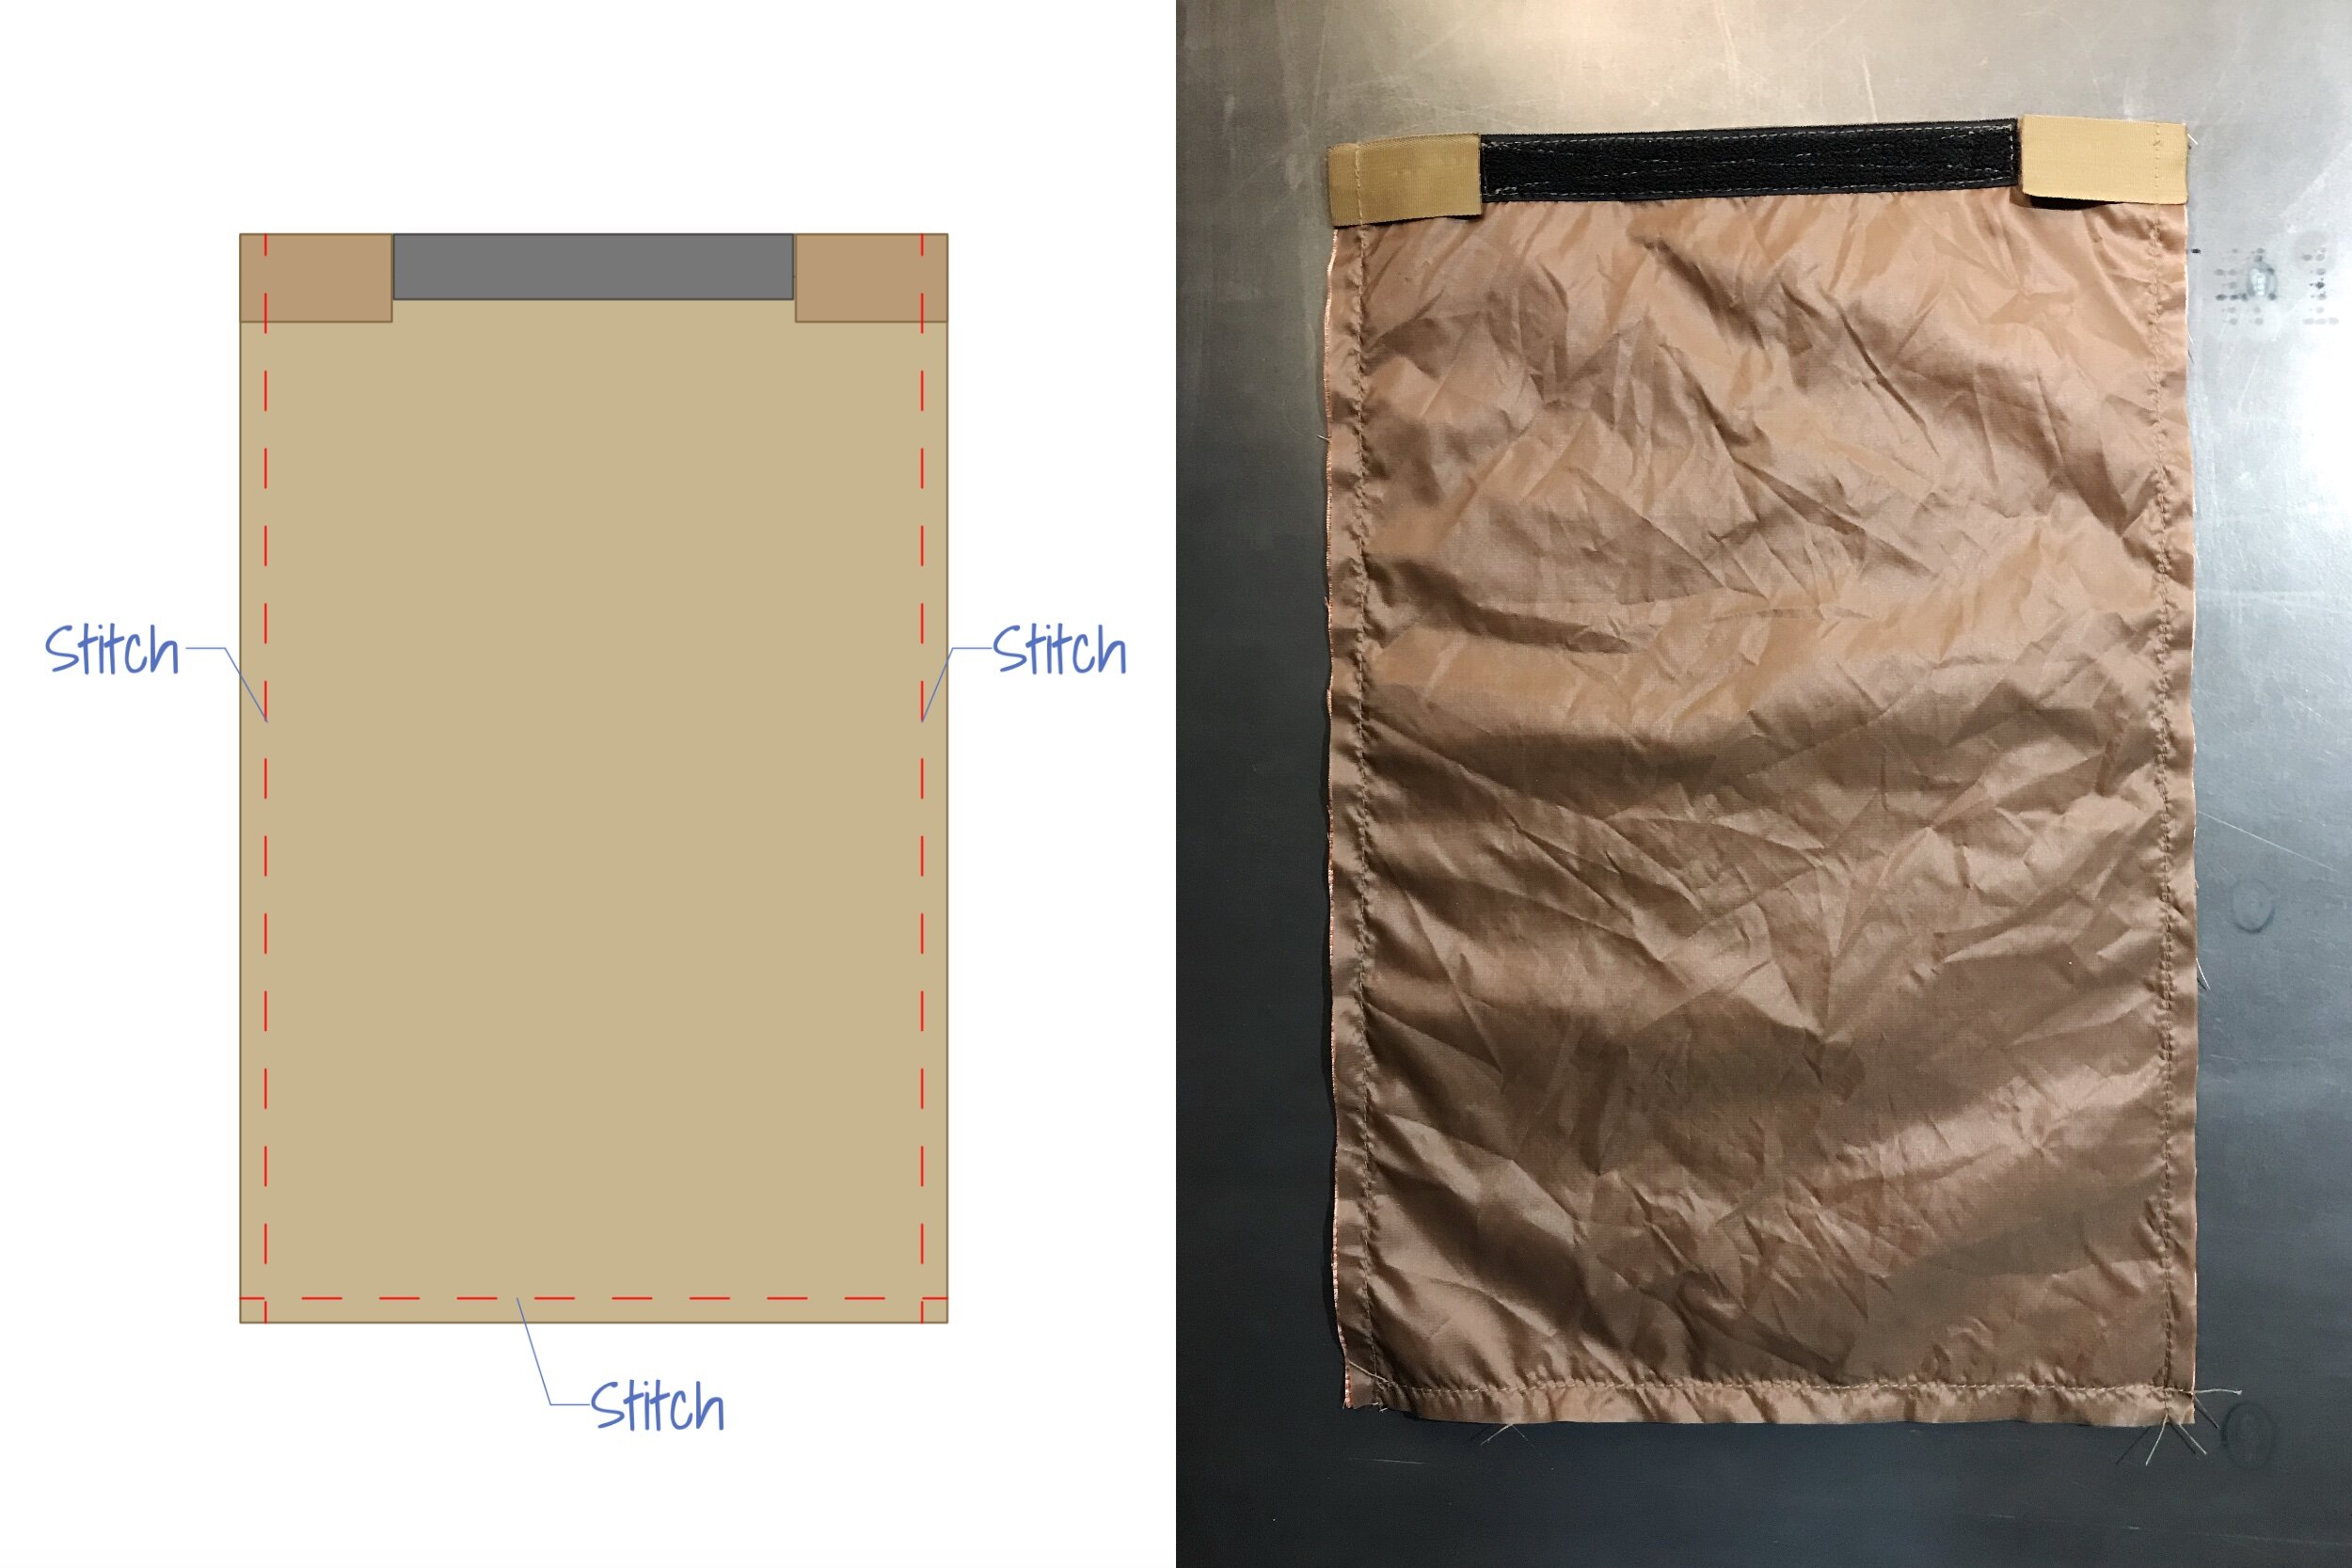
Pin one of the waterproof rectangles to the lining rectangle with the wrong sides together. Fold a ½” double fold hem on one short side of the rectangle as shown below. (Folding both layers of fabric together.) Stitch the hem in place.
Step 3
Fold a ½” double fold hem on one short edge of the second waterproof part, as shown below
Step 4
Pin the velcro to the waterproof side of the first rectangle, flush to the top, and centered left to right. Stitch the velcro in place with a box x stitch. Repeat this process with the third rectangle, sewing the velcro to the right side of the fabric.
Step 5
Pin the 2 parts together so that the velcro is facing out. Make sure the upper edges are aligned with each other. Pin the grosgrain to the top corners of the bag as shown below. The grosgrain should be flush to the top and sides. Stitch the parts together along the sides and bottom with a ⅜” seam allowance.
Step 7
Trim the seam allowance to half of its original width as shown below
Step 8
Turn the bag so that the Velcro faces in. Push the corners out with a pencil, then pull the seam tight and stitch again along the sides and bottom. This will enclose the seam allowance from the previous seam inside the new seam allowance, resulting in a finished edge.
Step 9
Turn the bag the other way out so that the grosgrain flaps are sticking out. Install a Kam snap in the center of each flap. Make sure you orient the snaps so that they can snap together.
Finishing Touches
If you want the bag to be waterproof you’ll need to seal the seams on the dry bag side with seam sealer. Be sure to use a sealer that is compatible with type of fabric you are using, and follow the instructions that come with the sealer.
As a side note, If you used a slippery fabric for the back side of the pillow and have a slippery inflatable pad, your pillow might slide around while sleeping. You can help mitigate this by painting some dots of seam sealer on the back side of the pillow to help it grip the pad.
That’s all there is to it! On your next trip, you can be proud to rest your head on a pillow you made yourself.
Related products that we recommend:
The links above are affiliate links. As an Amazon Associate Stitchback earns from qualifying purchases.