Easy to Make Bug Bivy
Sleeping out under the stars can be one of the most rewarding ways to spend a night in the wilderness. In fact, one of my most memorable nights spent outdoors was a warm, perfectly clear night in the high desert of Utah, where I witnessed the brightest and longest shooting star I had ever seen. The next morning, however, one of my companions discovered a scorpion had crawled up under his sleeping pad. This experience led me to eventually start using a bug bivy while cowboy camping.
A bug bivy is different than the fully waterproof bivys used by alpinists and some hikers. It is meant to be used on clear nights, or in conjunction with a tarp on stormy nights. Bug bivys offer several benefits in addition to protection from bugs. They can provide some protection from wind and drafts, (especially helpful if you use a quilt rather than a sleeping bag.) If a waterproof fabric is used for the floor, they can eliminate the need to carry a separate ground sheet, and can provide some splash protection when used with a tarp. They also add some warmth to your sleep system.
This article will go over how to make a bug bivy that has been designed to be easy to make. It makes a good companion piece to our “simple shelter” project. Like the other easy to make projects on our site, some functionality has been sacrificed in order to keep the project simple. In this case, the chest zipper on the bivy may not be as convenient to get in and out of as some other designs. But it does have the advantage of being a lightweight option, and it simplifies the construction process.
Note: This bug bivy was designed for use with pads that are 20” x 72” and has a circumference of about 70” at the chest and tapers towards the foot.
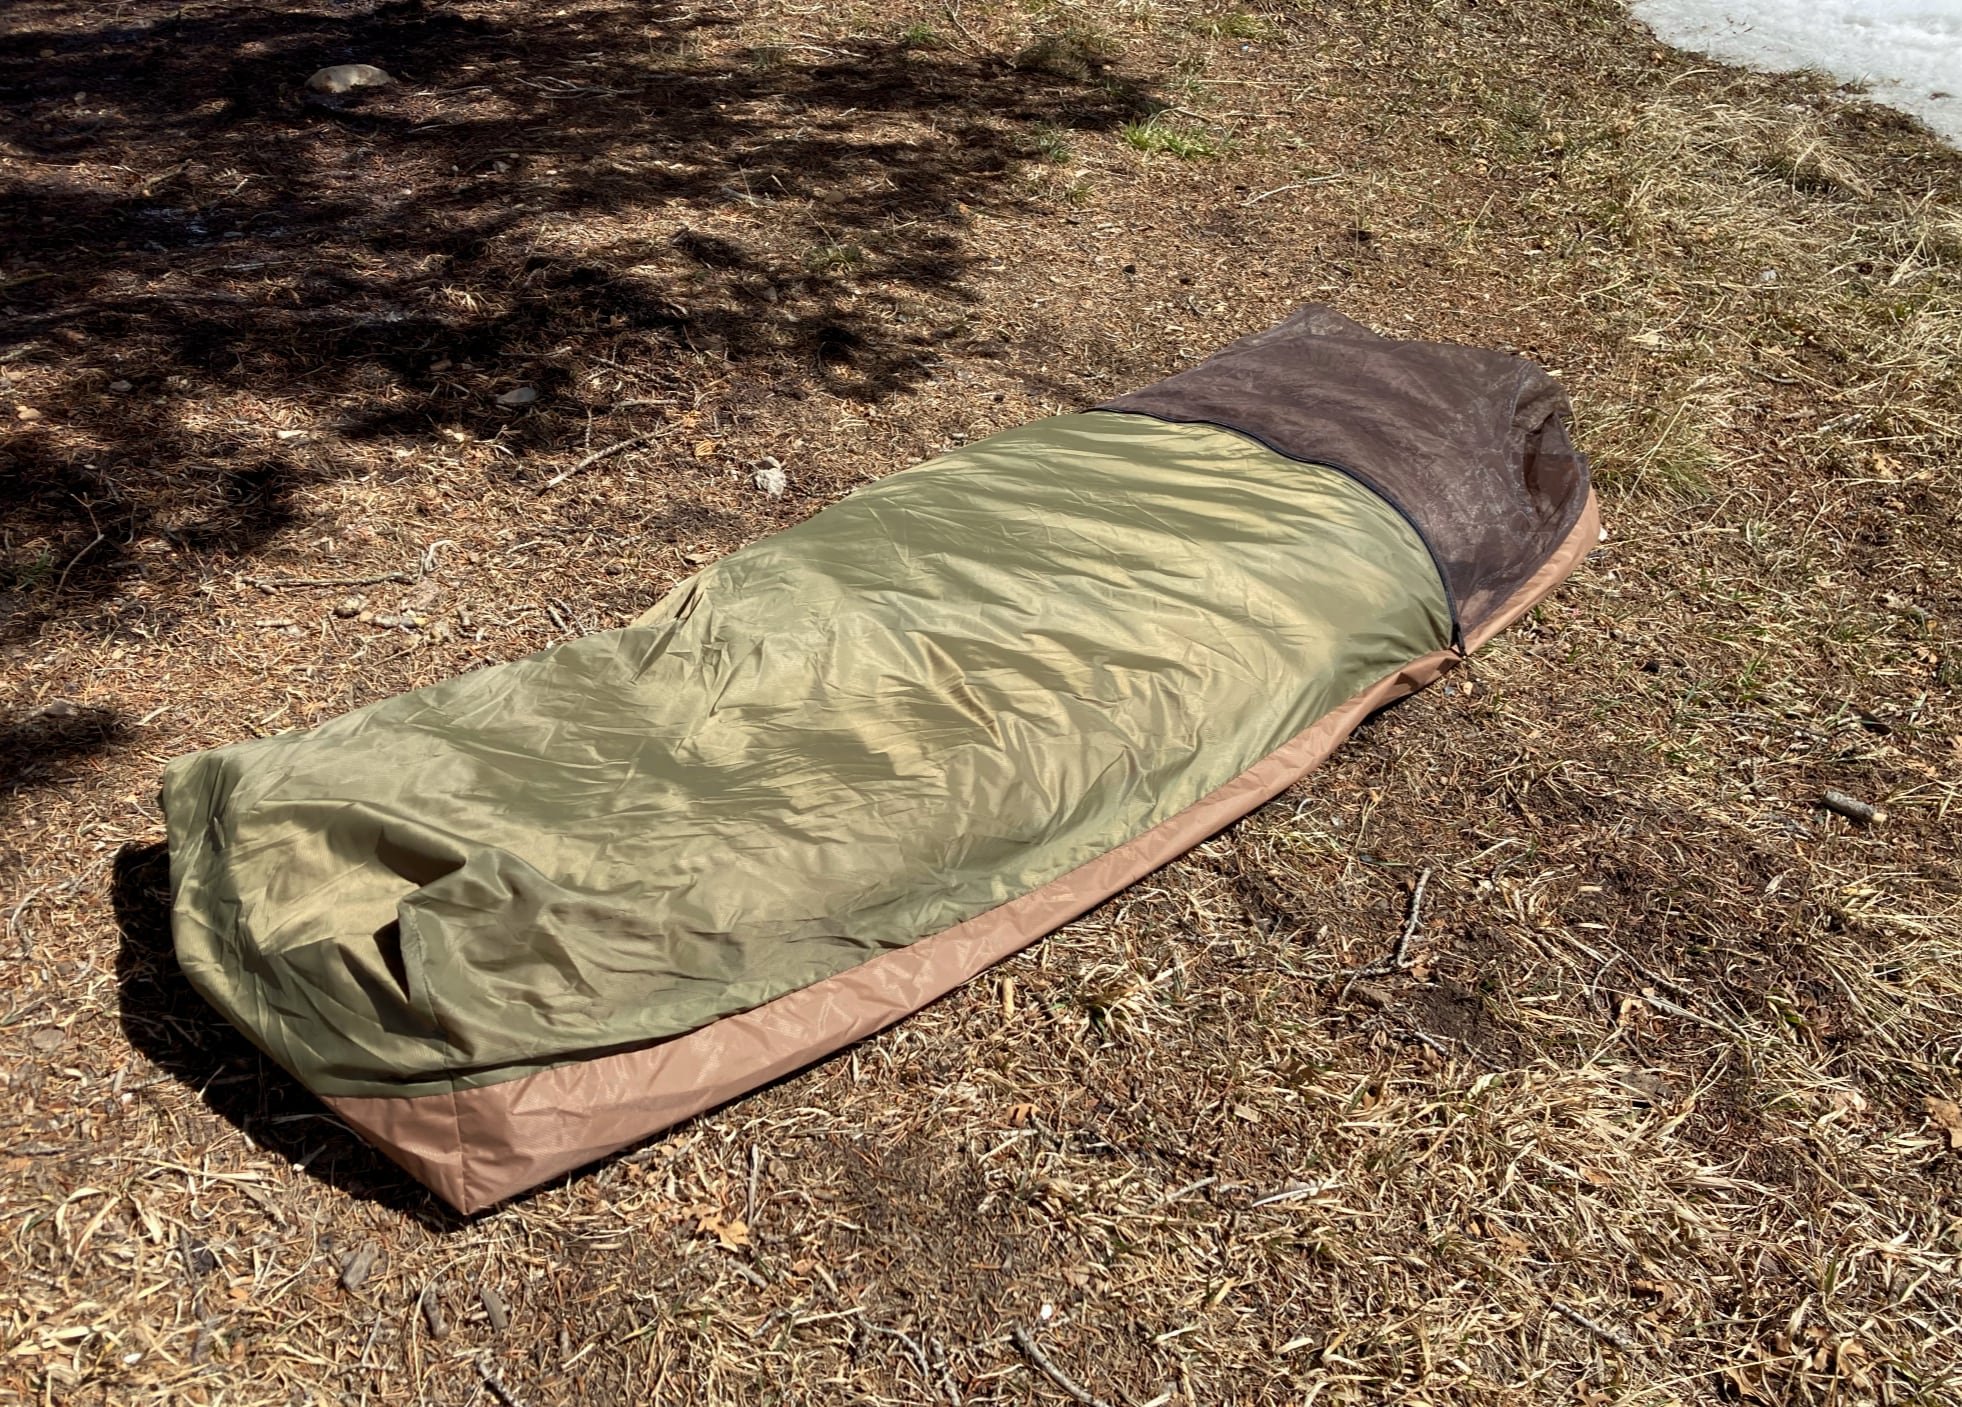
The bivy in the photos weighs 8.5 oz, but final weight will vary based on the materials used.

Rolled up bivy, shown with bottle for size comparison.
Materials Needed
Floor Fabric: 1 piece of fabric 33-1/2” x 91-1/2”.
A waterproof fabric should be used for the floor. (The bivy shown in the photos uses 1.6oz HyperD PU4000 from Ripstop by the Roll.)
Top Fabric: 1 piece of fabric 65-½” x 41-¼”.
A breathable fabric should be used for the top. Fabrics treated with a DWR are ideal as they will help provide some splash protection. (The bivy shown in the photos uses 1 oz HyperD uncalendered from Ripstop by the Roll.)
Hood Fabric: 1 piece of noseeum netting 34-1/2” x 43-1/2”
Zipper: 1 - 39” zipper (#5 zipper was used for the bivy in the photos.)
Zipper sliders: Double pull zipper sliders are needed, so that the bivy can be opened from both inside and outside. Match the sliders to the size of zipper. If an adjustable opening is desired, use 2 sliders.
Assembly
Cutting out the floor fabric
Begin with a piece of fabric that has been cut to 33-1/2” x 91-1/2”. Fold the fabric in half lengthwise as shown below.
On the edge opposite the fold, cut a 4” square from one corner as shown below, cutting through both layers of fabric.
On the other end of the fabric, cut a 4” x 6” rectangle from the corner as shown below, cutting through both layers of fabric.
Measure up 2” on the end of the fabric with the 4x6” cutout. Mark a line from this point to the corner on the opposite end of the fabric as shown below. Cut along the line cutting through both layers of fabric.
Finished dimensions of floor shown below.
Cutting out the top fabric
Begin with a piece of fabric that has been cut to 65-½” x 41-¼”. Fold the fabric in half lengthwise as shown below.
On the edge opposite the fold, cut a 7-¼” x 9-⅞” rectangle from the corner as shown below, cutting through both layers of fabric.
Measure up 2-5/8” on the end of the fabric with the cutout. Mark a line from this point to the corner on the opposite end of the fabric as shown below. Cut along the line cutting through both layers of fabric.
Finished dimensions of top shown below
Cutting out the hood fabric
Begin with a piece of netting that has been cut to 34-1/2” x 43-1/2”. Fold the fabric in half across the short dimension as shown below.
On the edge opposite the fold, cut a 9” square from the corner as shown below, cutting through both layers of fabric.
Measure up 1-1/8” on the end of the fabric without the cutout. Mark a line from this point to the corner on the opposite end of the fabric as shown below. Cut along the line, cutting through both layers of fabric.
The finished dimensions of the hood are shown below.
Assembling the bug bivy
Install the slider onto the 39” zipper. (If you want the ability to adjust the opening, use two zipper sliders.) Cut two rectangles, 1-1/4” x 2” from the remnants of the top fabric. Pin the parts to the ends of the zipper with right sides together as shown below. Stitch with a 3/8” seam allowance. Fold the parts open and topstitch 1/8” from the fold as shown below.
Install the zipper between the hood fabric and top fabric as shown. Be sure the zipper is centered on the parts. The zipper fabric will overhang on either end. Once the zipper is installed, trim the overhanging fabric flush.
Pin the top assembly to the floor fabric with wrong sides together. (The outside corners of the top assembly will line up with the outside corners of the floor. The inside corners will not align as the top assembly is larger than the floor.)
Stitch the top, bottom and sides with a 3/8” seam allowance as shown below.

After stitching, trim all four seam allowances down to half of their original width as shown below.

Turn the bivy wrong side out. Pull the previously sewn seams flat, and re-stitch with a 3/8” seam allowance, as shown below. This will enclose the previously trimmed seam allowance within the new one, creating a finished edge on the inside of the bivy bag.
Turn the bivy right side out. Form the foot box by pulling the inner corner of the top assembly away from the inner corner of the floor as shown below.

Stitch the corners with a 3/8” seam allowance as shown below. Repeat this process with the corners on the head end of the bag.
After stitching the four corners, trim the seam allowances down to half of their original width as shown below.

Turn the bug bivy wrong side out. Pull the previously sewn corners flat, and re-stitch with a 3/8” seam allowance, as shown below. This will enclose the previously trimmed seam allowance within the new one, creating a finished edge on the inside of the bivy bag.

Turn the bag right side out, If desired apply seam sealer or seam sealing tape to the corner seams of the floor.

There you have it! A simple and easy to make bug bivy. As a final note, this design was kept as simple as possible, but it could be easily upgraded. For example, you could add stake out loops at the corners or a small loop on the head net portion, for lifting the net of the face.